1. Киришүү
This manual provides essential information for the safe and effective operation, assembly, and maintenance of your BH Vanquish Multimedia II Treadmill. Please read this manual thoroughly before using the equipment and retain it for future reference.
The BH Vanquish Multimedia II Treadmill is designed for semi-professional use, offering a robust and interactive training experience. It features a powerful motor, a large running surface, electronic incline, and a multimedia TFT screen for entertainment and interactive training applications.
2. Коопсуздук маалыматы
ЭСКЕРТҮҮ: Олуттуу жаракат алуу коркунучун азайтуу үчүн, чуркоо жолун колдонуудан мурун, ушул колдонмодогу бардык маанилүү сактык чараларын жана көрсөтмөлөрдү окуп чыгыңыз.
- Кандайдыр бир көнүгүү программасын баштоодон мурун ар дайым дарыгер менен кеңешиңиз.
- Балдарды жана үй жаныбарларын ар дайым чуркоо жолунан алыс кармаңыз.
- Чуркоо жолун тегиз жерге коюңуз, анын артында кеминде 2 метр (6.5 фут) жана эки тарабында 0.6 метр (2 фут) бош орун калтырыңыз.
- Ensure the safety key is properly attached to your clothing during operation. In case of emergency, the safety key will stop the treadmill.
- Эгерде анын кубат шнуру же сайгычы бузулган болсо же ал туура иштебесе, чуркоо жолун иштетпеңиз.
- Тийиштүү спорттук бут кийим жана кийим кийиңиз. Чуркоо жолунда жылаңайлак жүрбөңүз.
- The maximum user weight capacity for this treadmill is 150 kg (330 lbs).
- Колдонулбай турганда же тазалоо жана тейлөө алдында чуркоо жолун электр розеткасынан сууруп коюңуз.
3. Орнотуу жана чогултуу
The BH Vanquish Multimedia II Treadmill requires some assembly. Follow these steps carefully:
- Пакеттен чыгаруу: Бардык компоненттерди таңгактан кылдаттык менен алып салыңыз. Таңгактоо тизмесинде көрсөтүлгөн бардык бөлүктөрдүн бар экенин текшериңиз.
- Негизги Ассамблея: Attach the uprights to the base frame using the provided hardware.
- Консоль тиркемеси: Secure the console to the top of the uprights. Connect all necessary cables from the uprights to the console.
- Рулду орнотуу: Install the handlebars, ensuring they are firmly secured.
- Кубат туташуу: Электр шнурын жерге туташтырылган электр розеткасына сайыңыз.
Камтылган компоненттер: The product includes Bluetooth speakers and a bottle holder.

Figure 3.1: The BH Vanquish Multimedia II Treadmill in its operational state.
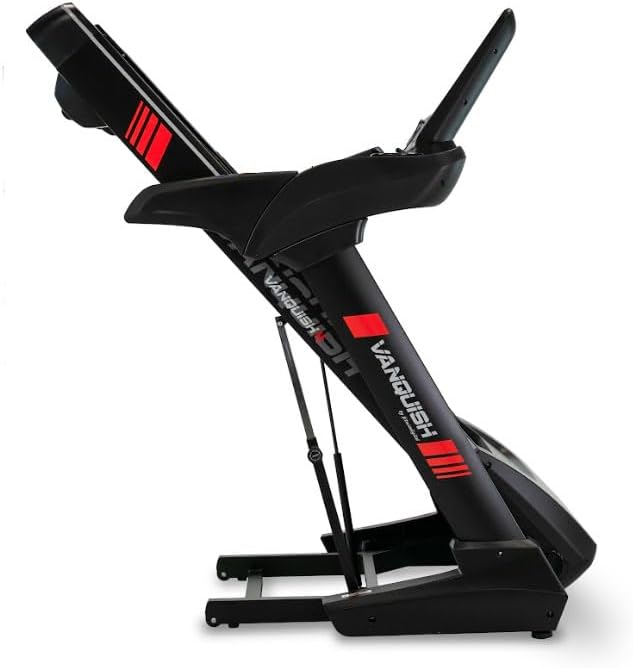
Figure 3.2: The treadmill in its folded position, demonstrating its space-saving design for storage.
4. Иштөө нускамалары
Familiarize yourself with the console and controls before starting your workout.
4.1 Console Overview

Сүрөт 4.1: Жакын пландан view of the treadmill's control console, featuring the 15-inch TFT multimedia screen and various control buttons.
The treadmill is equipped with a 15-inch TFT multimedia screen, allowing access to various applications and workout data.

Figure 4.2: The multimedia screen displaying various application icons, including YouTube, Netflix, Kinomap, and Zwift, alongside workout program options.
The console provides access to applications like YouTube, Netflix, Kinomap, and Zwift for interactive and entertaining workouts. Bluetooth FTMS connectivity allows synchronization with smartphones or tablets.
4.2 Машыгууну баштоо
- Чуркоо жолу электр розеткасына сайылып турганын жана коопсуздук ачкычы ордунда экенин текшериңиз.
- Чуркоо жолуна чыгып, буттарыңызды капталдагы рельстерге коюңуз.
- Коопсуздук ачкычынын клибин кийимиңизге бекитиңиз.
- Консольдогу START баскычын басыңыз. Кур жай ылдамдыкта кыймылдай баштайт.
- Gradually increase speed using the speed control buttons on the console or handlebars.
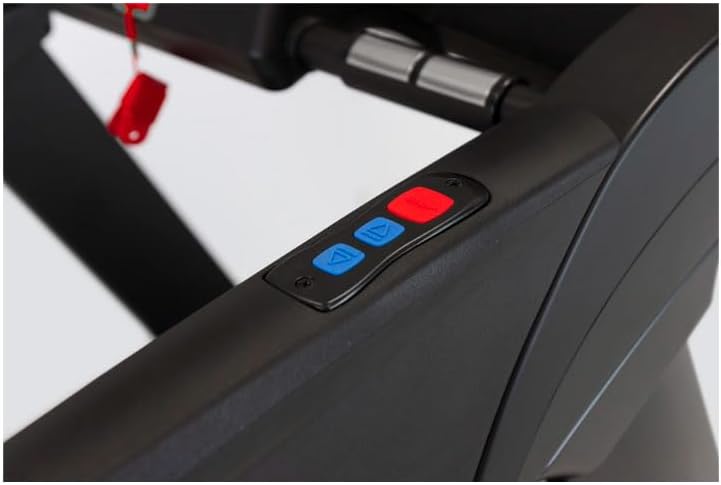
Figure 4.3: Close-up of the handlebar controls, showing buttons for adjusting speed and incline during a workout.
4.3 Ылдамдыкты жана жантайыңкылыкты жөндөө
- Ылдамдыгы: Use the '+' and '-' buttons on the console or handlebars to adjust the speed. The treadmill offers a maximum speed of 22 km/h.
- Жантайма: Use the incline control buttons to adjust the gradient. The treadmill features 15 levels of electronic incline.
4.4 Машыгуу программалары
The treadmill includes 32 predefined programs and allows for custom workout creation. It also features 4 virtual routes and 5 user profiles for detailed progress tracking.
- Select a program from the console menu.
- Follow the on-screen prompts to begin the program.
4.5 Monitoring Heart Rate
Heart rate can be monitored using the manual sensors on the handlebars or with a compatible chest strap (not included) connected via Bluetooth Smart or 5 kHz radio frequency.
4.6 Машыгууну токтотуу
- Консольдогу STOP баскычын басыңыз. Кур акырындык менен жайлап, токтойт.
- Alternatively, pull the safety key to immediately stop the treadmill.
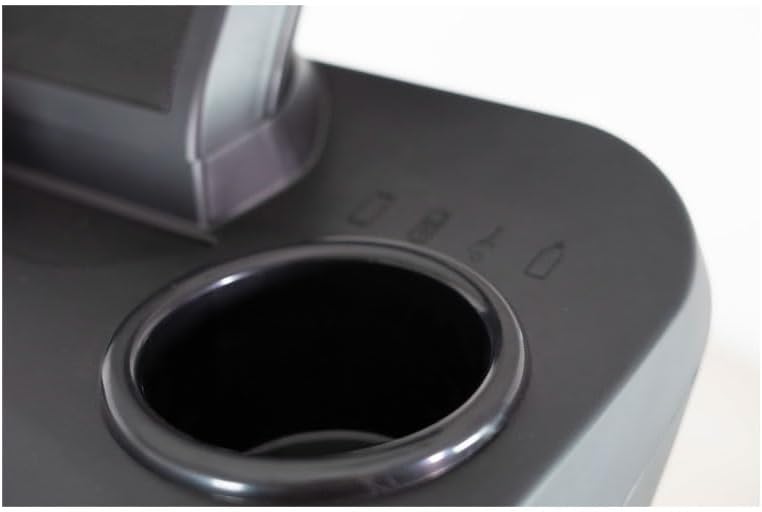
Figure 4.4: Integrated cup holder on the treadmill console, designed for convenient placement of water bottles or other beverages during exercise.
5. Техникалык тейлөө
Үзгүлтүксүз тейлөө сиздин чуркоо жолуңуздун узак мөөнөттүү жана оптималдуу иштешин камсыз кылат.
- Тазалоо: Чуркоо жолундагы беттерди жарнама менен сүртүңүзamp ар бир колдонуудан кийин кездеме. Абразивдүү тазалагычтарды же эриткичтерди колдонуудан алыс болуңуз.
- Белди майлоо: The running belt may require periodic lubrication. Refer to the specific instructions provided with your lubricant or consult customer support.
- Кур чыңдоо жана тегиздөө: Check the running belt tension and alignment regularly. Adjust as needed according to the instructions in the full product manual.
- Мотордун капкагы: Мотордун капкагын мезгил-мезгили менен алып салып, топтолгон чаңды же таштандыларды чаң соргуч менен тазалап туруңуз. Муну жасоодон мурун чуркоо жолу розеткадан суурулганын текшериңиз.
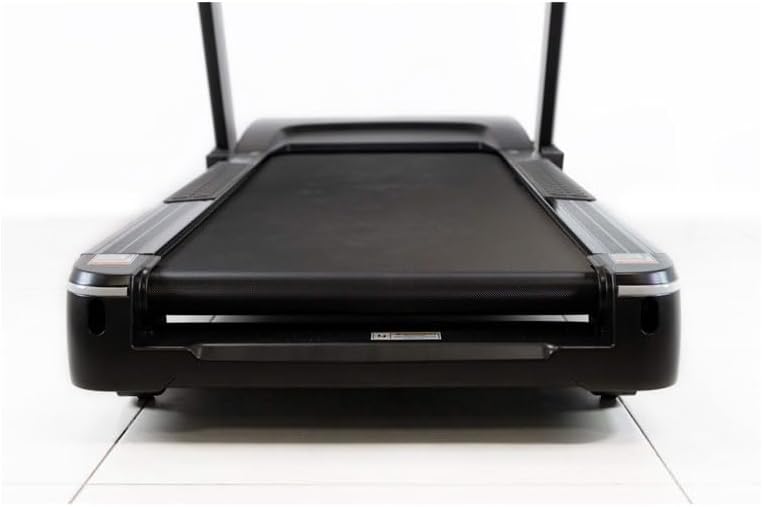
5.1-сүрөт: View of the treadmill's running deck, highlighting the spacious 150 x 55 cm surface and the robust construction.
6. Кыйынчылыктарды
Бул бөлүмдө чуркоо жолуңузда кездешүүсү мүмкүн болгон жалпы маселелер каралат.
| Көйгөй | Мүмкүн себеп | Чечим |
|---|---|---|
| Чуркоо тилкеси күйбөйт. | Power cord not plugged in; circuit breaker tripped; safety key not in place. | Ensure power cord is securely plugged in. Check household circuit breaker. Verify safety key is correctly inserted. |
| Чуркап бара жаткан кур тайып кетет же олку-солку болот. | Belt tension too loose; belt requires lubrication. | Adjust belt tension according to manual. Lubricate the running belt. |
| Иш учурунда адаттан тыш ызы-чуу. | Loose components; motor or belt issue. | Check all bolts and screws for tightness. If noise persists, contact customer support. |
| Консоль дисплейи бош же туруксуз. | Loose cable connection; power issue. | Check all cable connections to the console. Unplug and replug the treadmill. |
If you encounter issues not listed here or if solutions do not resolve the problem, please contact BH customer support.
7. Техникалык шарттар
| Өзгөчөлүк | Спецификация |
|---|---|
| Бренд | BH |
| Модел | Vanquish Multimedia II |
| Мотор күчү | 4 CV (2.5 CV continuous) |
| Максималдуу ылдамдык | 22 км/саат |
| Эңкейүү деңгээли | 15 (Electronic) |
| Running Surface | 150 x 55 см |
| Дисплей түрү | 15-inch TFT Multimedia Screen |
| Программалар | 32 Predefined, Custom Programs |
| Байланыш | Bluetooth FTMS |
| Максималдуу Колдонуучу Салмагы | 150 кг |
| Amortization System | 6 Эластомерлер |
| Бүктөлүүчү | Yes (Soft Drop System) |
| Транспорт дөңгөлөктөрү | Ооба |
| Frame Material | Эритме болот |
| Продукциянын өлчөмдөрү (L x W x Y) | Approx. 214 x 90 x 37 cm (packaged) |
| Продукт Салмагы | Approx. 125 kg (packaged) |
8. Кепилдик жана колдоо
BH Fitness products are designed for durability and performance. For specific warranty terms and conditions, please refer to the warranty card included with your product or visit the official BH Fitness webсайт. Кепилдик дооматтар үчүн сатып алганыңыздын далилин сактаңыз.
For technical assistance, spare parts, or any inquiries regarding your BH Vanquish Multimedia II Treadmill, please contact BH customer support. Contact information can typically be found on the manufacturer's webсайтында же продуктунун таңгагында.
When contacting support, please have your product model number (Vanquish Multimedia II) and serial number ready.