1. Киришүү
This manual provides comprehensive instructions for the installation and operation of the Idatalink Maestro HRN-HRR-SU1 T-Harness. This product is designed to facilitate the replacement of a factory radio with a compatible aftermarket unit in select Subaru vehicles manufactured between 2008 and 2015, while retaining essential factory features such as steering wheel controls and the use of the factory ampөмүрлүү.
Proper installation requires the use of an Idatalink Maestro ADS-MRR or ADS-MRR2 module, sold separately, and a compatible aftermarket car stereo with an Idatalink serial port.
2. Продукт бүтүп калдыview
The Idatalink Maestro HRN-HRR-SU1 T-Harness acts as an interface between your vehicle's factory wiring and an aftermarket car stereo. When used in conjunction with an Idatalink Maestro ADS-MRR or ADS-MRR2 module, it enables the retention of several factory features and adds new functionalities to your aftermarket head unit.
Key Features and Retentions:
- Рулду башкаруу элементтери (SWC): Retains original steering wheel audio controls with two-function programmability.
- Фабрика Amplifier & Subwoofer: Maintains functionality of the factory amplifier and subwoofer, including fader control.
- Factory Backup Camera: Retains the use of the factory backup camera.
- Performance Gauges: Displays selectable performance gauges on compatible aftermarket radio screens.
- Check Engine Codes: Allows reading and resetting of vehicle Check Engine codes on compatible aftermarket radio screens.
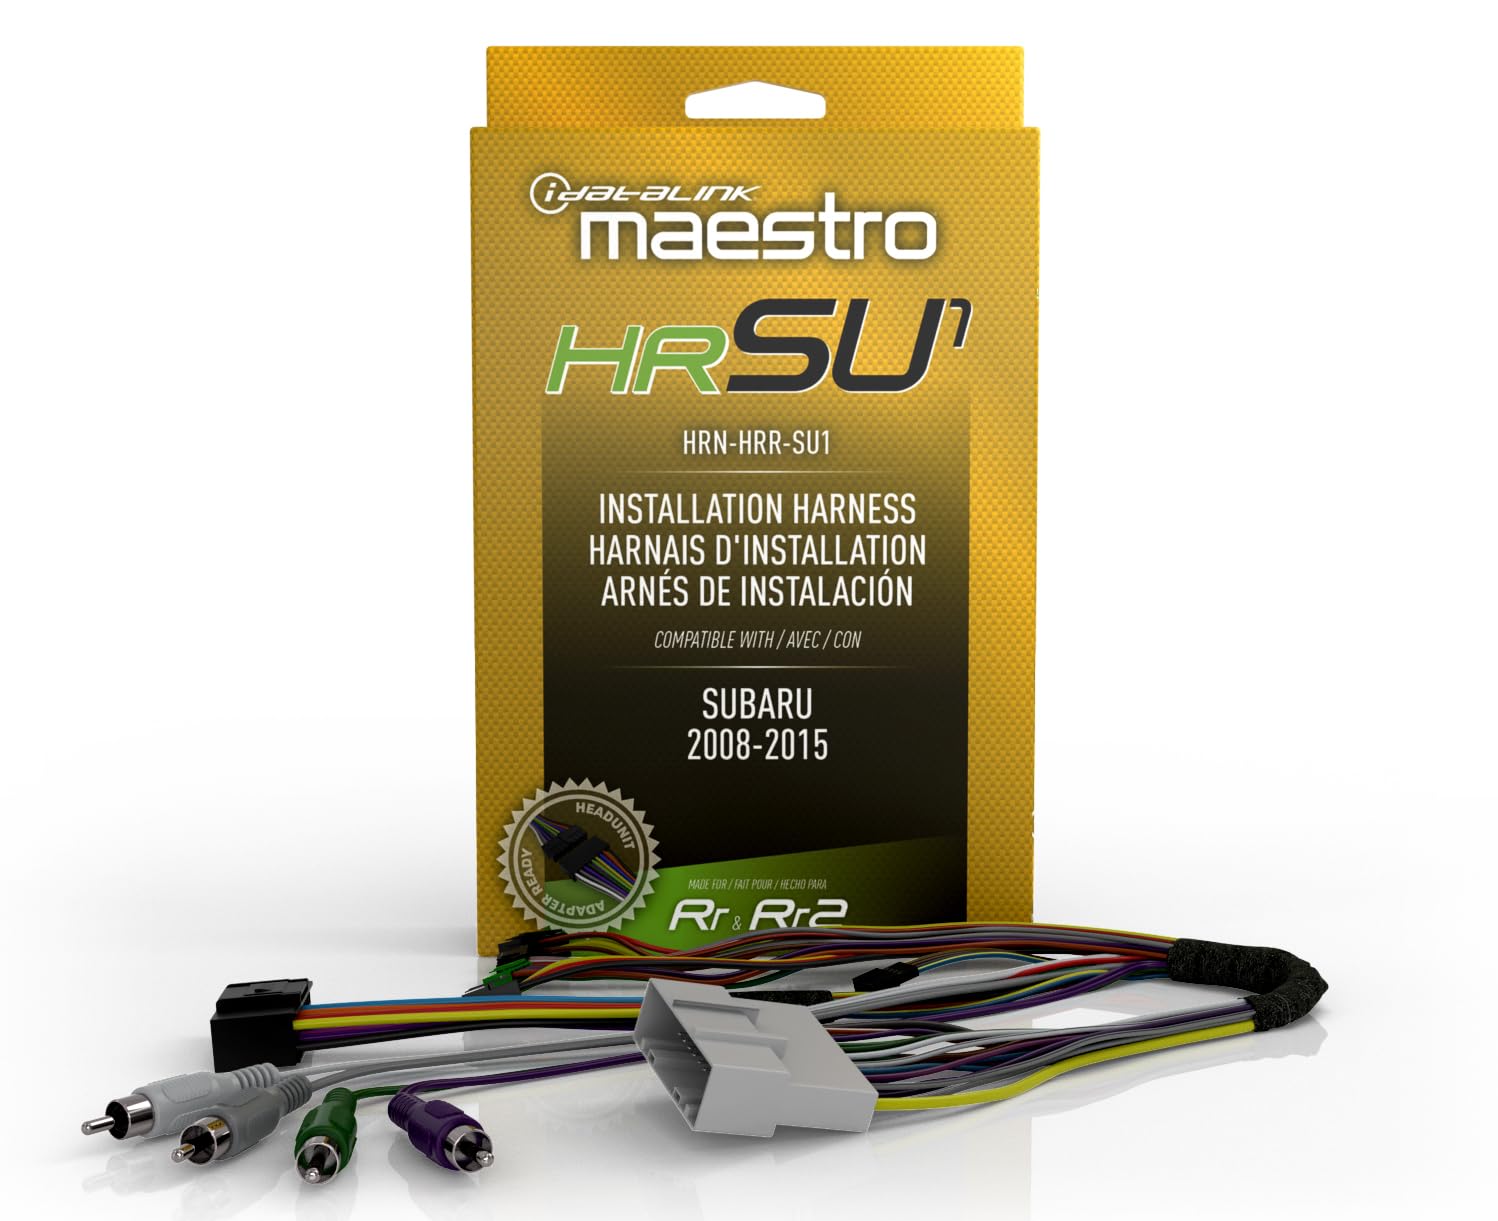
Figure 2.1: Idatalink Maestro HRN-HRR-SU1 T-Harness packaging and included wiring components.
3. Унаа шайкештиги
The HRN-HRR-SU1 T-Harness is compatible with select Subaru vehicles from 2008 to 2015. Compatibility also depends on the specific trim level and factory options of your vehicle. Refer to the tables below for detailed compatibility information.
Subaru Legacy, Outback, WRX, and XV Crosstrek Compatibility:

Figure 3.1: Compatibility chart for Subaru Legacy, Outback, WRX, and XV Crosstrek models (2008-2015). A checkmark indicates compatibility for that model and year.
Subaru Forester and Impreza Compatibility:
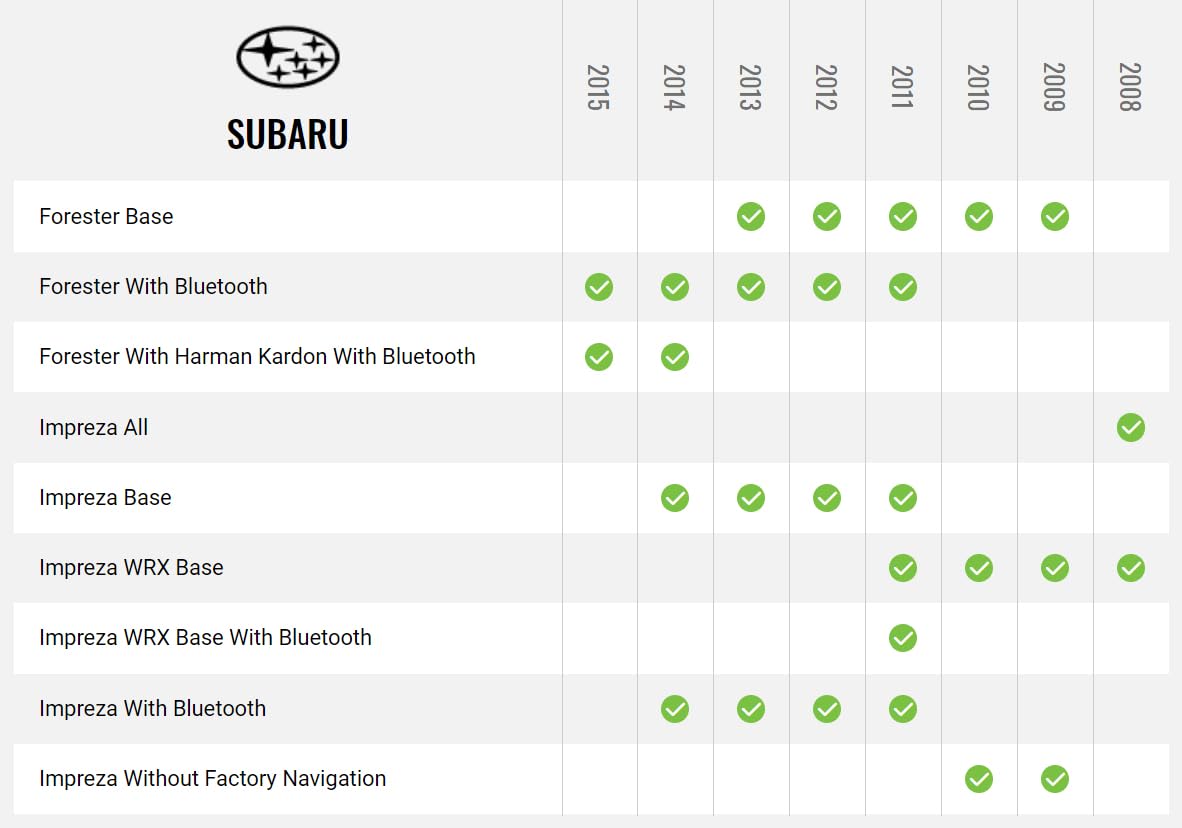
Figure 3.2: Compatibility chart for Subaru Forester and Impreza models (2008-2015). A checkmark indicates compatibility for that model and year.
Эскертүү: This harness requires an Idatalink Maestro ADS-MRR or ADS-MRR2 module and a compatible aftermarket head unit with an Idatalink serial port. It will not function with car stereos that lack an Idatalink serial port.
4. Орнотуу жана орнотуу
Installation of the HRN-HRR-SU1 T-Harness involves connecting it to an Idatalink Maestro ADS-MRR or ADS-MRR2 module and then integrating it with your aftermarket car stereo and the vehicle's factory wiring. Professional installation is recommended due to the complexity of vehicle electronics.
4.1 Керектүү компоненттер (өзүнчө сатылат)
- Idatalink Maestro ADS-MRR or ADS-MRR2 Interface Module: Essential for vehicle communication and feature retention.
- Compatible Aftermarket Car Stereo: Must feature an Idatalink serial port.
- Corresponding Idatalink Maestro Car Stereo Head-Unit Harness: Specific harnesses are available for various head unit brands (e.g., ACC-HU-ALP1 for Alpine, ACC-HU-PIO1 for Pioneer, ACC-HU-SON1 for Sony, ACC-HU-KEN1/KEN2/KEN3 for Kenwood/JVC, ACC-HU-BOS1 for BOSS Radio).
4.2 Жалпы орнотуу кадамдары
- Унаанын аккумуляторун ажыратыңыз: Always disconnect the negative terminal of the vehicle's battery before beginning any electrical work.
- Завод радиосун алып салуу: Carefully remove the existing factory radio from the dashboard.
- Connect T-Harness to Maestro Module: Plug the HRN-HRR-SU1 T-Harness connectors into the Idatalink Maestro ADS-MRR or ADS-MRR2 module.
- Connect to Vehicle Wiring: Plug the vehicle-specific connectors of the T-Harness into the corresponding factory wiring plugs behind the radio.
- Aftermarket Head Unitке туташыңыз:
- Using a Direct T-Harness (Recommended): If using a compatible Idatalink Direct T-Harness (e.g., ACC-HU-ALP1), connect it between the HRN-HRR-SU1 and your aftermarket head unit. This minimizes splicing.
- Without a Direct T-Harness: If a direct T-Harness is not used, you will need to cut off the 20-pin black connector from the HRN-HRR-SU1 harness. Then, carefully splice or solder the power/ground, illumination, speaker, and navigation output wires from the HRN-HRR-SU1 to the corresponding wires on your aftermarket receiver's wiring harness. Ensure all connections are secure and properly insulated.
- Connect Backup Camera Harness: If retaining the factory backup camera, connect the provided backup camera harness.
- Connect OBDII Harness: Connect the OBDII harness to allow for data communication with the vehicle's computer for features like performance gauges and Check Engine codes.
- Program Maestro Module: Follow the instructions provided with your Idatalink Maestro ADS-MRR or ADS-MRR2 module to program it for your specific vehicle and aftermarket radio. This step is crucial for proper functionality.
- Сыноо системасы: Before reassembling the dashboard, reconnect the vehicle battery and thoroughly test all functions of the aftermarket radio, steering wheel controls, amplifier, and backup camera. Verify that performance gauges and Check Engine code reading/resetting functions are operational.
- Башкаруу панелин кайра чогултуу: Once all functions are verified, carefully reassemble the dashboard.

4.1-сүрөт: Детальдуу view of the HRN-HRR-SU1 T-Harness components, showing various connectors for vehicle and head unit integration.

Figure 4.2: Diagram illustrating the connection concept of the HRN-HRR-SU1 T-Harness with a Maestro module and an aftermarket car stereo. For more information, visit q-r.to/balab.
5. Иштөө өзгөчөлүктөрү
Once installed and configured, the Idatalink Maestro HRN-HRR-SU1 T-Harness, in conjunction with the Maestro module and compatible head unit, enables the following operational features:
- Рулдун башкаруу функциясы: Use your vehicle's existing steering wheel buttons to control volume, track skip, source selection, and other programmable functions on your new aftermarket radio.
- Фабрика Amplifier and Subwoofer Integration: The factory audio system, including the amplifier and subwoofer, will operate as intended, with fader control maintained through the aftermarket head unit.
- Камдык камеранын дисплейи: The image from your factory backup camera will automatically display on your aftermarket radio's screen when the vehicle is in reverse.
- Унаа маалымат дисплей: On compatible Idatalink-ready head units, you can access and display various vehicle performance gauges (e.g., engine temperature, battery voltage, tire pressure) directly on the radio screen.
- Diagnostic Code Access: The system allows you to read and clear Check Engine Light (CEL) diagnostic trouble codes (DTCs) from your vehicle's onboard computer via the aftermarket radio interface.
6. Техникалык тейлөө
The Idatalink Maestro HRN-HRR-SU1 T-Harness is designed for long-term reliability and typically requires no routine maintenance. However, to ensure continued optimal performance:
- Коопсуз байланыштар: Ensure all connections remain secure and free from corrosion. If you experience intermittent issues, a professional can check the wiring integrity.
- Физикалык зыянды болтурбоо: Protect the harness and connected modules from physical damage, excessive heat, or moisture.
- Программалык камсыздоо жаңыртуулары: Periodically check the Idatalink website for any firmware updates for your Maestro ADS-MRR/MRR2 module, as these can improve compatibility and add features.
7. Кыйынчылыктарды
Орнотуудан кийин көйгөйлөргө туш болсоңуз, кайраview төмөнкү жалпы көйгөйлөрдү чечүү кадамдары:
- Сатуудан кийинки радиого электр кубаты жок:
- Check all power and ground connections from the HRN-HRR-SU1 harness to the aftermarket radio.
- Verify the vehicle's fuse for the radio circuit is intact.
- Ensure the Maestro module is properly connected and powered.
- Руль башкаруу элементтери иштебей жатат:
- Confirm the Maestro module has been correctly programmed for your specific vehicle and aftermarket radio.
- Check the connection between the HRN-HRR-SU1 and the Maestro module.
- Ensure your aftermarket radio is configured to accept steering wheel control inputs via the Idatalink interface.
- No Sound or Distorted Audio:
- Verify all speaker wire connections are correct and secure.
- If retaining a factory ampкөтөргүч, камсыз кылуу amplifier turn-on wire from the HRN-HRR-SU1 is connected to the aftermarket radio's remote turn-on output.
- Check the fader settings on your aftermarket radio.
- Камдык камера көрүнбөйт:
- Ensure the backup camera harness is correctly connected.
- Verify the aftermarket radio's camera input is properly configured and receiving a signal.
- Confirm the vehicle's reverse trigger wire is correctly connected to the aftermarket radio.
- Vehicle Data (Gauges, Check Engine Codes) Not Displaying:
- Ensure the OBDII harness is securely connected to both the HRN-HRR-SU1 and the vehicle's OBDII port.
- Verify that your aftermarket radio is an Idatalink-ready unit and supports these features.
- Confirm the Maestro module is correctly programmed.
If these steps do not resolve the issue, consult a professional car audio installer or contact Idatalink technical support for further assistance.
8. Техникалык шарттар
| Модель номери | HRN-HRR-SU1 |
| Бренд | Idatalink |
| Шайкеш модулдар | Idatalink Maestro ADS-MRR, ADS-MRR2 |
| Унаа шайкештиги | Select Subaru Vehicles (2008-2015) |
| Материал | Acrylonitrile бутадиен Styrene |
| Элемент Салмагы | 0.4 фунт (болжол менен 6.4 унция) |
| Пакеттин өлчөмдөрү | 6 x 4 x 2 дюйм |
| UPC | 627780004181 |
9. Кутуда эмне бар
The HRN-HRR-SU1 package includes the following components:
- Idatalink HRN-HRR-SU1 Vehicle-specific Harness
- Суб жабдыктар
- Камера кампасы
- Демпер жабдыктары
- Blue/white wire harness
- OBDII жабдыктары
10. Колдоо жана Кепилдик маалыматы
For technical support, installation assistance, or warranty inquiries regarding your Idatalink Maestro HRN-HRR-SU1 T-Harness, please contact Idatalink directly or visit their official webсайт.
Idatalink Official Webсайт: www.idatalinkmaestro.com
Warranty terms and conditions are provided by the manufacturer and typically cover defects in materials and workmanship. Please refer to the documentation included with your product or the manufacturer's webатайын кепилдик маалымат үчүн сайт.