1. Киришүү
This instruction manual provides essential information for the safe and effective operation of your Mastech MS2000G Digital Clamp Meter. Please read this manual thoroughly before use and retain it for future reference. This device is designed for measuring AC current, AC/DC voltage, resistance, continuity, diode, frequency, and temperature in various electrical applications.
2. Коопсуздук маалыматы
WARNING: To avoid electric shock or personal injury, always follow these safety precautions.
- Always disconnect measuring leads before removing the battery cover.
- Колдонбоңуз томtagэлектр же эсептегич үчүн көрсөтүлгөн максималдуу чектен ашып кеткен ток.
- Ensure the rotary switch is in the correct position for the desired measurement before connecting to the circuit.
- Ар бир колдонуудан мурун сыноо өткөргүчтөрүнүн бузулган изоляциясын же ачык металлын текшериңиз. Бузулган болсо, алмаштырыңыз.
- Эгерде эсептегич бузулгандай көрүнсө же корпусу ачык болсо, аны колдонбоңуз.
- The Mastech MS2000G is rated for CAT II 1000V and CAT III 600V. Adhere to these category ratings for safe operation.
- Ток чынжырлары менен иштөөдө өтө этият болуңуз.
For detailed safety guidelines, refer to relevant electrical safety standards.
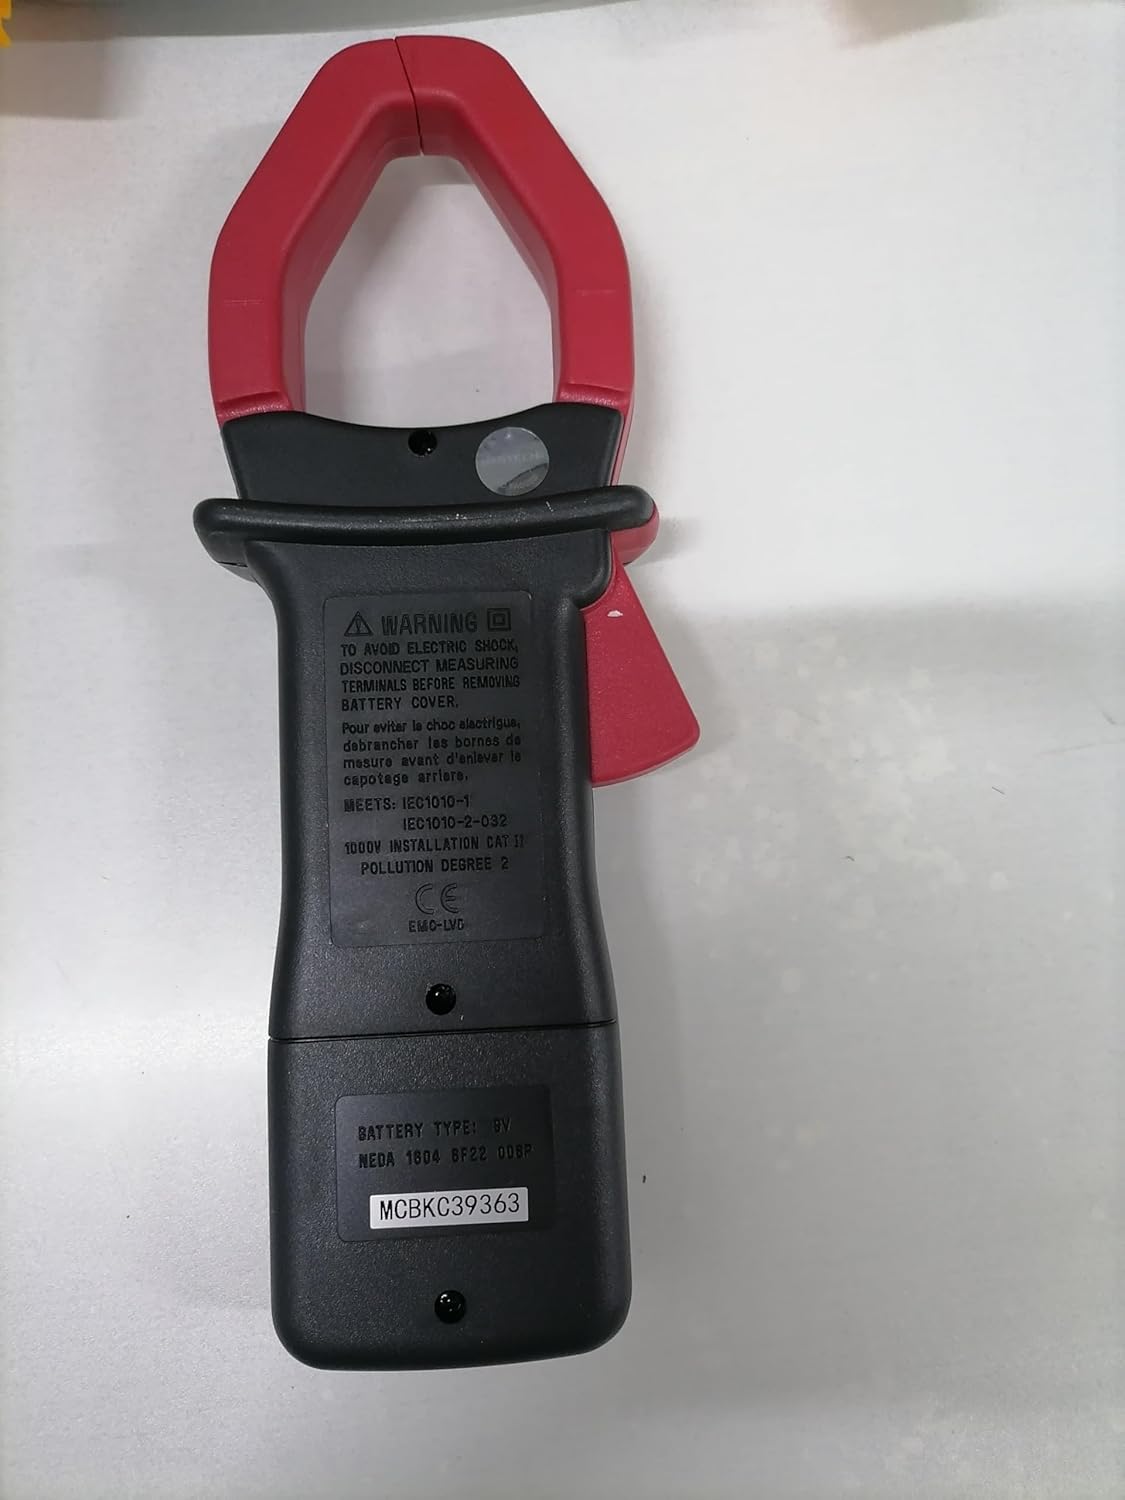
Арткы view of the Mastech MS2000G Digital Clamp Meter, showing the battery compartment and safety warnings, including instructions to disconnect leads before opening.
3. Продукциянын өзгөчөлүктөрү
- 2000 Санариптик дисплей
- Jaw Opening: 55mm (2.2 inches)
- Диоддун ачык көлөмүtagд: 3.0V
- Continuity Buzzer: Activates below 30Ω
- Маалыматтарды кармоо функциясы
- Display Backlight for low-light conditions
- Low Battery Display Indicator
4. Продукт бүтүп калдыview
The Mastech MS2000G features a robust design for professional and home use. Key components include:
- Clamp Жаак: Контактсыз AC токту өлчөө үчүн колдонулат.
- Айлануучу которгуч: Selects measurement functions (AC Current, Voltage, Resistance, etc.).
- LCD дисплей: Өлчөө окууларын, бирдиктерди жана көрсөткүчтөрдү көрсөтөт.
- Киргизүү уячалары: Көлөм үчүн сыноо өткөргүчтөрүн туташтыруу үчүнtage, resistance, continuity, diode, frequency, and temperature measurements.
- Дайындарды кармоо баскычы: Дисплейдеги учурдагы окууну токтотот.
- Арткы жарык баскычы: Жакшыраак көрүнүү үчүн дисплейди жарыктандырат.

Фронт view of the Mastech MS2000G Digital Clamp Meter, highlighting the display, rotary switch, and clamp жаак.
5. Орнотуу
5.1 Батареяны орнотуу
- Эсептегич ӨЧҮК экенин жана бардык сыноо өткөргүчтөрү ажыратылганын текшериңиз.
- Эсептегичтин арткы бетиндеги батарея бөлүмүнүн капкагын табыңыз.
- Батареянын капкагын бекиткен бурагычты(ларды) бошотуш үчүн бурагычты колдонуңуз.
- Капкакты алып салыңыз.
- Туура полярдуулукту (+ жана -) сактап, жаңы 9V батареяны салыңыз.
- Батареянын капкагын ордуна коюңуз жана аны бурама(лар) менен бекитиңиз.
5.2 Сыноо өткөргүчтөрүн туташтыруу
Сыноо өткөргүчтөрүн талап кылган өлчөөлөр үчүн (том)tage, resistance, continuity, diode, frequency, temperature):
- Insert the red test lead into the VHzΩ input jack.
- Кара сыноо өткөргүчтү COM киргизүү уясына салыңыз.
- For temperature measurements, connect the K-type thermocouple to the designated input terminals, observing polarity.
6. Иштөө нускамалары
To operate the Mastech MS2000G, turn the rotary switch to the desired function. The display will show the measurement reading.
6.1 AC ток өлчөө
- Turn the rotary switch to the 'A' (AC Current) range.
- cl ачыңызamp триггерди басуу менен жаакты.
- Чынжырдын бир гана өткөргүчүн cl менен курчап алыңызamp жаак. Жаактын толугу менен жабык экенин текшериңиз.
- Дисплейден AC учурдагы маанисин окуңуз.
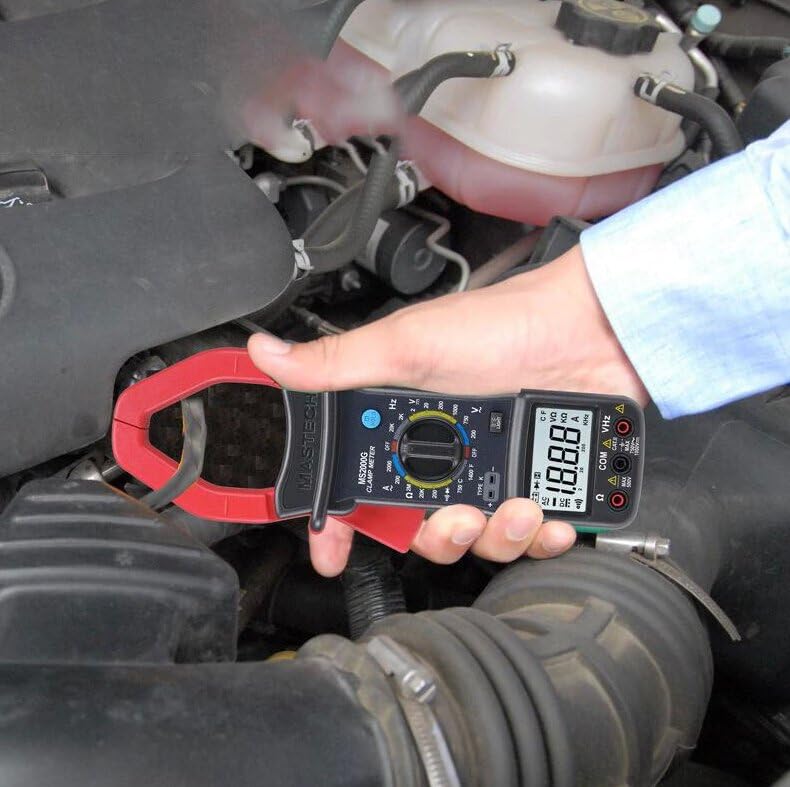
Demonstration of the Mastech MS2000G measuring AC current around a single conductor.
6.2 AC/DC Voltage Өлчөө
- Сыноо өткөргүчтөрүн 5.2-бөлүмдө сүрөттөлгөндөй туташтырыңыз.
- Айлануучу которгучту 'V~' (AC Voltage) же 'V=' (ТКнын көлөмүtagд) диапазон.
- Сыноо зонддорун текшерилип жаткан схемага же компонентке параллель туташтырыңыз.
- Томду окуңузtage мааниси дисплейде.
6.3 Каршылыкты өлчөө
- Сыноо өткөргүчтөрүн туташтырыңыз.
- Айлануучу которгучту 'Ω' (каршылык) диапазонуна буруңуз.
- Ensure the circuit or component is de-energized before connecting the probes.
- Сыноо зонддорун компоненттин үстүнө туташтырыңыз.
- Дисплейдеги каршылык маанисин окуп чыгыңыз.
6.4 Үзгүлтүксүздүк тести
- Сыноо өткөргүчтөрүн туташтырыңыз.
- Turn the rotary switch to the 'Ω' (Resistance) range and press the 'SELECT' button if necessary to choose continuity mode (indicated by a buzzer symbol).
- Сынамык зонддорду чынжыр же компонент боюнча туташтырыңыз.
- Эгерде каршылык болжол менен 30Ω төмөн болсо, үзгүлтүксүздүктү көрсөтүүчү сигнал угулат.
6.5 Диоддун сыноосу
- Сыноо өткөргүчтөрүн туташтырыңыз.
- Turn the rotary switch to the 'Ω' (Resistance) range and press 'SELECT' to choose diode mode (indicated by a diode symbol).
- Кызыл зондду анодго, кара зондду диоддун катодуна туташтырыңыз.
- Дисплей алдыга томду көрсөтөтtage drop. Reverse the probes; the display should show 'OL' (Open Loop) for a good diode.
6.6 Жыштыктарды өлчөө
- Сыноо өткөргүчтөрүн туташтырыңыз.
- Айланма которгучту 'Hz' (жыштык) диапазонуна буруңуз.
- Connect the test probes to the circuit where frequency is to be measured.
- Дисплейдеги жыштыктын маанисин окуңуз.
6.7 Температураны өлчөө
- Connect the K-type thermocouple to the designated input terminals, observing polarity.
- Turn the rotary switch to the '°C' or '°F' (Temperature) range.
- Термопардын зондун температурасы өлчөнө турган объектинин үстүнө же жанына кой.
- Дисплейдеги температуранын маанисин окуңуз.
6.8 Маалыматты кармоо функциясы
Дисплейдеги учурдагы көрсөткүчтү тоңдуруп коюу үчүн 'HOLD' баскычын басыңыз. Бошотуп, жандуу өлчөөлөрдү улантуу үчүн аны кайра басыңыз.
6.9 Дисплейдин арткы жарыгы
Press the 'LIGHT' button to turn on the display backlight for improved visibility in dimly lit environments. Press it again to turn off the backlight.
7. Техникалык тейлөө
7.1 Тазалоо
Эсептегичтин кутучасын жарнама менен сүртүңүзamp кездеме жана жумшак жуугуч каражат. Абразивдүү заттарды же эриткичтерди колдонбоңуз. Колдонуудан мурун эсептегичтин кургак экенин текшериңиз.
7.2 Батареяны алмаштыруу
When the 'Low Battery' indicator appears on the display, replace the 9V battery as described in Section 5.1. Prompt battery replacement ensures accurate readings.
7.3 Сактоо
If the meter is not used for an extended period, remove the battery to prevent leakage and damage. Store the meter in a cool, dry place, away from direct sunlight and extreme temperatures.
8. Кыйынчылыктарды
- Дисплей жок/Алсыз дисплей: Check battery installation and replace the 9V battery if necessary.
- Туура эмес окуулар: Ensure the rotary switch is set to the correct function and range. Verify test lead connections. Check for damaged test leads.
- Дисплейдеги "OL": Indicates an over-range condition or an open circuit. Select a higher range or check the circuit connection.
- Buzzer Not Sounding in Continuity Mode: The resistance may be above the continuity threshold (30Ω), or the circuit is open.
9. Техникалык шарттар
| Параметр | Спецификация |
|---|---|
| Дисплей | 2000 саны |
| Жаак ачуу | 55мм (2.2") |
| AC Voltage | 750V |
| DC Voltage | 1000V |
| AC тогу | 1000A |
| Каршылык | 2МΩ |
| Жыштык | 20кГц |
| Үзгүлтүксүздүк | <30Ω (Buzzer) |
| Диоддун ачык көлөмүtage | 3.0V |
| Температура (К түрү) | -0°Cден 750°Cге чейин (32°Fтен 1382°Fге чейин) |
| Коопсуздук рейтинги | CAT II 1000V, CAT III 600V |
| Power Source | 9V батарея (камтылган) |
| Продукциянын өлчөмдөрү | 7.87 x 5.91 x 9.84 дюйм |
| Элемент Салмагы | 1 килограмм (2.2 фунт) |

Detailed specifications and features for the Mastech MS2000G and other models.
10. Кутуда эмне бар
The Mastech MS2000G package typically includes:
- Mastech MS2000G Digital Clamp Метр
- Сыноочу линзалар (бир жуп)
- Wrapping Case
- K-түрү термопар
- 9V Батарея
- Калибрлөө сертификаты
- Ыкчам баштоо колдонмосу / Колдонуучунун колдонмосу

Contents of the Mastech MS2000G package, including the clamp meter and accessories.
11. Кепилдик жана колдоо
For warranty information and technical support, please refer to the documentation included with your product or contact the seller/manufacturer directly. Keep your purchase receipt as proof of purchase.


