1. Киришүү
This manual provides comprehensive instructions for the installation, operation, and maintenance of your Juno 2-Inch Flat Trim Canless Wafer LED Downlight. This innovative lighting solution is designed for quick and easy installation in various ceiling spaces, eliminating the need for traditional recessed housings. It features an all-in-one design with switchable white color temperature and adjustable lumen output, offering versatile lighting for accent, task, or general illumination.

Figure 1: Juno 2-Inch Flat Trim Canless Wafer LED Downlight with its remote driver box.
2. Коопсуздук маалыматы
Орнотуудан мурун бардык көрсөтмөлөрдү кунт коюп окуп чыгыңыз жана келечекте колдонуу үчүн бул колдонмону сактап коюңуз. Бул көрсөтмөлөрдү аткарбоо электр тогуна урунууга, өрткө же башка коркунучтарга алып келиши мүмкүн.
- Always turn off power at the circuit breaker before beginning installation or performing any maintenance.
- All electrical connections must be in accordance with local and National Electrical Code (NEC) standards. If you are unfamiliar with proper electrical wiring connections, consult a qualified electrician.
- Продукцияны эч кандай өзгөртүүгө же өзгөртүүгө болбойт.
- камсыз кылуу voltage is compatible with the fixture (120 Volts).
- This product is suitable for wet locations and is IC Rated for direct contact with insulation.
- Do not install damaged products. Inspect the product upon receipt.
3. Пакеттин мазмуну
Verify that all components are present and undamaged before proceeding with installation:
- LED Lens (Integrated with Downlight Fixture)
- Mounting Hardware (Spring clips, remote driver box)
Note: The downlight fixture and remote driver box are typically pre-assembled or connected.
4. Өзгөчөлүктөрү
The Juno 2-Inch Flat Trim Canless Wafer LED Downlight offers advanced features for optimal lighting performance and ease of use:
- Canless Design: No housing required, allowing installation directly into ceiling drywall.
- Switchable White Color Temperature (SWW5): Easily select from five color temperature options:
- 2700K жумшак ак
- 3000K жылуу ак
- 3500K нейтралдуу ак
- 4000K муздак ак
- 5000K Күндүзгү жарык
- Adjustable Lumen Output (ALO25): Choose from three brightness levels (Low, Medium, High) to suit your needs.
- Өчүрүүчү: Compatible with most standard TRIAC dimmers, dimming down to 10 percent.
- Энергияны үнөмдүү: Long-life LEDs and a high-efficiency driver ensure superior illumination and extended service life.
- IC рейтинги: Approved for direct contact with insulation, simplifying installation in insulated ceilings.
- Wet Location Certified: Suitable for use in bathrooms, showers, and outdoor covered areas.

Figure 2: Switches on the remote driver box allow selection of color temperature and lumen output.

Figure 3: Visual guide to the different color temperatures available.
5. Орнотуу жана орнотуу
The canless design simplifies installation. Follow these steps for a secure and proper setup:
- Кубатты өчүрүү: Баштоодон мурун, орнотуу аймагына берилүүчү электр кубаты автоматтык өчүргүчтөн өчүрүлгөнүн текшериңиз.
- Ачууну даярдоо: Cut a 2-inch diameter hole in the ceiling drywall at the desired location. Ensure there are no obstructions (joists, pipes, wires) within the ceiling space.
- Зымдарды туташтыруу:
- Open the remote driver box.
- Connect the building's supply wires (hot, neutral, ground) to the corresponding wires in the driver box using appropriate wire connectors.
- Бардык байланыштар коопсуз жана туура изоляцияланганын текшериңиз.
- Close the driver box cover.
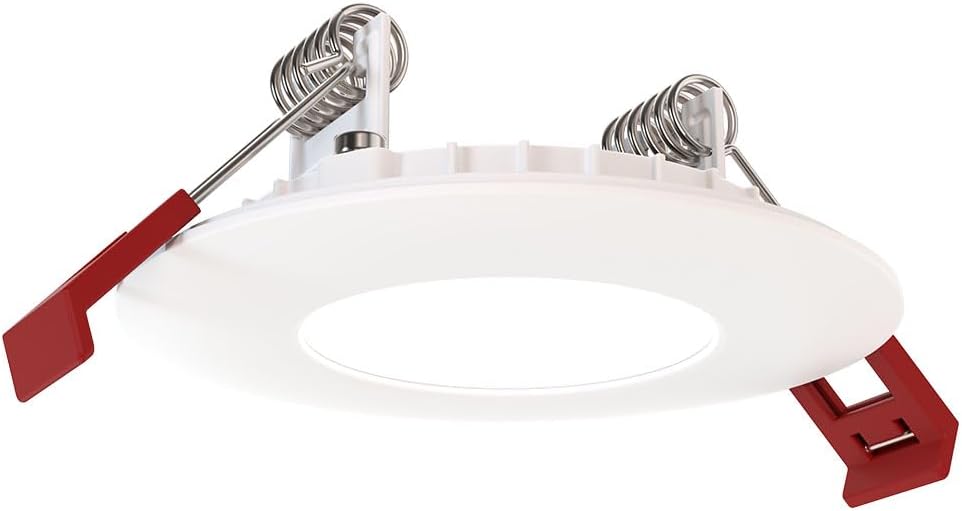
Figure 4: The remote driver box houses the electrical connections and adjustment switches.
- Select Settings (Pre-Installation): Before inserting the downlight into the ceiling, use the switches on the remote driver box to select your desired color temperature (2700K-5000K) and lumen output (Low, Medium, High). These settings can be adjusted later if needed, but it's easier before final installation.
- Insert Driver Box: Place the remote driver box into the ceiling opening. Its slim design allows it to fit into tight spaces.
- Install Downlight:
- Gently push the spring-loaded clips on the sides of the downlight upwards.
- Insert the downlight into the ceiling opening.
- Once the downlight is fully inserted, release the clips. The clips will spring back down and firmly secure the fixture against the ceiling.

Figure 5: Dimensions of the downlight and driver box for installation planning.
- Күчтү калыбына келтирүү: Turn the power back on at the circuit breaker. Test the downlight's functionality.
6. Иштөө нускамалары
Your Juno LED Downlight is designed for simple operation once installed.
- Күйгүзүү/өчүрүү: Control the light using a standard wall switch connected to the circuit.
- алсыздатуу: If connected to a compatible TRIAC dimmer switch, adjust the brightness by manipulating the dimmer control. The light can be dimmed down to 10% of its maximum output.
- Adjusting Color Temperature and Lumen Output:
The color temperature and lumen output are set via switches located on the remote driver box (refer to Figure 2). To change these settings after installation, you will need to access the driver box, which may require temporarily removing the fixture from the ceiling or accessing the box through an attic/access panel if it was placed there. It is recommended to set these preferences during installation.
- Color Temperature Switch: Select from 2700K, 3000K, 3500K, 4000K, or 5000K.
- Lumen Output Switch: Choose Low, Medium, or High brightness.
7. Техникалык тейлөө
The Juno LED Downlight requires minimal maintenance due to its durable design and long-life LEDs.
- Тазалоо: Тазалоодон мурун электр кубатынын өчүрүлгөнүн текшериңиз. Жабдууну жумшак, кургак же бир аз кургатылган чүпүрөк менен сүртүңүзamp кездеме. Абразивдүү тазалоочу каражаттарды же эриткичтерди колдонбоңуз, анткени алар каптамага же электрдик компоненттерге зыян келтириши мүмкүн.
- LED өмүрү: The integrated LEDs are designed for extended operation and do not require replacement under normal use.
8. Кыйынчылыктарды
If you encounter issues with your downlight, refer to the following common problems and solutions:
| Көйгөй | Мүмкүн себеп | Чечим |
|---|---|---|
| Жарык күйбөйт. | Шайманга күч жок. Бошогон зымдар байланышы. Бузук өчүргүч же автоматтык өчүргүч. | Ажыраткычты жана дубалды өчүргүчтү текшериңиз. Turn off power, check all wire connections in the driver box. Test switch or breaker; replace if necessary. |
| Жарык туура эмес жыпылыктайт же күңүрттөйт. | Шайкеш келбеген диммер которгучу. Бошоң зымдар. Ашыкча жүктөлгөн схема. | Ensure dimmer is TRIAC compatible and designed for LED lighting. Электр кубатын өчүрүңүз, бардык зым байланыштарын текшериңиз. Reduce load on the circuit or consult an electrician. |
| Incorrect color temperature or brightness. | Switches on driver box set incorrectly. | Access the remote driver box and adjust the color temperature and lumen output switches to desired settings. |
Эгерде бул чечимдерди колдонуп көргөндөн кийин көйгөй чечилбесе, кардарларды колдоо кызматына кайрылыңыз.
9. Техникалык шарттар
| Атрибут | Деталь |
|---|---|
| Бренд | Juno |
| Модель аты | WF2 RD ALO25 SWW5 90CRI 120 MW M6 (Round LED) |
| Өлчөмү | 2-Inch Flat Trim |
| Түс | Matte White |
| Материал | Алюминий, поликарбонат |
| Жарык булагы түрү | LED |
| Тtage | 120 вольт |
| Ватtage | 9.2 ватт |
| Өзгөчөлүктөр | Adjustable Color Temperature (2700K-5000K), Dimmable (Triac), Energy Efficient, Waterproof |
| Орнотуу түрү | Суу агызуучу монтаж (банкасыз) |
| Ички/тышкы колдонуу | Indoor, Outdoor (Wet Location Certified) |
| Продукциянын өлчөмдөрү | 3.2"L x 3.2"W x 1.3"H (Fixture) |
| Элемент Салмагы | 13.2 унция |
| Сертификаттар | CSA certified, Title 24, Energy Star, IC Rated |
10. Кепилдик жана колдоо
Кепилдик: This product comes with a Limited Warranty. Please refer to the product packaging or the manufacturer's official website for specific terms and conditions of the warranty.
Кардарларды колдоо: For technical assistance, troubleshooting beyond this manual, or warranty claims, please contact Juno customer support. Contact information can typically be found on the product packaging or the official Juno webсайт.
Онлайн ресурстар: For additional information, product updates, or FAQs, visit the official Juno webсайт: www.acuitybrands.com/brands/juno


