1. Маанилүү коопсуздук нускамалары
Please read all instructions carefully before using your Klarstein Ice Maker Machine. Keep this manual for future reference.
- электр менен жабдууну камсыз кылуу voltage шаймандагы рейтинг белгисине дал келет.
- Шайманды, электр шнурун же сууга же башка суюктуктарды розеткага салбаңыз.
- Шайманды колдонбогондо жана тазалоодон мурун электр розеткасынан сууруп алыңыз.
- Эч кандай шайманды зымы же сайы бузулган, же шайман иштебей калгандан кийин же кандайдыр бир түрдө бузулгандан кийин иштетпеңиз.
- Place the ice maker on a stable, level surface, away from direct sunlight and heat sources.
- Allow at least 10 cm (4 inches) of space around the appliance for proper ventilation.
- Бул шайман физикалык, сезүү же акыл-эс жөндөмү начар же тажрыйбасы жана билими жок адамдар (анын ичинде балдар) үчүн, эгерде алардын коопсуздугуна жооптуу адам тарабынан көзөмөлсүз же шайманды колдонуу боюнча көрсөтмө болбосо, колдонууга арналбайт.
- Суу сактагычта ичүүгө жарактуу сууну гана колдонуңуз.
2. Продукт бүтүп калдыview
Familiarize yourself with the components of your Klarstein Ice Maker Machine.

Сүрөт 2.1: Алдыңкы view of the Klarstein Ice Maker Machine with included accessories.

2.2-сүрөт: Интерьер view showing the ice basket and bullet-shaped ice cubes.
Компоненттери:
- Башкаруу панели: Features power button, ice size selection, and indicator lights.
- Суу сактагыч: Located beneath the ice basket, holds water for ice production.
- Муз себет: Өндүрүлгөн муз кубиктерин чогултуу үчүн алынуучу себет.
- Муз кашык: For convenient removal of ice cubes.
- Тунук капкак: Allows monitoring of the ice-making process.
3. Орнотуу
Follow these steps to set up your ice maker for first use.
3.1 Пакеттен чыгаруу
- Муз жасагычты таңгагынан кылдаттык менен чыгарыңыз.
- Бардык таңгактоочу материалдарды, анын ичинде скотчту же коргоочу пленкаларды алып салыңыз.
- Check for any damage during transit. If the appliance is damaged, do not use it and contact customer support.
3.2 Орнотуу
- Place the ice maker on a firm, level, and stable surface.
- Ensure adequate ventilation by leaving at least 10 cm (4 inches) of space around the unit.
- Түзмөктү жылуулук булактарынын жанына (мисалы, мештер, радиаторлор) же күндүн нуру түз тийген жерге койбоңуз.
- Do not place the unit in an enclosed cabinet or on a soft surface where vents could be blocked.

Figure 3.1: Recommended placement and dimensions for the ice maker.
3.3 Алгачкы тазалоо
Биринчи жолу колдонуудан мурун, муз жасагычтын ичин тазалаңыз.
- Муз себетти алып салыңыз.
- ичин жумшак чүпүрөк менен тазалоо dampжылуу суу жана жумшак жуугуч менен бүттү.
- Жакшылап жууп, кургатып сүртүңүз.
- Run a self-cleaning cycle (refer to Section 5.2) before making ice for consumption.
4. Иштөө нускамалары
Follow these steps to produce ice cubes with your Klarstein Ice Maker Machine.

Figure 4.1: Quick start guide for ice production.
- Сууну толтуруу: Open the lid and fill the water reservoir with potable water up to the 'MAX' fill line. Do not overfill.
- Туташуу кубаты: Муз жасагычты жерге туташтырылган электр розеткасына сайыңыз.
- Күйгүзүү: Press the 'POWER' button on the control panel to turn on the appliance.
- Муз өлчөмүн тандоо: Press the 'SELECT' button to choose between small (S) or large (L) ice cube sizes. The corresponding indicator light will illuminate.
- Муз өндүрүүнү баштоо: The machine will automatically begin the ice-making cycle after a few seconds. The 'ICE MAKING' indicator light will be on.
- Прогресс мониторинги: The first batch of ice cubes will be ready in approximately 7-9 minutes, depending on the selected size and ambient temperature.
- Муз толук көрсөткүчү: When the ice basket is full, the 'ICE FULL' indicator light will illuminate, and the machine will pause operation. Remove ice to resume production.
- Суу көрсөткүчүн кошуу: If the water level in the reservoir is too low, the 'ADD WATER' indicator light will illuminate, and the machine will pause. Add more water to resume.
- Өчүрүү: Press the 'POWER' button to turn off the ice maker when you are finished.
5. Техникалык тейлөө
Regular cleaning and proper maintenance will ensure the longevity and optimal performance of your ice maker.
5.1 Жалпы тазалоо
- Тазалоодон мурун шайманды розеткадан ажыратыңыз.
- Сыртын жумшак менен тазалаңыз, гamp кездеме. Абразивдүү тазалагычтарды же эриткичтерди колдонбоңуз.
- Муз себетти алып чыгып, жылуу, самындуу суу менен тазалаңыз. Чайкап, жакшылап кургатыңыз.
- Drain any remaining water from the reservoir by removing the drain plug (usually located at the bottom or side of the unit).
- Clean the interior of the water reservoir and ice-making components with a soft cloth and a mild, food-safe cleaning solution. Rinse thoroughly with clean water.
5.2 Өзүн өзү тазалоо функциясы
The ice maker features a self-cleaning function for convenient maintenance.
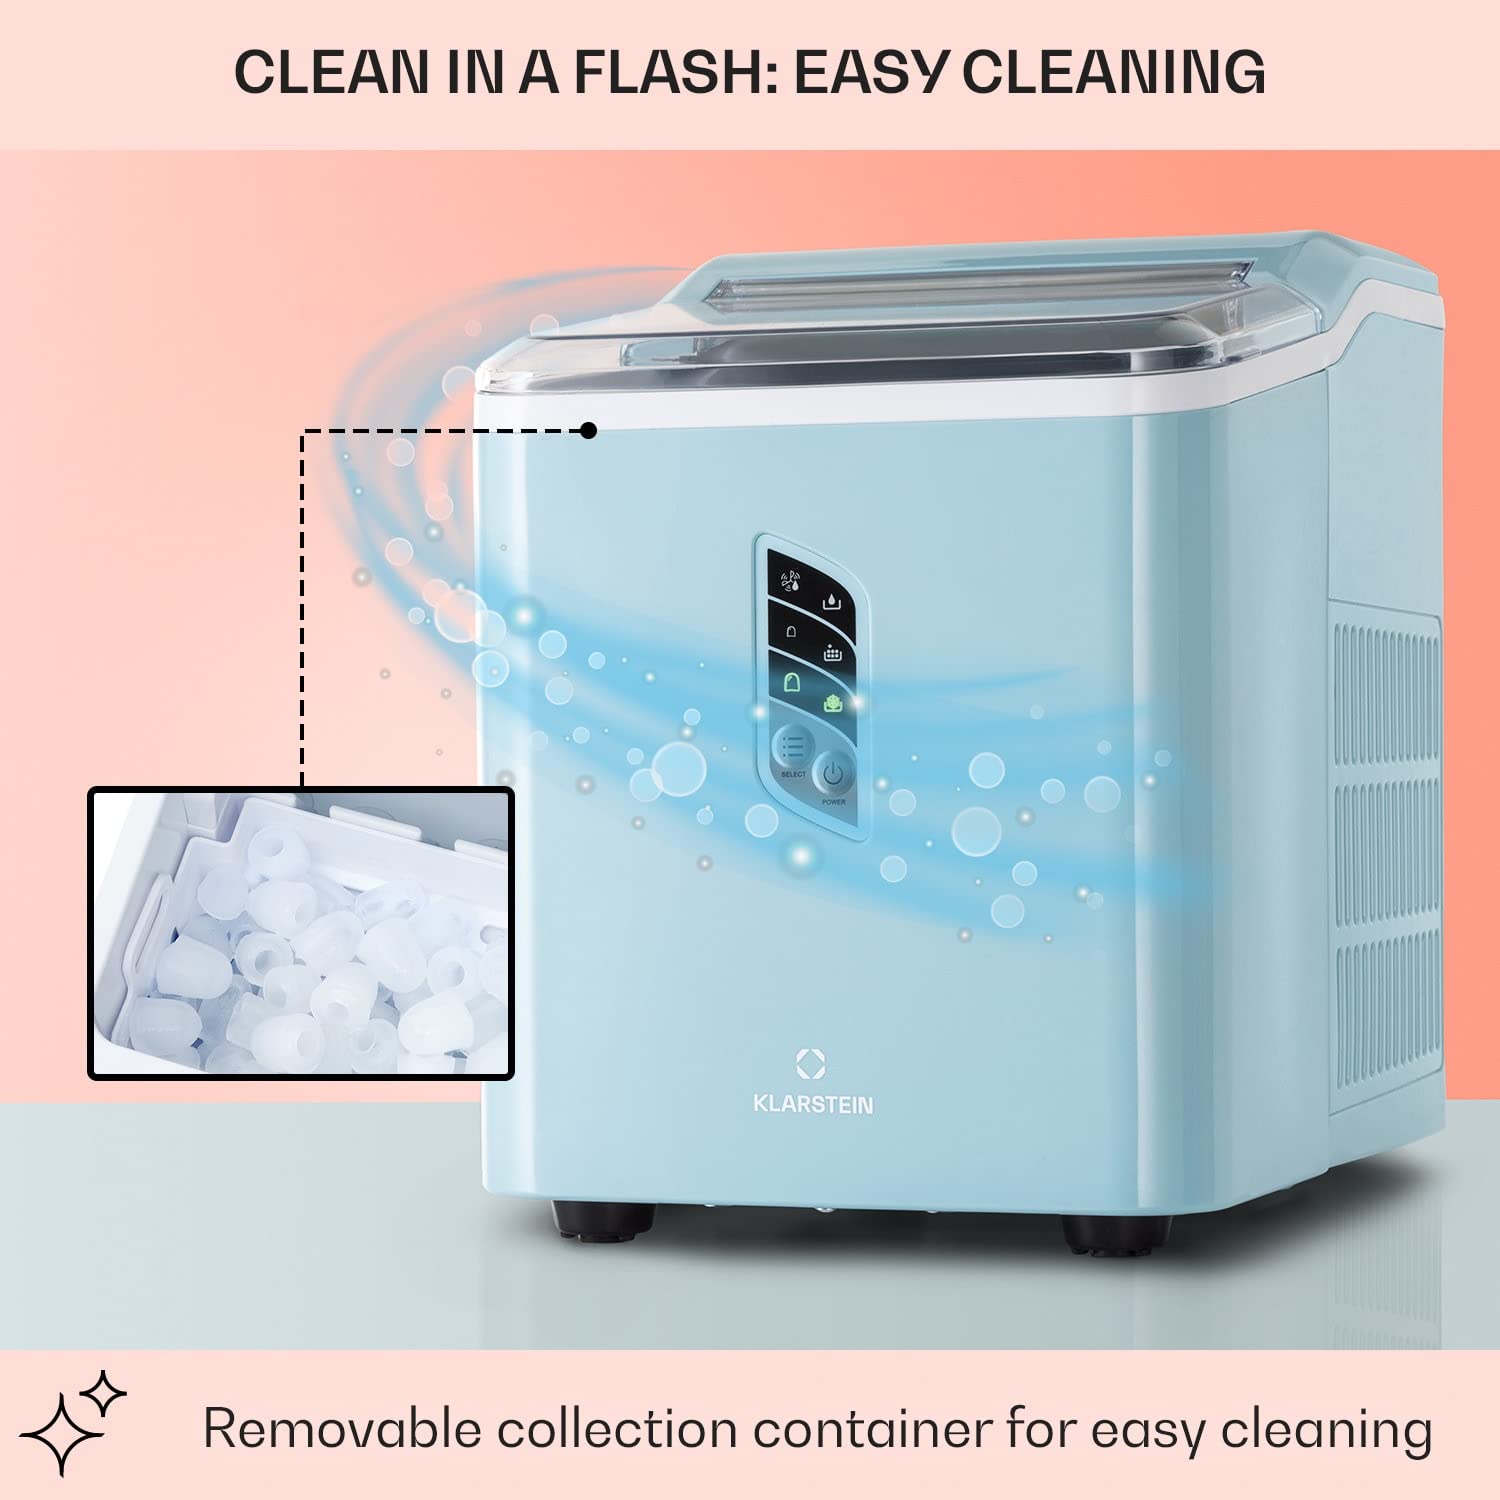
Figure 5.1: Self-cleaning function overview.
- Суу сактагыч таза суу менен толтурулат.
- Refer to your specific model's control panel for the self-cleaning activation method (often a long press of the 'SELECT' or 'POWER' button, or a dedicated 'CLEAN' button).
- The machine will circulate water through its system to clean internal components.
- Цикл аяктагандан кийин, резервуардагы сууну төгүп, ички бетин кургатыңыз.
5.3 Сактоо
Эгерде муз жасагычты узак убакытка сактасаңыз:
- Perform a thorough cleaning and self-cleaning cycle.
- Ensure all internal components are completely dry to prevent mold or mildew growth.
- Шайманды салкын, кургак жерде, түз күн тийбеген жерде сактаңыз.
6. Кыйынчылыктарды
Жалпы маселелер жана алардын чечимдери үчүн бул бөлүмдү караңыз.
| Көйгөй | Мүмкүн себеп | Чечим |
|---|---|---|
| Муз жасагыч күйбөй жатат | Электр энергиясы жок | Электр шнурунун иштеген розеткага бекем сайылганын текшериңиз. |
| 'ADD WATER' indicator is on | Water reservoir is empty or low | Fill the water reservoir with potable water up to the 'MAX' line. |
| 'ICE FULL' indicator is on | Муз себет толду | Remove ice cubes from the basket. The machine will resume operation. |
| муз өндүрүү жок | Insufficient water, high ambient temperature, or air blockage | Ensure water is filled. Place the unit in a cooler environment. Check for proper ventilation. |
| Муз кубиктери өтө кичинекей же томпок | Water temperature too high, or first cycle | Use colder water. The first few cycles may produce smaller ice. Ensure proper ventilation. |
| Иш учурунда адаттан тыш ызы-чуу | Normal compressor operation, or unit not level | Some noise is normal. Ensure the unit is on a stable, level surface. |
7. Техникалык шарттар
Technical data for the Klarstein Countertop Ice Maker Machine.
| Өзгөчөлүк | Спецификация |
|---|---|
| Бренд | КЛАРШТЕЙН |
| Модель аты | Үстүндөгү муз жасоочу |
| Продукциянын өлчөмдөрү (D x W x Y) | 11.42" x 8.86" x 12.6" (29 x 22.5 x 32 см) |
| Сыйымдуулугу (Суу сактагыч) | 1.5 литр |
| Муз өндүрүшүнүн кубаттуулугу | Күнүнө 12 кг (26.5 фунт) чейин |
| Муз өндүрүү цикли | Approx. 7-9 minutes per batch |
| Ватtage | 11500 watts (Note: This value seems unusually high for an ice maker and might be a data entry error. Please refer to the product label for accurate wattagд.) |
| Тtage | 220 вольт |
| Элемент Салмагы | 7.6 килограмм (16.7 фунт) |
| Муздаткыч | R600a |
| Материалдын түрү | Дат баспаган болот |
8. Кепилдик жана колдоо
For warranty information, technical support, or service inquiries, please refer to the warranty card included with your product or contact Klarstein customer service directly. Contact details can typically be found on the manufacturer's official webсайтында же сатып алуу документтеринде.


