1. Introduction and Overview
This manual provides comprehensive instructions for the installation, operation, and maintenance of your MXT SuperLive Plus 5MP 8CH Hybrid Digital Video Recorder (DVR). This DVR supports up to 8 channels of 5MP HD-TVI/CVI/AHD analog camera input and up to 4 channels of IP camera input, offering a versatile surveillance solution. It features H.265 video compression for efficient storage and is NDAA compliant. Remote surveillance is available via the free SuperLive Plus mobile application.
2. Кутуда эмне бар
Пакетти ачканда, бардык компоненттер бар экенин жана жакшы абалда экендигин текшериңиз:
- 1x MXT SuperLive Plus 5MP 8CH Hybrid DVR (Hard Drive is NOT included)
Note: Additional accessories such as a power adapter, mouse, and remote control are typically included but not explicitly listed in the provided "What's in the box" information. Please check your specific product packaging.
3. Продукциянын өзгөчөлүктөрү
The MXT SuperLive Plus Hybrid DVR offers a robust set of features for your surveillance needs:
- Hybrid Capability: Supports 8 channels of 5MP Lite 1080p HD Analog (TVI/AHD/CVI) video input and up to 4 channels of IP video input.
- NDAAга шайкеш келет: Adheres to the National Defense Authorization Act standards.
- Remote Surveillance: Free remote monitoring via the SuperLive Plus APP for iOS and Android devices.
- Сактагыч: Supports 1x SATA hard drive up to 10TB and 1x E-SATA for expanded storage (Hard Drive not included).
- Видео чыгаруу: Multiple output options including 1x HDMI, 1x VGA, and 1x BNC.
- H.265 Кысуу: Advanced video compression for efficient storage and bandwidth usage.
- Ойнотуу: Simultaneous 8-channel playback.
- Alarm & Audio: 8-channel alarm input, 2-channel alarm output, 8-channel RCA audio input, 1-channel RCA audio output.

3.1-сүрөт: Фронт view of the MXT Hybrid DVR, illustrating its sleek design and indicators for recording (REC), network (NET), and power (PWR). Below the DVR, icons represent various supported features such as HD resolution, H.265 compression, DDNS, network connectivity, PTZ control, audio, microphone input, mobile access, CMS, USB, mouse, and email notifications.
4. Орнотуу колдонмосу
Follow these steps to set up your MXT Hybrid DVR:
4.1. Аппараттык байланыштар
- Катуу дискти орнотуу (милдеттүү эмес): If you wish to record video, install a compatible SATA hard drive (up to 10TB) into the DVR. Refer to the DVR's internal instructions for proper installation.
- Камераларды туташтыруу:
- Analog Cameras: Connect your HD-TVI/CVI/AHD analog cameras to the BNC video input ports (1-8) on the rear panel of the DVR.
- IP камералар: Connect IP cameras to your network via a PoE switch (sold separately). The DVR does not have built-in PoE ports. Ensure IP cameras are on the same network as the DVR.
- Дисплейди туташтыруу: Connect a monitor to the DVR using either the HDMI or VGA port for local viewing. A BNC-CVBS output is also available.
- Аудио туташтыруу (кошумча): If using external microphones or audio sources, connect them to the RCA audio input ports.
- Тармакка туташуу: Connect an Ethernet cable from the DVR's LAN port to your router or network switch for remote access and IP camera connectivity.
- USB түзмөктөрүн туташтыруу: Connect the included USB mouse to a USB port for local control. You can also connect a USB flash drive for data backup.
- Туташуу кубаты: Connect the provided power adapter to the DVR's DC 12V power input and then plug it into a power outlet. The DVR will power on automatically.

4.1-сүрөт: Top and rear panel view of the MXT Hybrid DVR, illustrating its sleek design and indicators for recording (REC), network (NET), and power (PWR). The rear view details the various input/output ports including BNC video inputs, RCA audio inputs/outputs, alarm inputs/outputs, VGA, HDMI, LAN, USB, E-SATA, and power input.

4.2-сүрөт: Technical diagrams of the MXT Hybrid DVR. The top diagram illustrates the product dimensions (300mm width, 45mm/48.1mm height, 248.5mm depth). The bottom diagram provides a detailed schematic of the rear panel, labeling each port for video input (1-8), audio input/output, alarm, VGA, HDMI, LAN, USB, E-SATA, and power.
4.2. Баштапкы конфигурация
Биринчи жолу жүктөлгөндө, DVR сизди баштапкы орнотуу устасы аркылуу жетектейт. Буга адатта төмөнкүлөр кирет:
- Администратордун сырсөзүн орнотуу.
- Күн жана убакыт конфигурацияланууда.
- Network settings (DHCP is usually enabled by default).
- Hard drive initialization (if installed).
- Adding IP cameras (if applicable).
Баштапкы орнотууну аяктоо үчүн экрандагы көрсөтмөлөрдү аткарыңыз.
5. Иштөө нускамалары
5.1. Local Operation (Using Mouse)
Navigate the DVR's graphical user interface (GUI) using the connected USB mouse. Right-click to access the main menu, which includes options for live view, playback, recording settings, network configuration, system settings, and more.
5.2. Remote Surveillance with SuperLive Plus APP
The SuperLive Plus mobile application allows you to view live feeds, play back recordings, and manage your DVR remotely from your smartphone or tablet.
- Колдонмону жүктөп алыңыз: Издөө "SuperLive Plus" in the Apple App Store (for iOS) or Google Play Store (for Android) and install it.
- Колдонмону ишке киргизиңиз: Open the SuperLive Plus application on your mobile device.
- Түзмөк кошуу:
- Tap the "Add Device" or "+" icon.
- Select "DVR/NVR" as the device type.
- Enter the DVR's serial number (usually found on a sticker on the DVR or in the DVR's system information menu) or scan the QR code provided by the DVR for quick setup.
- Enter the DVR's username and password (the one you set during initial configuration).
- Save the device.
- View Тирүү жем: Once added, select your DVR from the device list to view түз эфирдеги камера берүүлөр.
- Ойнотуу: Use the playback function within the app to review foo жазылганtage.
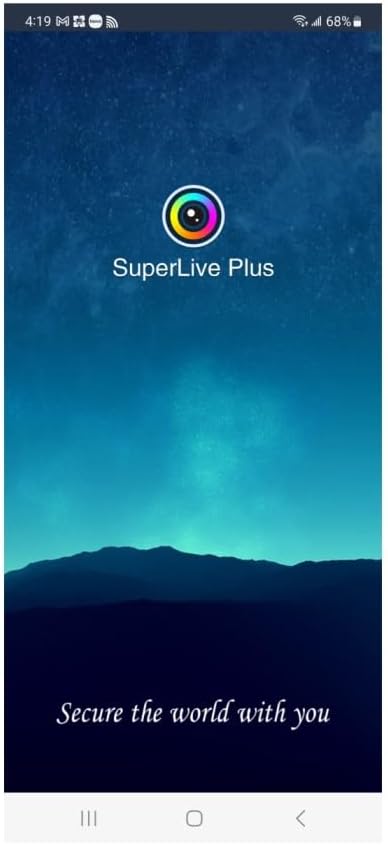
5.1-сүрөт: The splash screen of the SuperLive Plus mobile application, displaying the app's logo and the tagline "Secure the world with you." This screen appears upon launching the application.

5.2-сүрөт: A smartphone displaying the live view interface of the SuperLive Plus mobile application. The screen shows multiple camera feeds simultaneously, with controls for audio, snapshot, and other functions at the bottom. The SuperLive Plus logo is prominently displayed next to the phone.
5.3. Remote Control via Web Кардар же CMS
The DVR can also be accessed and managed through a web browser on a computer or via a dedicated Central Management Software (CMS). This allows for preview, playback, backup, PTZ control, and configuration.
- Web Кардар: ачуу а web browser and enter the DVR's IP address. Log in with your credentials.
- CMS Software: Install the provided CMS software (if applicable) on your computer and add the DVR using its IP address or serial number.
6. Техникалык тейлөө
Үзгүлтүксүз техникалык тейлөө DVR системаңыздын оптималдуу иштешин жана узак мөөнөттүү иштешин камсыз кылат:
- Тазалоо: Periodically clean the DVR's exterior with a soft, dry cloth. Ensure ventilation openings are free from dust and obstructions.
- Программалык камсыздоонун жаңыртуулары: Өндүрүүчүнү текшериңиз website for firmware updates. Keeping your DVR's firmware up-to-date can improve performance, add features, and enhance security.
- Катуу дисктин ден соолугу: Monitor the health of your hard drive through the DVR's system settings. Back up important footagд үзгүлтүксүз.
- Сырсөз коопсуздугу: Change your DVR and app passwords periodically to maintain security.
- Экологиялык шарттар: Ensure the DVR is operated within its specified temperature and humidity ranges. Avoid direct sunlight and excessive heat.
7. Кыйынчылыктарды
Бул бөлүм сиз кабылышы мүмкүн болгон жалпы көйгөйлөрдү карайт:
| Көйгөй | Мүмкүн себеп | Чечим |
|---|---|---|
| Монитордо видео чыгаруу жок. | Loose video cable, incorrect display resolution, DVR not powered on. | Check HDMI/VGA cable connections. Ensure DVR is powered. Try a different monitor or cable. Adjust DVR resolution if necessary. |
| Cannot access DVR remotely via app/web. | Network issue, incorrect IP address/port forwarding, app configuration error. | Verify DVR has network connectivity. Check router settings for port forwarding (if not using P2P/Cloud). Re-enter device details in the app. |
| Жаздыруу жок. | No hard drive installed, hard drive not initialized, recording schedule not set. | Install a hard drive. Initialize the hard drive through DVR settings. Configure recording schedules. |
| No audio from cameras. | Camera does not have a microphone, audio not enabled, DVR does not support Audio-Over-Coax. | Ensure cameras have built-in microphones or external audio input. Verify audio settings on DVR. Note: This DVR model does NOT support Audio-Over-Coax for built-in mic cameras; audio is only via RCA input. |
If you encounter issues not listed here, please refer to the "Warranty and Support" section for assistance.
8. Техникалык шарттар
| Өзгөчөлүк | Деталь |
|---|---|
| Видео киргизүү | 8CH HD Analog TVI/AHD/CVI (5MP/4MP/1080p/720p/WD1) + up to 4CH IP (5MP/4MP/3MP/1080p/960p/720p) |
| PoE порттору | None (PoE switch required for IP cameras, sold separately) |
| Ойнотуу | 8CH бир эле учурда |
| Сигнал киргизүү/чыгаруу | 8CH Input, 2CH Output |
| Аудио киргизүү/чыгаруу | RCAx8 Input, RCAx1 Output (No Audio-Over-Coax support) |
| Record Resolution | 5MP Lite/4MP Lite/1080p/1080p Lite/720p/WD1/D1 |
| өткөрүү жөндөмдүүлүгү | Incoming: 32Mbps, Outgoing: 60Mbps |
| HDD сыйымдуулугу | 1x SATA up to 10TB; 1x E-SATA (HDD NOT included) |
| Video Output | 1x HDMI (1920x1080/1280x1024/1024x768), 1x VGA (1920x1080/1280x1024/1024x768), 1x BNC-CVBS |
| Алыстан башкаруу | Web Client, CMS, SuperLive Plus APP (iOS/Android) |
| Өлчөмдөрү (болжол менен) | 18 x 14 x 5 дюйм (Пакет) |
| Элемент Салмагы | 4 фунт |
| Модель номери | 5MP8CHDVR |
| Байланыш технологиясы | Зымдуу |
9. Кепилдик жана колдоо
Warranty and US-based Professional & Experienced Tech Support are provided exclusively by the Seller. For any technical assistance, troubleshooting, or warranty claims, please contact the seller directly through your purchase platform.
For the most up-to-date support information, please refer to the seller's contact details provided at the time of purchase or on the product listing page.


