1. Продукт бүтүп калдыview
The Raddy AG7 is a comprehensive wireless weather station designed to provide accurate monitoring of various environmental conditions. It features a 7.4-inch digital display for clear readability and includes an atomic clock for precise timekeeping. The system monitors indoor and outdoor temperature, humidity, wind speed and direction, and precipitation. It also offers 12-hour weather forecasts and displays barometric pressure.
- Professional Monitoring: Tracks temperature, humidity, wind, and precipitation.
- Кеңейтүүчү система: Supports up to three additional R5 sensors for monitoring up to five zones.
- Precise Outdoor Sensor: Equipped with a rain funnel, wind vane, anemometer, thermo-hygrometer with anti-radiation shield, and a solar panel. Offers a range of up to 100 meters.
- Чоң дисплей: 7.4-inch screen shows indoor/outdoor temperature/humidity, precipitation, atmospheric pressure, wind speed/direction, dew point, felt temperature, 12-hour forecast, and daily max/min values.
- Оңой орнотуу: Clear instructions and diagrams facilitate quick setup.
2. Компоненттер
The Raddy AG7 weather station includes the main display console and a multi-sensor outdoor unit. The outdoor unit integrates several instruments for comprehensive weather data collection.

Сүрөт: Деталдаштырылган view of the Raddy AG7 outdoor sensor unit, highlighting its key components.
- 1. Anemometer Cups: Measure wind speed.
- 2. Rain Gauge Funnel: Collects precipitation for measurement.
- 3. Thermo-Hygrometer Shield: Protects temperature and humidity sensors from direct sunlight and radiation.
- 4. Solar Panel: Powers the outdoor sensor and charges its internal battery.
- 5. Wind Vane: Шамалдын багытын аныктайт.
3. Орнотуу жана орнотуу
3.1. Сырткы сенсорлорду орнотуу
Proper placement of the outdoor sensor is crucial for accurate readings. Choose an open location away from obstructions like buildings or trees that could interfere with wind or rain measurements. Ensure the solar panel receives adequate sunlight.

Сүрөт: Diagram illustrating various mounting options for the outdoor sensor, including top and side pole mounting. This image also shows the battery compartment and reset button for the sensor.
- Монтаждоо параметрлери: The sensor can be mounted on top of a pole or to the side of a pole using the provided hardware.
- Уюл диаметри: For pole installation, it is recommended that the pole has a minimum diameter of 2.4 cm (0.9 inches).
- Багыты: Ensure the wind vane is oriented correctly (usually pointing North) for accurate wind direction readings.
3.2. Дисплей консолун орнотуу
The display console can be placed on a table or mounted on a wall.

Сүрөт: The display console shown on a table stand and mounted on a wall, demonstrating flexible placement.
- Кубат булагы: The console can be powered by AAA batteries for economy mode or an adapter for continuous display.
- Баштапкы кубаттоо: Insert batteries or connect the power adapter. The console will automatically search for the outdoor sensor.
- Atomic Clock Synchronization: The atomic clock feature (DCF) will attempt to synchronize automatically. Ensure the console is placed in a location where it can receive the signal.
4. Иштөө нускамалары
4.1. Маалыматты көрсөтүү
The 7.4-inch display provides a wealth of information at a glance.

Сүрөт: The Raddy AG7 display showing various weather parameters and time, illustrating its multifunctionality.
- Үйдүн ичиндеги/сырткы температура жана нымдуулук: Эки чөйрө үчүн учурдагы көрсөткүчтөр.
- Жаан-чачын: Displays rainfall data.
- Аба ырайы: 12-hour forecast icons.
- Убакыт жана календарь: Atomic clock synchronized time and date.
- Wind Direction & Speed: Current wind conditions.
- Dew Point & Felt Temperature: Additional comfort indicators.
- Атмосфералык басым: Учурдагы барометрдик басым.
- Макс/мин Температура: Daily maximum and minimum temperature records.
4.2. Арткы жарыкты тууралоо
The display features 4 adjustable backlight levels for optimal viewжарыктын ар кандай шарттарында.

Сүрөт: Төрт мурункуamples of the display with different backlight levels (LV0 to LV3), demonstrating the adjustability.
Refer to the specific buttons on your console (usually labeled "LIGHT" or similar) to cycle through the backlight levels.
4.3. Ойготкуч орнотуулары
The AG7 allows setting high/low alerts for various parameters and dual alarms for weekdays and weekends. Consult the detailed instructions in the included manual for specific button functions and navigation to set these alarms.
4.4. Multi-Zone Monitoring
The system can connect with up to three additional R5 sensors (sold separately) to monitor up to five distinct zones (one outdoor, one indoor from main console, and three additional indoor/outdoor zones).
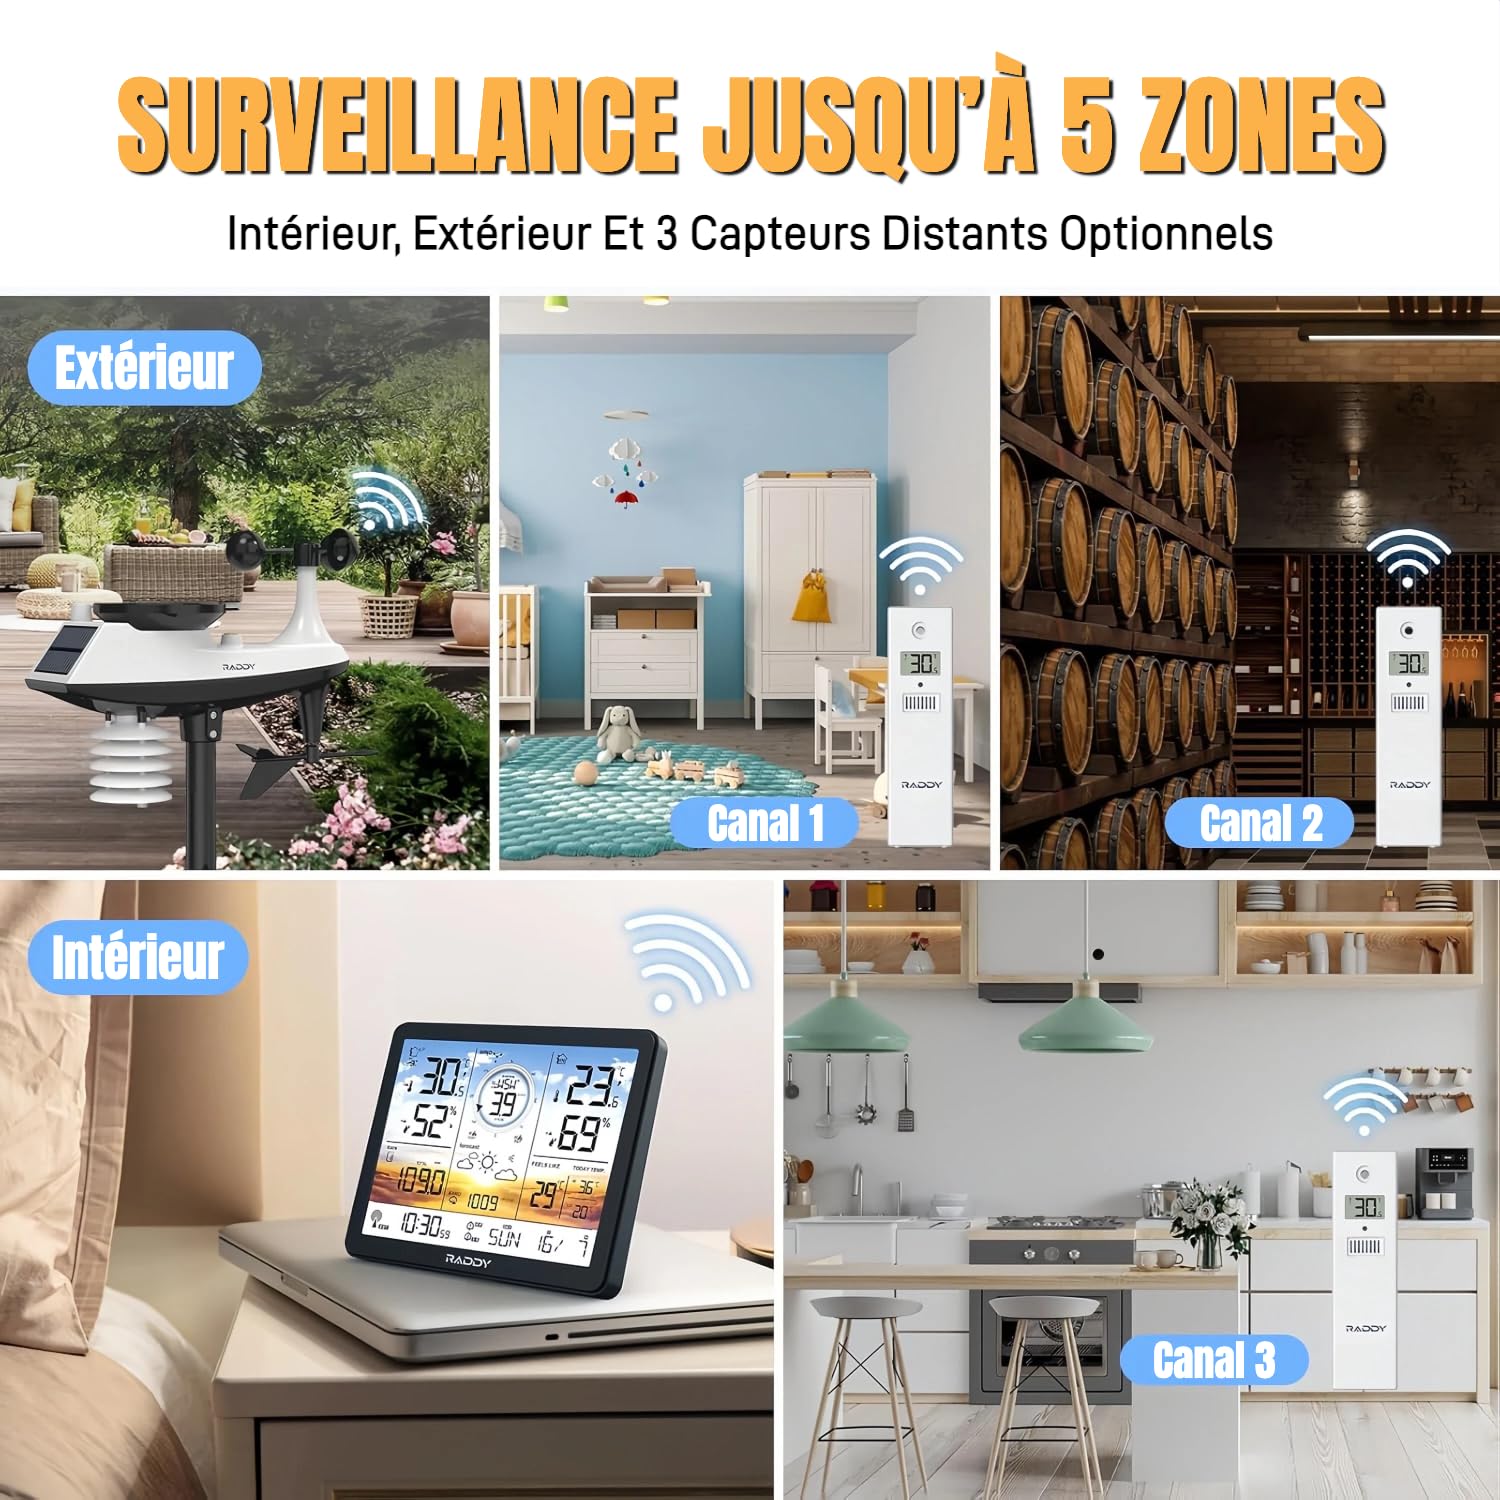
Сүрөт: Visual representation of the weather station monitoring multiple zones, including outdoor, indoor, and three additional channels with R5 sensors.
To add R5 sensors, follow the pairing instructions provided with the R5 sensors and the main AG7 manual. Each R5 sensor will transmit data to a specific channel on your main display.
5. Техникалык тейлөө
5.1. Батареяны алмаштыруу
The display console uses AAA batteries (not included). The outdoor sensor is solar-powered with a backup battery. Replace batteries when the low battery indicator appears on the display.
Сүрөт: А деталдуу view of the outdoor sensor's underside, showing the battery compartment (labeled 4) and reset button (labeled 1).
- Тышкы сенсор: Access the battery compartment on the underside of the sensor. Ensure proper polarity when inserting new batteries.
- Дисплей консолу: The battery compartment is typically on the back of the unit.
5.2. Тазалоо
- Тышкы сенсор: Periodically clean the rain gauge funnel and anemometer cups to ensure accurate readings. Remove any debris or insects.
- Дисплей консолу: Экранды сүртүңүз жана сasing жумшак, кургак чүпүрөк менен. Абразивдүү тазалагычтардан алыс болуңуз.
6. Кыйынчылыктарды
- No Outdoor Sensor Data / Loss of Radio Contact:
- Ensure the outdoor sensor is within the 100-meter transmission range of the display console.
- Check for obstructions (thick walls, metal structures, large appliances) between the sensor and console.
- Replace batteries in both the outdoor sensor and display console with fresh ones.
- Perform a reset: Press the reset button on the outdoor sensor (often a small pinhole, labeled 1 in the sensor detail image) and then on the display console (refer to your manual for console reset location). Re-pair the units if necessary.
- Avoid placing the console near electronic devices that may cause interference.
- Inaccurate Readings (Wind/Rain):
- Verify the outdoor sensor is installed in an open area, free from obstructions.
- Clean the rain gauge funnel and anemometer cups to remove any debris.
- Ensure the wind vane is correctly oriented.
- Дисплей көрүнбөйт / күңүрт:
- Батареянын деңгээлин текшерип, керек болсо алмаштырыңыз.
- If using an adapter, ensure it is properly connected and functioning.
- Adjust the backlight level (refer to section 4.2).
- Atomic Clock Not Synchronizing:
- Ensure the console is placed near a window or in an area with good signal reception.
- Avoid placing it near large metal objects or electronic devices that can block the signal.
- Allow sufficient time (up to 24 hours) for initial synchronization.
7. Техникалык шарттар
| Өзгөчөлүк | Деталь |
|---|---|
| Бренд | Рэдди |
| Модел | AG7 |
| Байланыш технологиясы | 433 МГц зымсыз |
| Дисплей түрү | LCD |
| Кубат булагы (консол) | Battery (AAA, not included) or Power Adapter |
| Кубат булагы (тышкы сенсор) | Батареянын резервдик көчүрмөсү менен күн энергиясы |
| Температуранын тактыгы | ±0.5 °C |
| Максималдуу иштөө температурасы | 60 °C |
| Өзгөчөлүктөр | Alarm, Atomic Clock (DCF), 4-level Backlight |
| Тышкы сенсор диапазону | 100 метрге чейин (330 фут) |
8. Кепилдик жана колдоо
Raddy provides lifetime technical support for the AG7 weather station. If you encounter any issues or have questions regarding the product, please contact Raddy customer service for assistance.
For contact information, please refer to the packaging or the official Raddy webсайт.


