1. Киришүү
This manual provides detailed instructions for the safe and effective use of your Zoom H1 XLR Handy Recorder. The H1 XLR is a portable audio recording device designed for musicians, podcasters, filmmakers, and content creators, featuring 32-bit float recording technology and versatile input options. Please read this manual thoroughly before operating the device to ensure proper functionality and to prevent damage.
2. Продукт бүтүп калдыview
2.1. Компоненттер жана башкаруу элементтери
Familiarize yourself with the various parts and controls of your H1 XLR recorder.

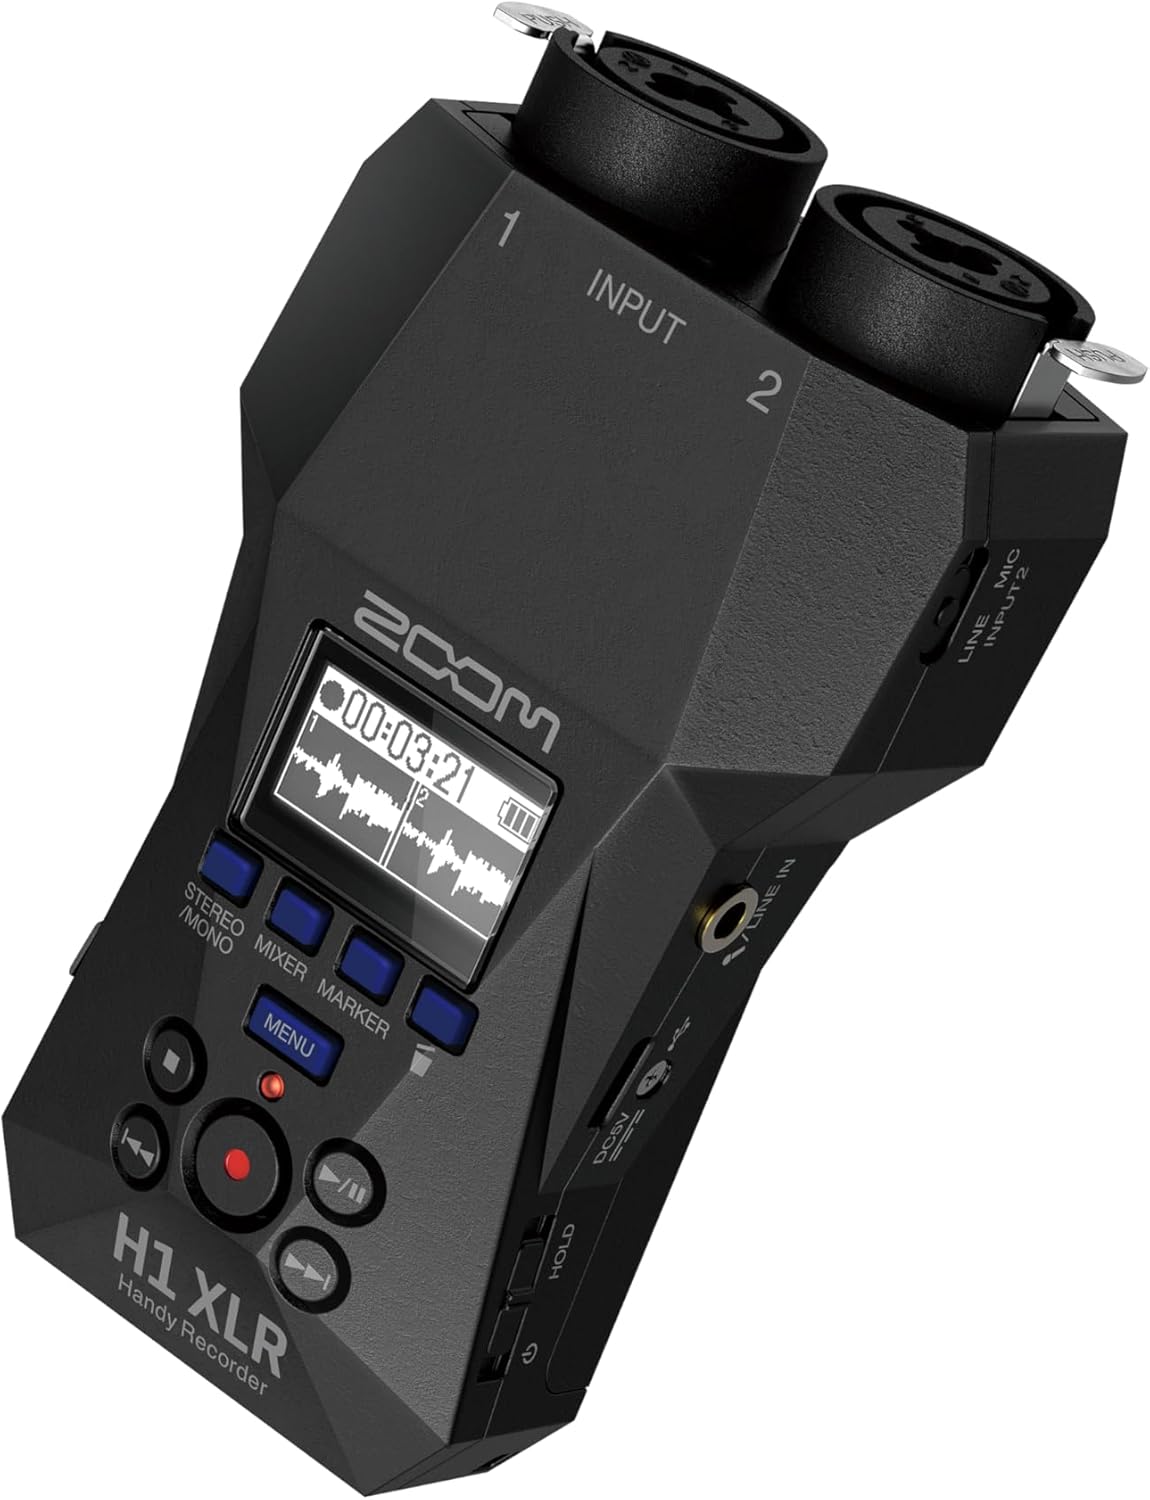
Сүрөт 2.1: Алдыңкы View of Zoom H1 XLR
This image displays the front of the Zoom H1 XLR, highlighting the two XLR/TRS combo input jacks at the top, the monochrome OLED display in the center, and the main control buttons including Record, Play/Pause, Stop, Menu, and navigation buttons.
2.2-сүрөт: Бурчтуу View with Side Controls
This angled view of the H1 XLR shows the side panel, which includes the LINE IN/MIC IN switch, gain adjustment knobs for inputs 1 and 2, the USB-C port, and the power/hold switch.
- XLR/TRS Combo Inputs (1 & 2): Connect XLR microphones or 1/4" TRS line-level devices.
- OLED дисплей: Shows recording levels, battery status, time, and menu options.
- Жазуу баскычы: Жаздырууну баштайт жана токтотот.
- Меню баскычы: Системанын жөндөөлөрүнө жана параметрлерине кире.
- Чабыттоо баскычтары: Used for menu navigation and playback control.
- LINE IN / MIC IN Switch: Selects input type for the 3.5mm stereo jack.
- Күчөтүү баскычтары: Ар бир канал үчүн киргизүү сезгичтигин тууралаңыз.
- USB-C порту: For data transfer, power, and use as an audio interface.
- 3.5 мм стерео уяча: Тышкы микрофондорду же линия деңгээлиндеги булактарды туташтыруу үчүн.
- Гарнитуранын чыгышы: 3.5mm stereo jack for monitoring audio.
- Power/Hold Switch: Turns the unit on/off and locks controls.
3. Орнотуу
3.1. Батареяны орнотуу
- Бирдиктин өчүрүлгөнүн текшериңиз.
- Түзмөктүн арткы жагындагы батарея бөлүмүнүн капкагын ачыңыз.
- Бөлүмдүн ичинде көрсөтүлгөндөй туура полярдуулукту (+/-) сактап, эки АА батарейканы салыңыз.
- Батарея уясынын капкагын бекем жабыңыз.
The H1 XLR supports alkaline, NiMH, and lithium AA batteries. Battery life is approximately 10 hours with alkaline batteries.
3.2. MicroSD картасын орнотуу
- Бирдиктин өчүрүлгөнүн текшериңиз.
- Бирдиктин капталындагы microSD карта уячасын табыңыз.
- Insert a microSD card (up to 1TB capacity supported) into the slot until it clicks into place. Ensure the card is inserted in the correct orientation.
- To remove, gently push the card until it clicks out, then pull it from the slot.
A microSD card is required for recording audio. Format the card using the H1 XLR's menu before first use.
3.3. Күйгүзүү / Өчүрүү
- Күйгүзүү үчүн: Slide the Power/Hold switch upwards and hold for a few seconds until the display illuminates.
- Өчүрүү үчүн: Slide the Power/Hold switch upwards and hold for a few seconds until the display turns off.
- кармап туруу функциясы: Slide the Power/Hold switch downwards to the 'HOLD' position to lock all buttons and prevent accidental operation during recording or transport.
4. Негизги операция
4.1. Connecting Microphones and Line Devices
- XLR микрофондору: Connect XLR cables from your microphones to the XLR/TRS combo inputs (1 and 2) at the top of the unit. Ensure the cables lock securely.
- 1/4" TRS Line Devices: Connect 1/4" TRS cables from line-level sources to the XLR/TRS combo inputs (1 and 2).
- 3.5mm Stereo Input: For external stereo microphones or line-level devices, connect to the 3.5mm stereo jack. Use the LINE IN / MIC IN switch to select the appropriate input level.

Figure 4.1: Connecting XLR Cables
This image shows a user holding the H1 XLR with two XLR cables securely connected to the top input jacks, demonstrating the device's readiness for external microphone input.
4.2. Аудио жаздыруу
- Connect your audio source(s).
- Power on the H1 XLR.
- Adjust the input gain for each channel using the dedicated gain knobs. Monitor the levels on the OLED display to ensure they are not clipping. The 32-bit float recording feature provides significant headroom, reducing the risk of clipping.
- басыңыз Жаздыруу button once to enter record-standby mode. The record indicator will flash.
- басыңыз Жаздыруу button again to start recording. The record indicator will illuminate steadily.
- Жазууну токтотуу үчүн, басыңыз Токто button. The recorded file will be saved to the microSD card.
4.3. Аудиону көзөмөлдөө
Connect headphones to the 3.5mm headphone output jack to monitor your audio in real-time during recording or playback. Adjust the headphone volume using the dedicated volume controls.
4.4. Ойнотуу
- Каалаганга өтүңүз file навигация баскычтарын колдонуу.
- басыңыз Ойнотуу/Тыныгуу ойнотууну баштоо үчүн
- басыңыз Ойнотуу/Тыныгуу button again to pause playback.
- басыңыз Токто ойнотууну токтотуу үчүн баскыч.
5. Өркүндөтүлгөн функциялар
5.1. USB Audio Interface Functionality
The H1 XLR can function as a 2-input/2-output USB audio interface for your computer or mobile device. Connect the H1 XLR to your computer or smartphone via the USB-C port. Select 'Audio Interface' mode from the device's menu. This allows you to record directly to your digital audio workstation (DAW) or use the H1 XLR as a high-quality microphone input for live streaming or video conferencing.

Figure 5.1: H1 XLR as an Audio Interface
This image illustrates the Zoom H1 XLR connected to a smartphone, showcasing its capability to serve as an external audio interface for mobile recording or streaming setups.
5.2. 32-Bit Float Recording
The H1 XLR utilizes 32-bit float recording technology, which captures audio with an extremely wide dynamic range. This virtually eliminates the need to set input gain levels precisely, as clipping is prevented even with very loud signals. You can adjust the volume of your recordings in post-production without introducing noise or distortion.
6. Техникалык тейлөө
- Keep the unit dry and clean. Avoid exposure to extreme temperatures, humidity, or direct sunlight.
- Сыртын тазалоо үчүн жумшак, кургак чүпүрөктү колдонуңуз. Абразивдүү тазалоочу каражаттарды же эриткичтерди колдонбоңуз.
- Агып кетүүнүн алдын алуу үчүн бирдик узак убакыт бою колдонулбай турган болсо, батарейкаларды алып салыңыз.
- Handle the microSD card with care to prevent data loss.
7. Кыйынчылыктарды
- Түзмөк күйбөйт: Check battery installation and charge level. Ensure the Power/Hold switch is not in the 'HOLD' position.
- Аудио жаздырылган жок: Verify a microSD card is inserted and formatted. Check input connections and gain levels. Ensure the correct input type (LINE IN/MIC IN) is selected.
- Аудио сапаты начар: Check microphone connections. Ensure gain levels are appropriate (though 32-bit float minimizes clipping, extremely low levels can introduce noise). Try a different microphone or cable.
- Баскычтар жооп бербейт: Check if the Power/Hold switch is in the 'HOLD' position.
For further assistance, refer to the official Zoom support resources.
8. Техникалык шарттар
| Өзгөчөлүк | Спецификация |
|---|---|
| Модель номери | H1 XLR |
| Жазуу форматы | WAV (32-bit float) |
| Киргизүүлөр | 2 x XLR/TRS Locking Combo Jacks, 1 x 3.5mm Stereo Mini Jack |
| Чыгуулар | 1 x 3.5mm Headphone/Line Output |
| Дисплей | 0.96" Monochrome OLED |
| Power Source | 2 x AA Batteries (Alkaline, NiMH, Lithium) or USB-C |
| Батареянын иштөө мөөнөтү | Болжол менен 10 саат (щелочтуу) |
| Сактагыч медиа | microSD/microSDHC/microSDXC card (up to 1 TB) |
| USB интерфейси | USB Type-C (for data transfer, power, and audio interface) |
| Өлчөмдөрү (W x D x H) | 5.8 x 3.8 x 1.9 дюйм (болжол менен) |
| Салмагы | 6.4 ounces / 0.4 pounds (without batteries) |
9. Коопсуздук маалыматы
- Агрегатты ажыратууга же өзгөртүүгө аракет кылбаңыз.
- Аппаратты түшүрүүдөн же катуу соккулардан сактаныңыз.
- Балдар жетпеген жерде сактаңыз.
- Батареяларды жергиликтүү эрежелерге ылайык жок кылыңыз.
- Белгиленген кубат булактарын жана аксессуарларды гана колдонуңуз.
10. Кепилдик жана колдоо
For warranty information and technical support, please refer to the official Zoom webсайтка кайрылыңыз же жергиликтүү дистрибьютериңиз менен байланышыңыз. Сатып алганыңыздын далили катары сатып алуу дүмүрчөгүңүздү сактаңыз.


