Introduction
This manual provides essential information for the setup, operation, maintenance, and troubleshooting of your Pro-Ject Debut EVO 2 Audiophile Turntable. Please read these instructions carefully before using the turntable to ensure proper function and longevity of the product.
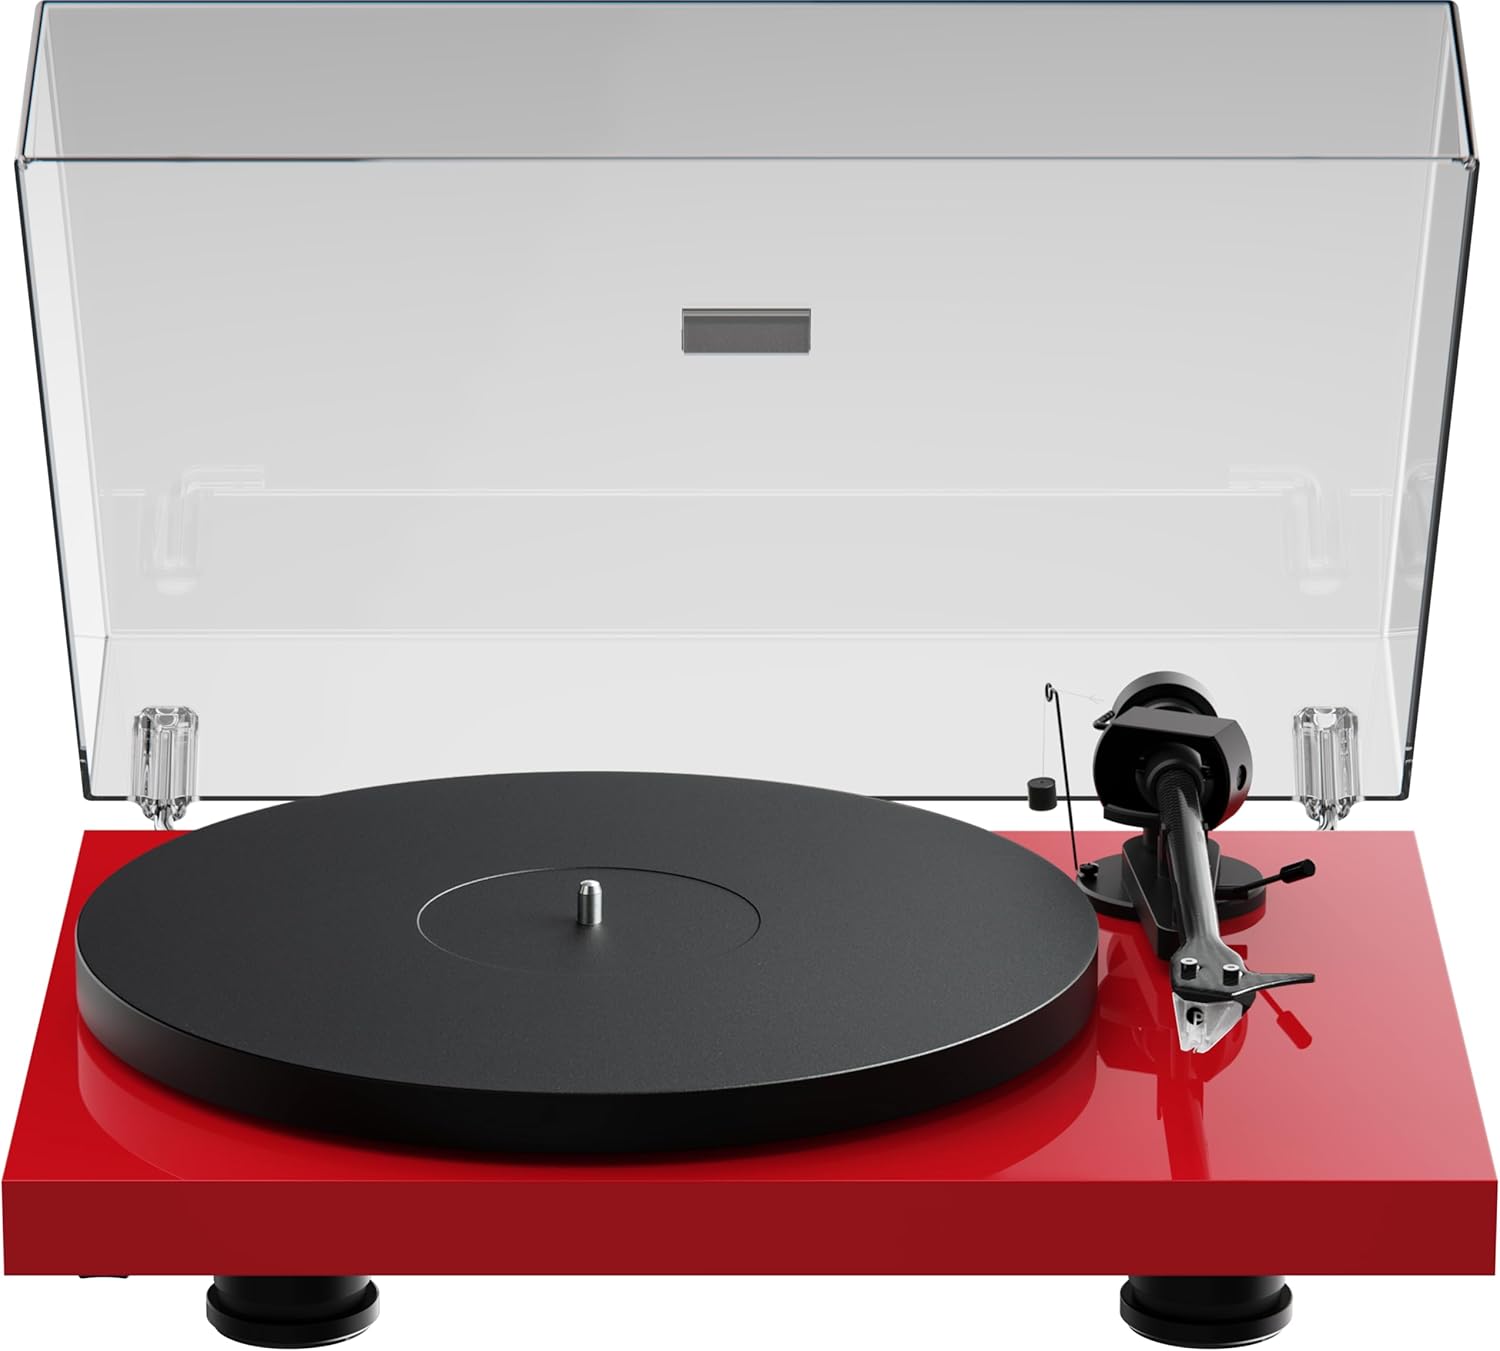
Image: The Pro-Ject Debut EVO 2 turntable in High Gloss Red, featuring a clear dust cover, platter, and tonearm.
Коопсуздук нускамалары
- Тазалоодон же техникалык тейлөөдөн мурун айланма табакты ар дайым электр тогунан ажыратыңыз.
- Электр кабелине ным кол менен тийбеңиз.
- Avoid placing the turntable near water or excessive moisture.
- Ensure the turntable is placed on a stable, level surface to prevent vibrations and ensure proper operation.
- Таңгактоочу материалдарды, айрыкча желим баштыктарды балдардан алыс кармаңыз.
Кутуда эмне бар
Carefully unpack all items from the packaging. Please ensure all components listed below are present and undamaged.
- Pro-Ject Debut EVO 2 Айлануучу
- Transparent Dustcover
- Connection Cable (RCA)
- Кубаттуу адаптер
- Тегиздөө транспорттору
- Single Adapter (for 45 RPM records with large center holes)
- Платтер
- Drive Belt
- Каршы салмак
- Конькиге каршы салмак
- Pick it MM EVO Cartridge (pre-mounted)
Жайгашуу
1. Жайгаштыруу
Place the turntable on a firm, level surface, away from direct sunlight, heat sources, and excessive vibration. Ensure adequate ventilation around the unit.
2. Табакты жана курду орнотуу
- Place the main platter onto the sub-platter spindle.
- Carefully loop the drive belt around the sub-platter and the motor pulley. Ensure the belt is not twisted.

Сүрөт: деталдуу view of the turntable's belt drive system, showing the belt wrapped around the sub-platter and motor pulley.
3. Tonearm Balance and Tracking Force
The Pick it MM EVO cartridge is pre-mounted. Follow these steps to set the tracking force:
- Стилус коргоочуну алып салыңыз.
- Place the counterweight onto the rear of the tonearm.
- Adjust the counterweight until the tonearm floats freely and is perfectly balanced horizontally.
- Rotate the tracking force dial (the numbered ring on the counterweight) to '0' without moving the counterweight itself.
- Rotate the entire counterweight counter-clockwise until the desired tracking force is set. Refer to the cartridge specifications for the recommended tracking force (typically 1.8g for the Pick it MM EVO).
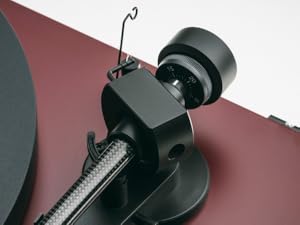
Image: A close-up of the carbon fiber tonearm, illustrating its construction and connection points.
4. Коньки тебүүгө каршы тууралоо
The anti-skating mechanism counteracts the inward force on the tonearm. Attach the anti-skating weight's thread to the second groove of the anti-skating stub for the recommended tracking force.

Image: The anti-skating weight hanging from its thread, attached to the tonearm's anti-skating stub.
5. Анга туташуу Ampөмүрлүү
Connect the turntable's RCA output cables to the 'Phono' input of your ampкөтөргүч. Эгер сенин ampкөчүргүчтө атайын "Фоно" киргизүүсү жок, сизге тышкы фоно алдын ала туташтыргыч керек болот.ampөмүрлүү.
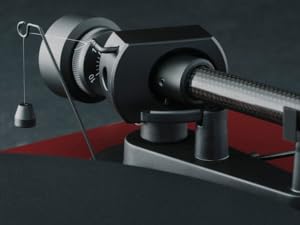
Image: The rear panel of the turntable, displaying the RCA output jacks for audio connection and the power input.
6. Чаң капкагын орнотуу
Insert the hinges of the transparent dust cover into the designated slots at the rear of the turntable plinth.
Иштеп жатат
1. Күйгүзүү/өчүрүү
Connect the power adapter to the turntable and a wall outlet. The turntable is powered on by pressing the power button, usually located on the underside or side of the plinth.
2. Ылдамдыкты тандоо
The Debut EVO 2 features electronic speed selection. Use the speed selector switch (often a button on the plinth) to switch between 33 1/3 RPM and 45 RPM. For 78 RPM records, a special belt and stylus may be required (not included).
3. Жазууну ойнотуу
- Табакка рекорд кой.
- Туура ойнотуу ылдамдыгын тандаңыз.
- Кью рычагын колдонуп, тонер рычагын көтөрүңүз.
- Тонеармды жазуунун каалаган баштапкы оюкчасынын үстүнө жайгаштырыңыз.
- Gently lower the tonearm using the cueing lever. The stylus will begin playing the record.
4. Ойноону токтотуу
At the end of a record, or when you wish to stop playback:
- Кью рычагын колдонуп, тонер рычагын көтөрүңүз.
- Тонер колду калыбына келтириңиз.
- Белгилөө рычагын түшүрүңүз.
- Turn off the turntable if not playing another record.
Техникалык тейлөө
1. Тазалоо
- Айланма табактын негизи жана чаң капкагы: Use a soft, lint-free cloth to wipe surfaces. For stubborn marks, a slightly damp чүпүрөктү колдонсо болот, андан кийин кургак чүпүрөк менен сүртүңүз. Абразивдүү тазалоочу каражаттардан алыс болуңуз.
- Табак: Clean the platter surface with a soft, dry cloth.
2. Стилуска кам көрүү
- Regularly clean the stylus using a dedicated stylus cleaning brush, brushing gently from back to front.
- Стилусту манжаларыңыз менен тийгизүүдөн алыс болуңуз.
- Replace the stylus when signs of wear are apparent (e.g., distorted sound, increased surface noise). The Pick it MM EVO cartridge is designed for easy stylus replacement.

Сүрөт: деталдуу view of the Pick it MM EVO cartridge mounted on the tonearm, highlighting its design.
3. Курду алмаштыруу
The drive belt may stretch or degrade over time. If you notice inconsistent speed or reduced torque, the belt may need replacement. Contact Pro-Ject support or an authorized dealer for a replacement belt.
Проблемаларды чечүү
If you encounter issues with your turntable, consult the following table before contacting support.
| Көйгөй | Мүмкүн себеп | Чечим |
|---|---|---|
| Күч жок | Электр кабели туташкан эмес; розетка туура эмес | Check power connections; Try a different outlet |
| Үн жок же үнү төмөн | Туура эмес киргизүү тандалды amplifier; Cables loose; Stylus protector still on; Amplifier not set to 'Phono' input | Select correct input; Check all cable connections; Remove stylus protector; Use a phono preampкерек болсо көтөргүч |
| Бурмаланган үн | Incorrect tracking force; Damaged stylus; Dirty stylus; Incorrect anti-skating setting | Adjust tracking force; Inspect/clean/replace stylus; Adjust anti-skating |
| Ыңгайсыз ылдамдык | Drive belt worn or loose; Motor pulley dirty | Replace drive belt; Clean motor pulley |
| Укмуш ызы-чуу | Ground wire not connected; Interference from other electronics | Ensure ground wire is connected; Move turntable away from other electronics |
Техникалык шарттар
- Модель аты: Дебют EVO 2
- Бренд: Pro-Ject
- Модель номери: 9120129864930
- Продукциянын өлчөмдөрү: 16.4 x 12.6 x 4.5 дюйм (41.6 x 32 x 11.4 см)
- Элемент Салмагы: 13.2 фунт (6 килограмм)
- Материал: Carbon Fiber (tonearm)
- Мотор түрү: Belt-Drive
- Сигнал форматы: Фоно
- Камтылган компоненттер: Turntable, transparent dustcover, connection cable, power adapter, alignment protractor, single adapter
- Шайкеш түзмөктөр: Ampкөтөрүүчү, баяндамачы
- Өндүрүүчү: Pro-Ject аудио тутумдары
Кепилдик
Pro-Ject Audio Systems offers a warranty for this product. Please refer to the warranty card included with your purchase or visit the official Pro-Ject webдеталдуу кепилдик шарттары жана шарттары үчүн сайт. Кепилдик дооматтар үчүн сатып алганыңыздын далилин сактаңыз.
Key Warranty Feature: 25-year spare parts availability guarantee, ensuring long-term support for your turntable.
Колдоо
For further assistance, technical support, or spare parts, please contact your authorized Pro-Ject dealer or visit the official Pro-Ject Audio Systems webсайт:
- Pro-Ject Store: Visit the Pro-Ject Store on Amazon
- Өндүрүүчү: Pro-Ject аудио тутумдары


