1. Маанилүү коопсуздук нускамалары
Please read all safety instructions carefully before using this projector. Keep this manual for future reference.
- Кубат булагы: Белгиленген кубат адаптерин гана колдонуңуз. Voltage проектордун талаптарына дал келет.
- Вентиляция: Желдетүүчү тешиктерди жаппаңыз. Проектордун ысып кетишине жол бербөө үчүн, анын айланасында жетиштүү аба айлануусун камсыз кылыңыз.
- Суу жана ным: Проекторду жамгырдын, нымдуулуктун же башка суюктуктардын таасирине дуушар кылбаңыз.
- Тазалоо: Тазалоодон мурун проекторду электр кубатынан сууруп алыңыз. Жумшак, кургак чүпүрөктү колдонуңуз. Суюк же аэрозоль тазалоочу каражаттарды колдонбоңуз.
- Жылуулук: Keep the projector away from heat sources such as radiators, heat registers, stoves, or other apparatus that produce heat.
- Тейлөө: Бул продуктту өзүңүз тейлөөгө аракет кылбаңыз. Бардык тейлөөнү квалификациялуу тейлөө кызматкерлерине тапшырыңыз.
- Көздү коргоо: l болгондо проектордун объективине тике карабаamp күйүк.
2. Пакеттин мазмуну
Пакетиңизде бардык буюмдар бар экенин текшериңиз:
- Optex Compact WiFi Projector
- Алыстан башкаруу
- Кубаттуу адаптер
- Колдонуучунун Колдонмосу (бул документ)
3. Продукт бүтүп калдыview
3.1 Алдыңкы жана үстү View
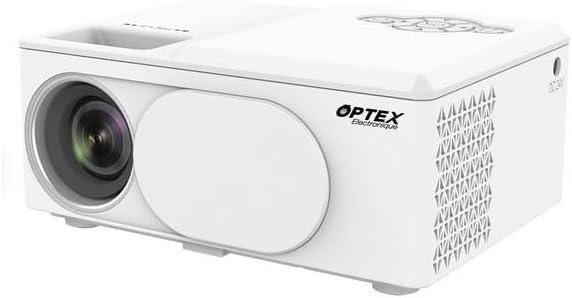
This image displays the Optex Compact WiFi Projector from a three-quarter front and top perspective. Visible components include the projection lens on the front left, a protective lens cover, and the main body of the projector. The top surface shows a recessed area for focus adjustment and a control panel with navigation buttons.
3.2 Башкаруу панели жана порттор

This image highlights two key areas of the projector. On the left, a close-up of the top control panel shows a circular array of navigation buttons (up, down, left, right, OK), power button, and return button, allowing for direct interaction with the projector's menu. On the right, a close-up of the side panel reveals the various input/output ports: DC 21V power input, IR receiver, two USB ports, an HDMI port, and a Type-C port, enabling diverse connectivity options.
4. Орнотуу колдонмосу
4.1 Орнотуу
- Проекторду туруктуу, тегиз бетке коюңуз.
- Ensure the projector is positioned at an appropriate distance from the projection surface (wall or screen) to achieve the desired image size.
- For optimal image quality, project in a dark environment.
4.2 Кубат туташтыруу
- Connect the power adapter to the 'DC 21V' port on the side of the projector.
- Кубат адаптеринин экинчи учун розеткага сайыңыз.
- Проектордогу кубат индикаторунун жарыгы күйөт.
5. Иштөө нускамалары
5.1 Күйгүзүү/өчүрүү
- Күйгүзүү: Проектордун же пульттун кубат баскычын басыңыз.
- Өчүрүү: Кубат баскычын кайра басыңыз. Суралса, өчүрүүнү ырастаңыз.
5.2 Фокусту тууралоо
- Rotate the focus ring located near the lens until the projected image appears clear and sharp.
5.3 Киргизүү булагын тандоо
- Press the 'Source' button on the remote control or navigate through the projector's menu to select the desired input source (e.g., HDMI, USB, WiFi).
- HDMI: Connect an HDMI cable from your device (laptop, game console) to the projector's HDMI port.
- USB: Insert a USB drive into a USB port to play media files.
5.4 WiFi Connection and Screen Mirroring
- Navigate to the 'Settings' or 'WiFi' menu on the projector.
- WiFi тармагын тандап, сырсөздү киргизиңиз.
- Once connected, select the 'Screen Mirroring' or 'Wireless Display' option.
- On your smartphone or tablet, enable screen mirroring (e.g., Miracast, AirPlay, Smart View) and select the projector from the list of available devices.
6. Техникалык тейлөө
6.1 Линзаны тазалоо
- Оптикалык линзалар үчүн атайын жасалган жумшак, түксүз кездемени колдонуңуз.
- Gently wipe the lens to remove dust or smudges. Do not use abrasive cleaners.
6.2 Проектордун корпусун тазалоо
- Проектордун сыртын жумшак, кургак чүпүрөк менен сүртүңүз.
- Катаал химиялык заттарды же эриткичтерди колдонбоңуз.
6.3 Сактоо
- When not in use, store the projector in a cool, dry place.
- Cover the lens with its protective cap to prevent dust accumulation.
7. Кыйынчылыктарды
Эгер көйгөйлөргө туш болсоңуз, төмөнкү жалпы көйгөйлөрдү жана чечимдерди караңыз:
- Кубат жок: Кубат адаптери проекторго да, розеткага да бекем туташтырылганын текшериңиз. Башка розетканы колдонуп көрүңүз.
- Сүрөт жок: Check the input source selection. Ensure the connected device is powered on and sending a signal. Verify all cables are securely connected.
- бүдөмүк сүрөт: Adjust the focus ring on the projector lens. Ensure the projection surface is flat and the projector is at an optimal distance.
- Үн жок: Проектордун жана туташкан булак түзмөгүнүн үн жөндөөлөрүн текшериңиз. Эгерде тышкы динамиктер колдонулса, алардын туура туташтырылганын текшериңиз.
- Алыстан башкаруу иштебейт: Пульттагы батареяларды текшериңиз. Пульт менен проектордун инфракызыл кабыл алгычынын ортосунда эч кандай тоскоолдуктар жок экенин текшериңиз.
8. Техникалык шарттар
| Өзгөчөлүк | Спецификация |
|---|---|
| Бренд | Оптекс |
| Дисплей технологиясы | LED |
| Native Resolution | 800 x 400 |
| Дисплейдин максималдуу чечилиши | 1920 x 1080 (Full HD) |
| Жарыктык | 2100 Lumens |
| Байланыш технологиясы | HDMI, USB, WiFi |
| Аппараттык интерфейс | HDMI, USB, Type-C |
| Controller Type | Алыстан башкаруу |
| Энергияны керектөө | 43 Ватт |
| Форма фактору | Portable |
| Монтаж түрү | Стол орнотуу |
9. Кепилдик жана Кардарларды колдоо
This product comes with a standard manufacturer's warranty. For specific warranty terms and conditions, please refer to the documentation provided with your purchase or contact your retailer.
For technical support or customer service inquiries, please contact the Optex customer support team through their official webсайт же сатып алуу документтеринде көрсөтүлгөн байланыш маалыматы.