1. Киришүү
This manual provides detailed instructions for the setup, operation, and maintenance of your Facmogu BT-298 Pro Home Audio Amplifier. Please read this manual thoroughly before using the product to ensure proper function and to maximize your audio experience.

Figure 1: Facmogu BT-298 Pro Home Audio Amplifier. This image displays the front and top view -ныкы ampкөтөргүч, көрсөтүүчүasing its compact design, front panel controls, and extended FM antenna.
2. Коопсуздук маалыматы
- Электр камсыздоо: камсыз кылуу ampкөтөргүч көрсөтүлгөн томго дал келген кубат булагына туташтырылганtage (110V AC / 12V DC).
- Вентиляция: Вентиляция тешиктерин жаап албаңыз. Ашыкча ысып кетүүнүн алдын алуу үчүн аппараттын айланасында адекваттуу аба агымын камсыз кылыңыз.
- Нымдуулук: сактаңыз amplifier away from water, moisture, and high humidity environments.
- Тазалоо: Тазалоодон мурун электр кубатынан ажыратыңыз. Кургак, жумшак чүпүрөктү колдонуңуз. Суюк тазалоочу каражаттарды же аэрозольдорду колдонбоңуз.
- Тейлөө: Түзмөктү өз алдынча ачууга же тейлөөгө аракет кылбаңыз. Бардык тейлөө иштерин квалификациялуу адистерге тапшырыңыз.
- Динамик Импеданс: Connect speakers with an impedance rating between 4-16 ohms. Connecting speakers outside this range may damage the ampжашоочу же спикерлер.
3. Пакеттин мазмуну
Пакетте бардык буюмдар бар экенин текшериңиз:
- Facmogu BT-298 Pro Home Audio Ampөмүрлүү
- Алыстан башкаруу
- Колдонуучунун Колдонмосу (бул документ)
4. Продукт бүтүп калдыview
4.1 Front Panel Controls and Inputs

Figure 2: Front Panel Layout. This diagram labels the various controls and input ports on the front panel of the ampөмүрлүү.
- USB порт: USB сактагыч түзмөктөрдү туташтыруу үчүн.
- SD/MMC карта слоту: SD же MMC эстутум карталарын салуу үчүн.
- Үч ыргак башкаруу: Жогорку жыштыктагы аудио деңгээлдерин тууралайт.
- Басс башкаруу: Төмөнкү жыштыктагы аудио деңгээлин тууралайт.
- Эхо башкаруу: Adjusts the reverberation effect for microphone inputs.
- MIC 1 киргизүү: Микрофонду туташтыруу үчүн 6.35 мм уяча.
- MIC 2 киргизүү: 6.35mm jack for a second microphone connection.
- MIC/VOL Control: Adjusts the volume level of connected microphones.
- Режим баскычы: Selects input source (Bluetooth, USB, SD, FM, AUX).
- Ырды башкаруу баскычтары: Play/Pause, Previous Track, Next Track (for USB/SD/Bluetooth modes).
- Үндү көзөмөлдөө: Башкы чыгаруу көлөмүн тууралайт.
- Санариптик дисплей: Учурдагы режимди, трек маалыматын же FM жыштыгын көрсөтөт.
4.2 Арткы панелдин туташуулары
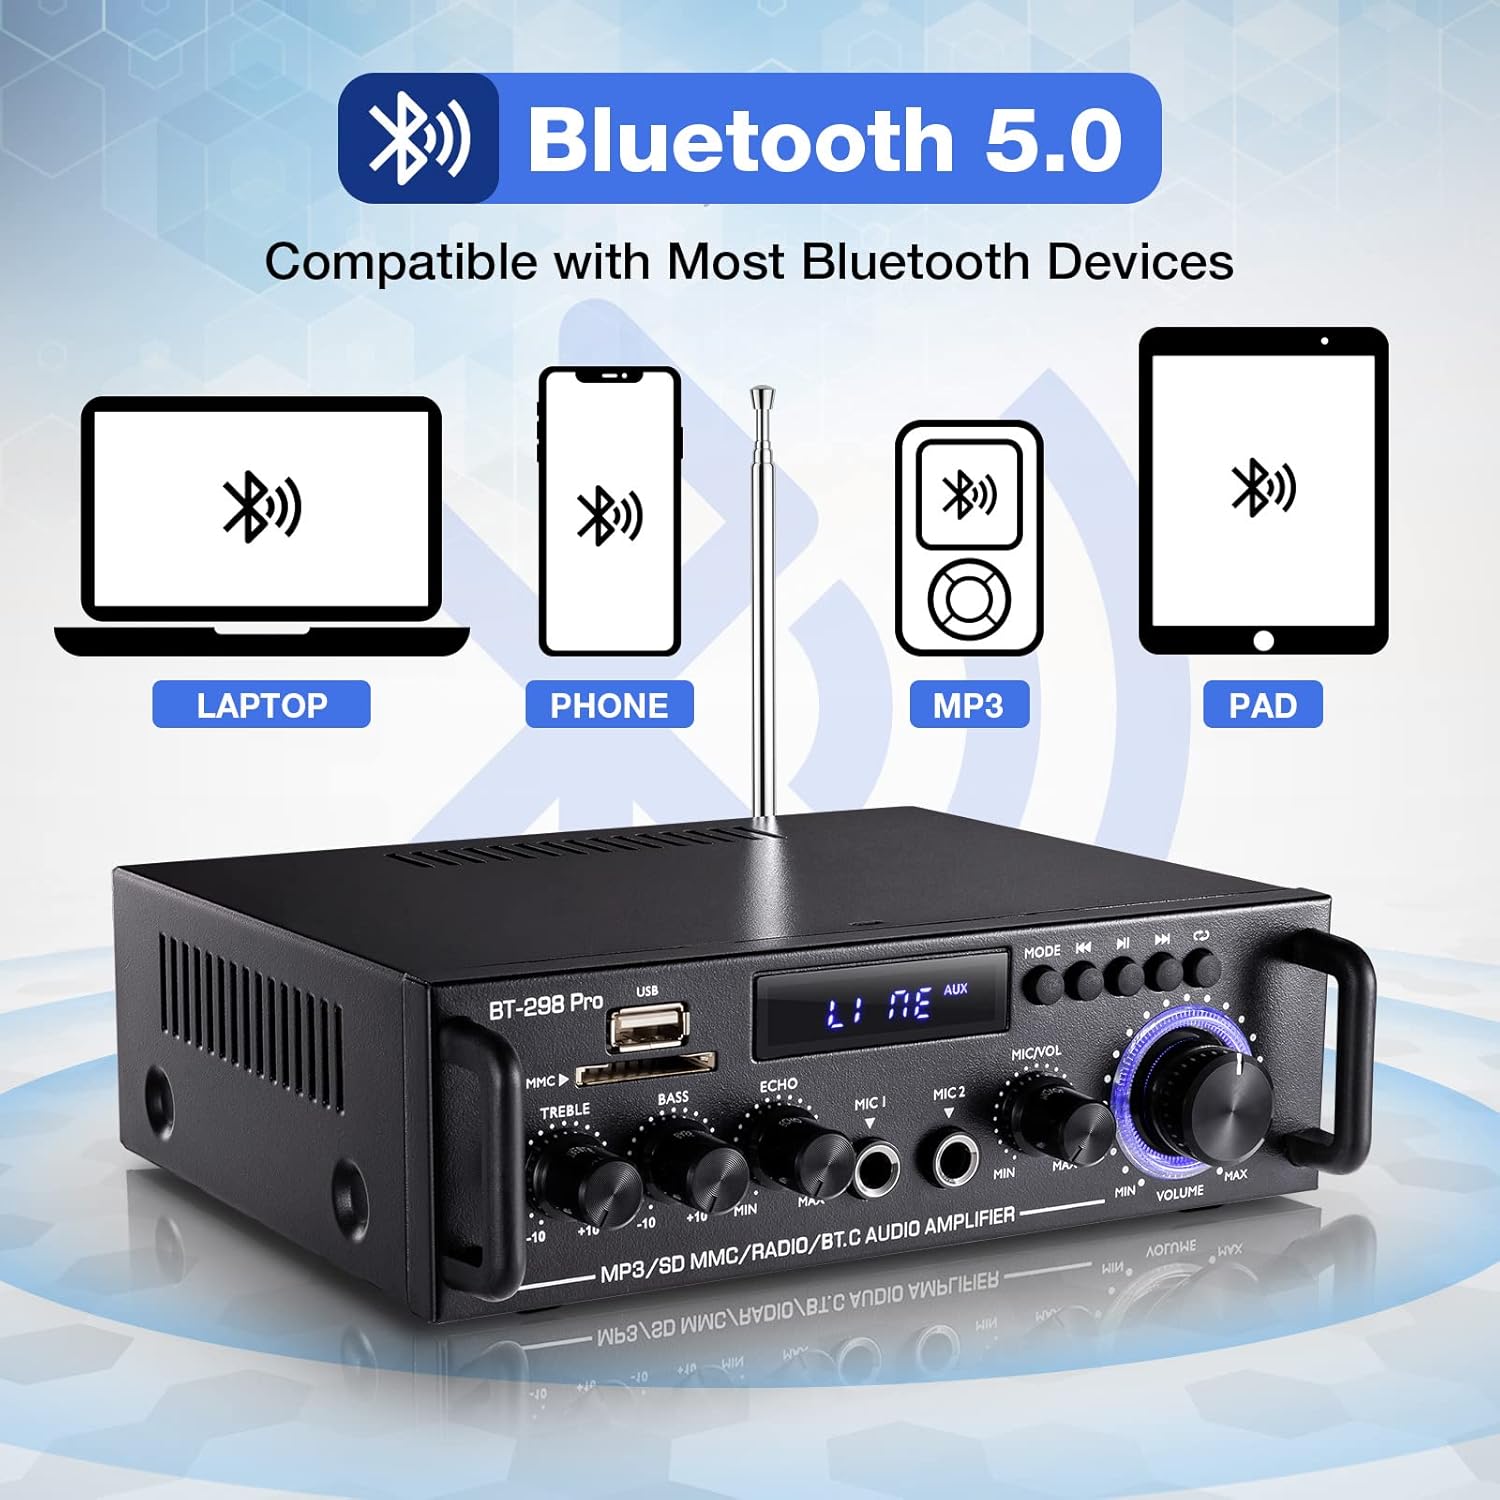
Figure 3: Rear Panel Layout. This diagram illustrates the rear panel connections.
- Радио антенна: Connection for the FM radio antenna (87.5-108MHz).
- Аудио киргизүү (RCA): Stereo RCA jacks for connecting external audio sources (e.g., CD player, TV).
- Speaker Outputs (L/R): Terminals for connecting passive left and right speakers (4-16Ω).
- DC 12V кубат киргизүү: For connecting a 12V DC power supply.
- 110V Power Cord Input: AC кубат шнурын туташтыруу үчүн.
- Кубат которгучу: бурат ampөмүрдү күйгүзүү же өчүрүү.
5. Орнотуу
5.1 Динамиктерди бириктирүү
- камсыз кылуу ampкөтөргүч өчүрүлгөн.
- Пассивдүү динамиктериңизди туташтырыңыз Speaker Outputs (L/R) on the rear panel. Ensure correct polarity (positive to positive, negative to negative).
- The amplifier supports speakers with an impedance of 4-16 ohms. Using speakers outside this range may result in damage.

Figure 4: Speaker Terminals. A detailed view of the speaker output terminals on the rear panel, designed for connecting passive speakers.
5.2 Аудио булактарын туташтыруу
- RCA киргизүү: Use an RCA cable to connect external audio devices (e.g., DVD player, TV, turntable with pre-amp) га Аудио киргизүү (RCA) уячалар.
- USB/SD/TF: Insert a USB drive or SD/TF card into the respective slots on the front panel.
- Bluetooth: For wireless connection, refer to the Bluetooth Connection section.
5.3 Кубат туташтыруу
- Connect the 110V AC power cord to the 110V Power Cord Input on the rear panel, then plug it into a wall outlet.
- Alternatively, for DC power, connect a 12V DC power supply to the DC 12V Power Input.
6. Иштөө нускамалары
6.1 Күйгүзүү/өчүрүү
Flip the Power Switch on the rear panel to the 'ON' position to power on the amplifier. Flip it to 'OFF' to power off.
6.2 Киргизүүнү тандоо
басыңыз Режим баскычы on the front panel or the remote control to cycle through available input sources: Bluetooth (BLUE), USB, SD, FM, and AUX (RCA).
6.3 Bluetooth байланышы

Figure 5: Bluetooth Compatibility. This image highlights the Bluetooth 5.0 connectivity feature.
- басыңыз Режим баскычы until the digital display shows "BLUE".
- Мобилдик түзмөгүңүздө (телефон, планшет, ноутбук) Bluetooth'ду күйгүзүп, жеткиликтүү түзмөктөрдү издеңиз.
- Select "BT" from the list to connect. A confirmation sound will indicate a successful connection.
- Эскертүү: The amplifier cannot connect to Amazon Echo devices.
- Аралык: Maintain a distance of within 16.4ft (5m) between the device and amplifier without obstacles. For PC connections, keep within 6.5ft (2m).
- Синхрондуу байланыштар: The amplifier supports only one Bluetooth connection at a time. Connecting multiple devices will disrupt the audio stream.
- Bluetooth and Wired Connections: Bluetooth and wired functions cannot operate simultaneously. If using Bluetooth, ensure no devices are connected to the wired input jacks. If switching from wired to Bluetooth, disconnect wired devices, restart the amplifier, and then reconnect Bluetooth.
6.4 USB/SD/TF Playback
Insert a USB drive or SD/TF card into the corresponding slot. The amplifier will automatically switch to USB/SD mode and begin playback. Use the Song Control Buttons for play/pause, previous, and next track functions.
6.5 FM радиосунун иштеши
- басыңыз Режим баскычы until the digital display shows "FM".
- Press the Play/Pause button (often labeled with a play/pause icon) to initiate an automatic search for FM stations. The amplifier will scan and store available stations. Noise may be present during the scanning process.
- Use the Previous/Next Track buttons to navigate through the stored stations.
- Эскертүү: The amplifier does not retain the last tuned radio station after being powered off. You will need to re-select your desired station upon powering on.
6.6 Microphone and Echo Control

Figure 6: Echo Control. A close-up view of the Echo adjustment knob.

Figure 7: Microphone Volume Controls. A close-up of the Microphone Volume and Master Volume controls.
- Эки микрофонго чейин туташтырыңыз MIC 1 жана MIC 2 киргизүү уячалары.
- жардамы менен микрофондун үнүн тууралаңыз MIC/VOL Control.
- айлантыңыз Эхо Control knob to add or reduce the reverberation effect to the microphone audio.
6.7 Үндү башкаруу элементтери

Figure 8: Tone Controls. A detailed view of the Treble, Bass, and Echo rotary knobs.
- колдонуу Үч ыргак башкаруу knob to adjust the high-frequency response of the audio.
- колдонуу Басс башкаруу knob to adjust the low-frequency response of the audio.
6.8 Мастер үндү башкаруу
Чоңду айлантыңыз Үндү көзөмөлдөө knob to adjust the overall output volume of the ampөмүрлүү.
6.9 Алыстан башкарууну колдонуу
The included mini remote control allows for convenient adjustment of audio settings from a distance. Ensure the plastic insulating sheet is removed from the remote's battery compartment upon receipt for it to function.
7. Техникалык тейлөө
- Тазалоо: Сыртын тазалоо үчүн жумшак, кургак чүпүрөктү колдонуңуз ampкөтөргүч. Абразивдүү тазалагычтардан же эриткичтерден качыңыз.
- Сактагыч: Узак мөөнөткө колдонулбаганда, сактаңыз ampтүз күндүн нурунан жана экстремалдык температурадан алыс салкын, кургак жерде liifier.
- Вентиляция: Мезгил-мезгили менен желдетүү тешиктери чаңдан жана таштандыдан таза экенин текшерип туруңуз.
8. Кыйынчылыктарды
Жалпы маселелер үчүн төмөнкү чечимдерди караңыз:
- Loose Components/Rattling Sound: If you hear rattling, check and tighten any loose screws on the rear panel. This can occur due to transit.
- Bluetooth туташуу маселелери:
- камсыз кылуу ampкөтөргүч Bluetooth режиминде ("КӨК" көрсөтүлөт).
- Verify Bluetooth is enabled on your device and search for "BT".
- If unstable, ensure no obstacles (especially metal) are blocking the signal.
- өчүрүү amplifier, disconnect and clear the Bluetooth connection on your transmitting device, then restart the amplifier and reconnect.
- сактаңыз amplifier's LED indicator side facing your phone and maintain distance within 16.4ft (5m) for phones, or 6.5ft (2m) for TVs/PCs.
- Үн жок же бурмаланган үн:
- Check all cable connections, ensuring they are fully inserted and secure. Incomplete connections can cause distortion.
- Verify speaker polarity (positive to positive, negative to negative).
- Ensure speaker wattage is compatible (rated power below 50W). Overdriving the amplifier with high-wattage speakers can cause clipping and damage.
- Adjust the master volume and input source volume.
- Noise (e.g., electrical current noise):
- Try replacing the audio input cable and/or the input device. Inferior cables can introduce noise.
- Ensure speakers' power ratings are matched with the ampөмүрлүү.
- Confirm that surrounding electrical signals are not causing interference.
- Ensure there is spacing between the positive and negative speaker wires; being too close can cause noise or channel loss.
- FM Radio Stations Not Stored:
- Switch to FM mode. Press the Play/Pause button to start an automatic channel search. This process stores the channels.
- The amplifier does not offer manual preset saving for FM stations.
9. Техникалык шарттар

Figure 9: Product Dimensions and Specifications. This image provides the physical dimensions and a table detailing key product specifications.
| Өзгөчөлүк | Спецификация |
|---|---|
| Модел | BT-298 Pro |
| RMS күчү | 50W х 2 |
| Чоку күч | 400W х 2 |
| Сигнал-ызы-чуу катышы (SNR) | >92дБ |
| Импеданс | 4-8Ω |
| Электр камсыздоо | 110V AC / 12V DC |
| Канал конфигурациясы | 2 канал стерео |
| Distortion Rate | 0.2% |
| Резолюция | 47K |
| Frequency Response | 10-20KHz |
| FM радиосунун жыштыгы | 87.5-108 МГц |
| Байланыш технологиясы | Көмөкчү, Bluetooth |
| Элемент Салмагы | 2.7 фунт |
| Пакеттин өлчөмдөрү | 8.27 x 8.19 x 3.19 дюйм |
10. Кепилдик жана колдоо
For warranty information or technical support, please refer to the documentation provided at the time of purchase or contact Facmogu customer service through their official channels. Keep your purchase receipt for warranty claims.


