1. Продукт бүтүп калдыview
The RALENO D440 Pro and D660 Photo Studio Light Box kit provides a comprehensive solution for product photography. This bundle includes two distinct light boxes: the compact D440 Pro (16''x12''x12'') ideal for small items like jewelry, and the larger D660 (24''x24''x24'') suitable for bigger products such as small suitcases or electronic devices. Both light boxes feature adjustable, stable lighting with stepless dimming, high CRI for accurate color reproduction, and quick assembly via Velcro edges. The kit also comes with multiple color backdrops for versatile shooting options.
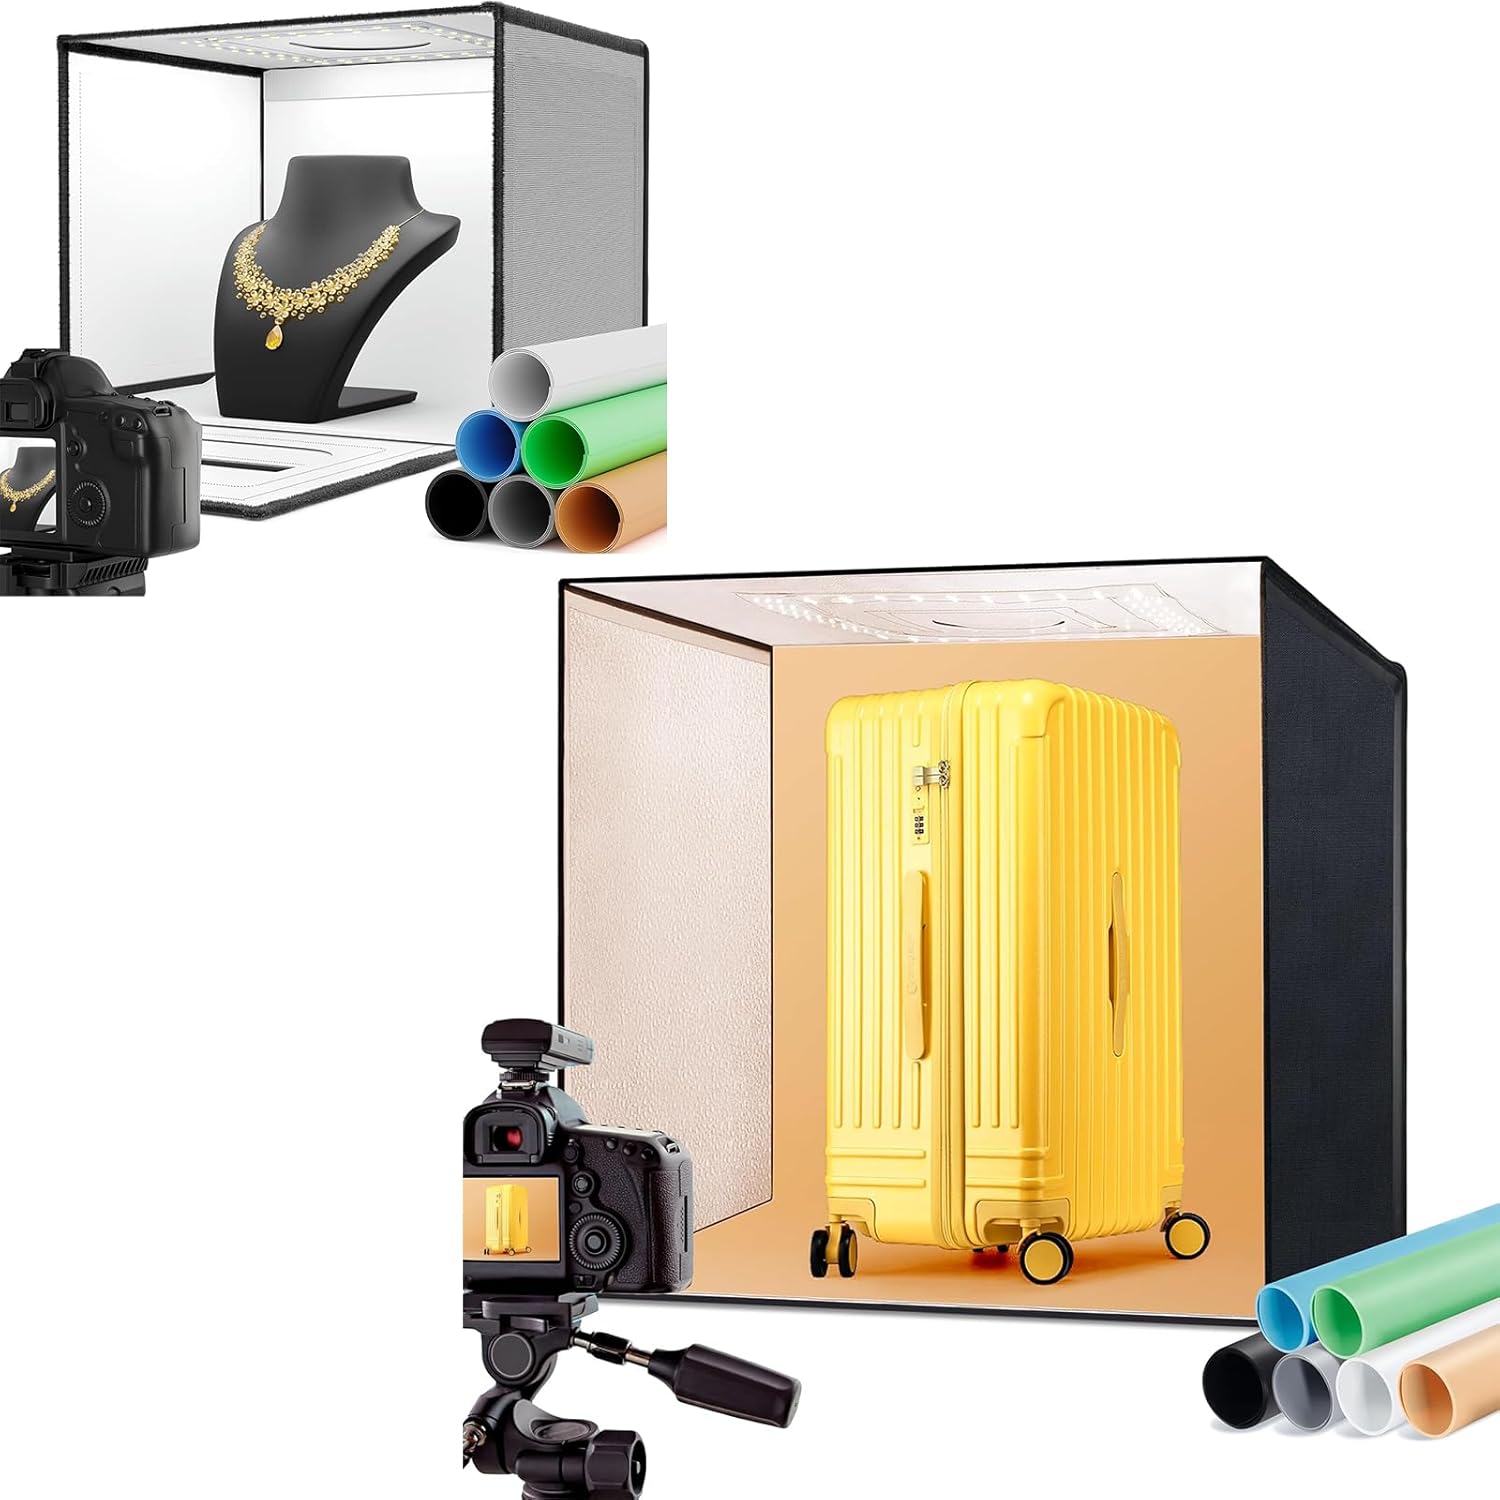
Figure 1.1: ашыкview of the RALENO D440 Pro and D660 Photo Studio Light Box kit, showcasing both sizes with a camera setup and various backdrops.
2. Эмнелер камтылган
The RALENO D440 Pro+D660 Photo Studio Light Box kit includes the following components:
- 1x 16''x12''x12'' Light Box (D440 Pro)
- 1x 24''x24''x24'' Light Box (D660)
- 2x Soft Diffusers
- 2x DC Power Adapters
- 2x Sets of 6 Color PVC Backdrops (Black/White/Orange/Blue/Red/Green)
- 1x Storage Bags
- 2x Колдонуучу колдонмолору

Figure 2.1: The six included PVC backdrops, offering a variety of colors for different product photography needs.
3. Техникалык шарттар
| Параметр | D440 Pro | D660 |
|---|---|---|
| Жарыктык | Stepless dimming from 0-100% with stable lighting | |
| CRI | ≥97 | |
| Түс температурасы | 5500K | |
| Максималдуу чыгаруу күчү | 24 Вт | 65 Вт |
| LED жарыктары | 112 large-sized LED beads | 156 large-sized LED beads |
| Төшөө материалы | PU White Layer Lining (new) | Stone Pattern Road Lining |
| Салмагы | 4.33 фунт | 9.78 фунт |
| Пакеттин өлчөмү | 12"D x 15.7"W x 2.8"H | 23"D x 24"W x 4"H |
| Жарык булагы түрү | LED | |
| Материал | Пластик, кездеме | |

Figure 3.1: Detailed features of the D440 Pro light box, highlighting its specifications and design elements.
4. Орнотуу нускамалары
The RALENO light boxes are designed for quick and easy assembly using high-quality Velcro edges.
4.1. Ассамблея
- Unfold the light box from its collapsed state.
- Align the Velcro edges of the side panels and firmly press them together to form the cube shape. Ensure all edges are securely fastened.
- Place the light box on a stable, flat surface to prevent tipping during use.
- Connect the DC power adapter to the designated port on the light box and then plug it into a power outlet.
4.2. Backdrop Installation
- Select one of the 6 color PVC backdrops (Black/White/Orange/Blue/Red/Green) based on your product and desired effect.
- Carefully insert the backdrop into the light box, ensuring it lies flat and smooth against the back and bottom surfaces. Avoid creasing or damaging the backdrop.
4.3. Diffuser Placement
Use the provided soft diffusers to soften the light and reduce harsh shadows, enhancing the quality of your photographs. Place the diffuser inside the light box, typically below the LED light strips, to evenly disperse the light.

Figure 4.1: The D440 Pro light box assembled and ready for use, demonstrating its compact size suitable for jewelry photography.

Figure 4.2: The D660 light box assembled and ready for use, demonstrating its larger capacity for items like a suitcase.
5. Иштөө нускамалары
5.1. Күйгүзүү жана өчүрүү
Once the light box is assembled and connected to power, the LED lights will illuminate. There is typically an inline switch on the power cable or a control knob on the light box itself to turn the unit on or off.
5.2. Жарыктыкты жөндөө
The light boxes feature stepless dimming from 0-100%. Use the brightness control knob (if present) or buttons to adjust the light intensity to suit your photography needs. This allows for precise control over exposure and shadow detail.
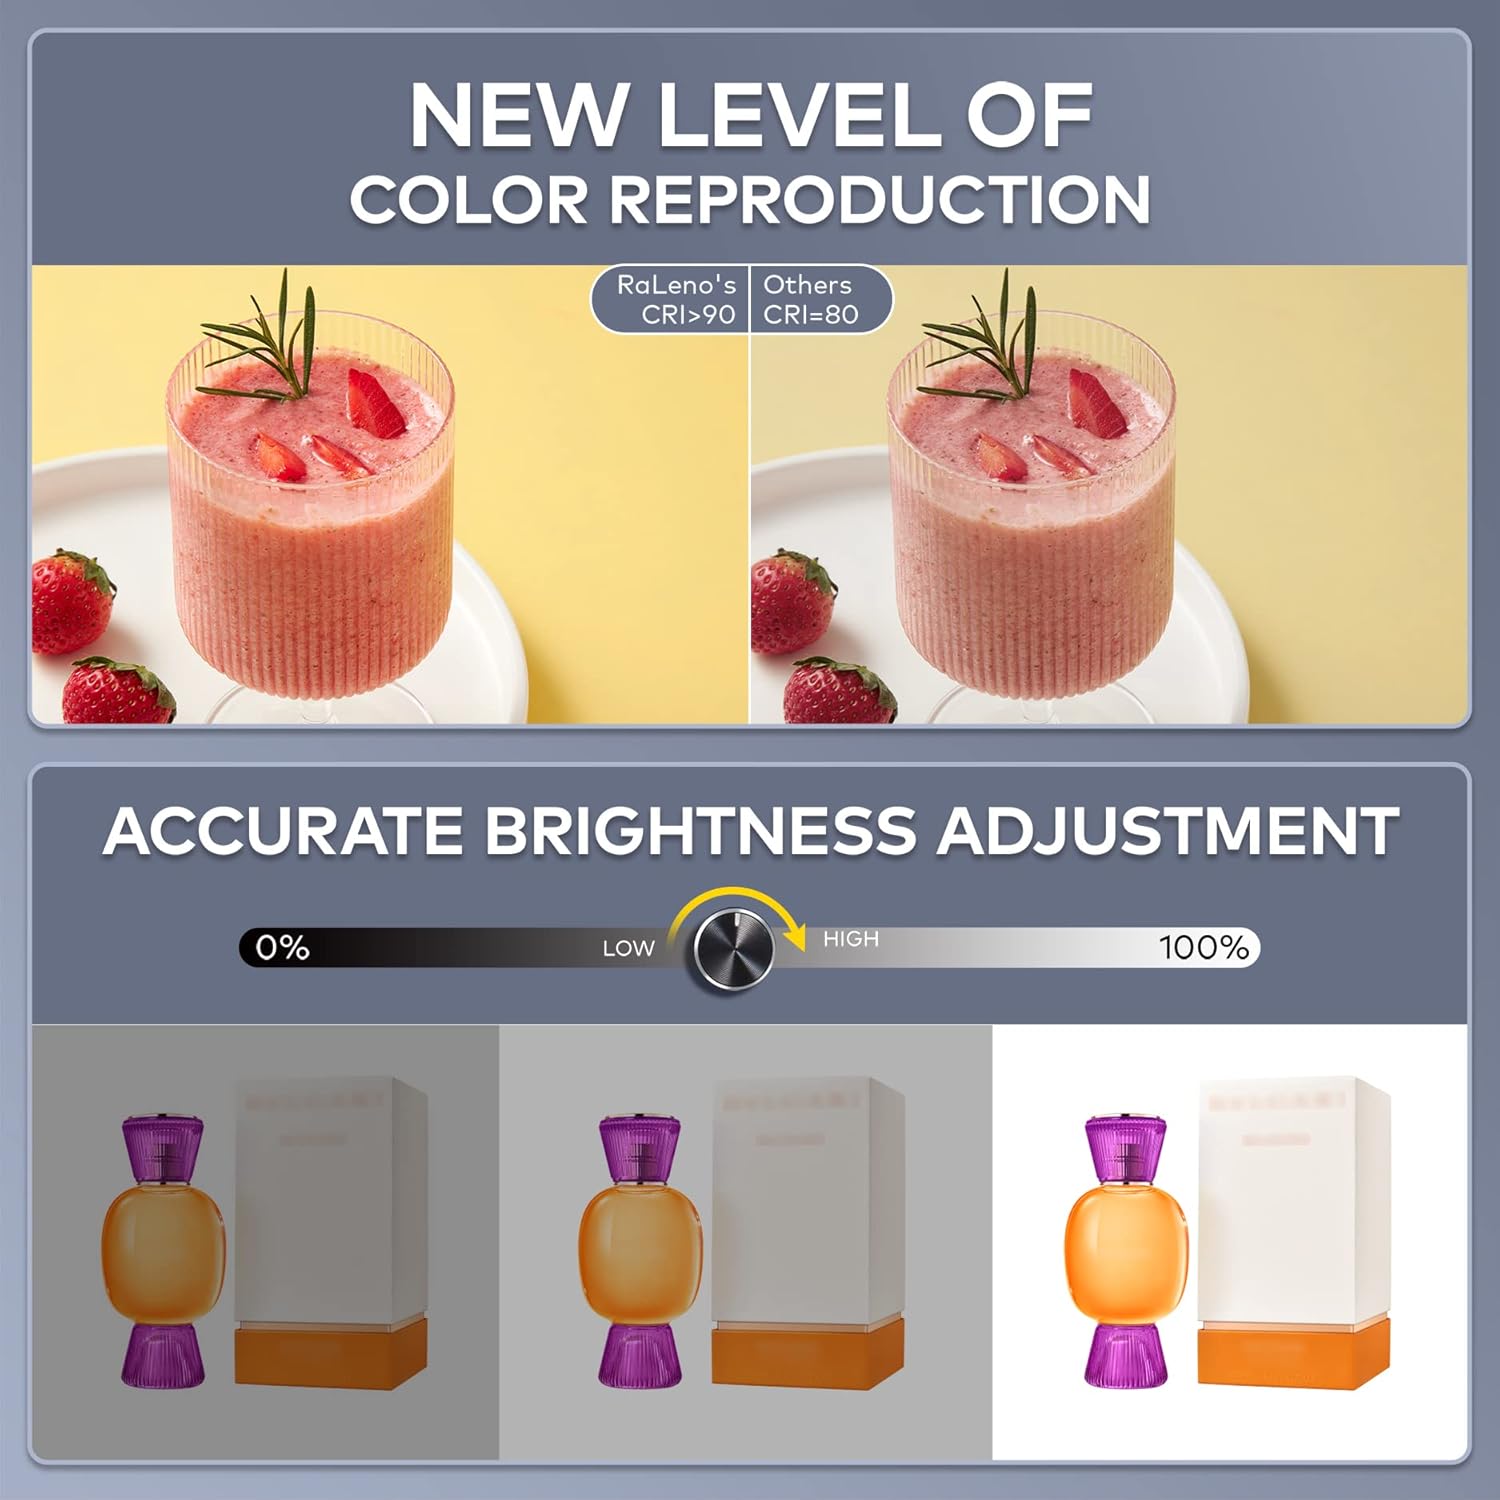
Figure 5.1: Illustration of the stepless brightness adjustment feature and the superior color reproduction (CRI ≥97) of the RALENO light boxes.
5.3. Utilizing Multiple Shooting Angles
The light boxes are designed with multiple openings to provide flexibility for multi-angle shooting. This ensures comprehensive showcasing of your products from all perspectives.
- Эң мыкты кадр: Use the opening on the top of the light box for overhead shots.
- Half-Open Shot: Partially open the front flap for specific angles.
- Frontal Shot: Shoot directly through the main front opening.
- Shooting Wide Open: Fully open the front for maximum access and wider shots.

5.2-сүрөт: Мисamples of various shooting angles achievable with the RALENO light boxes, including top, half-open, frontal, and wide-open shots.
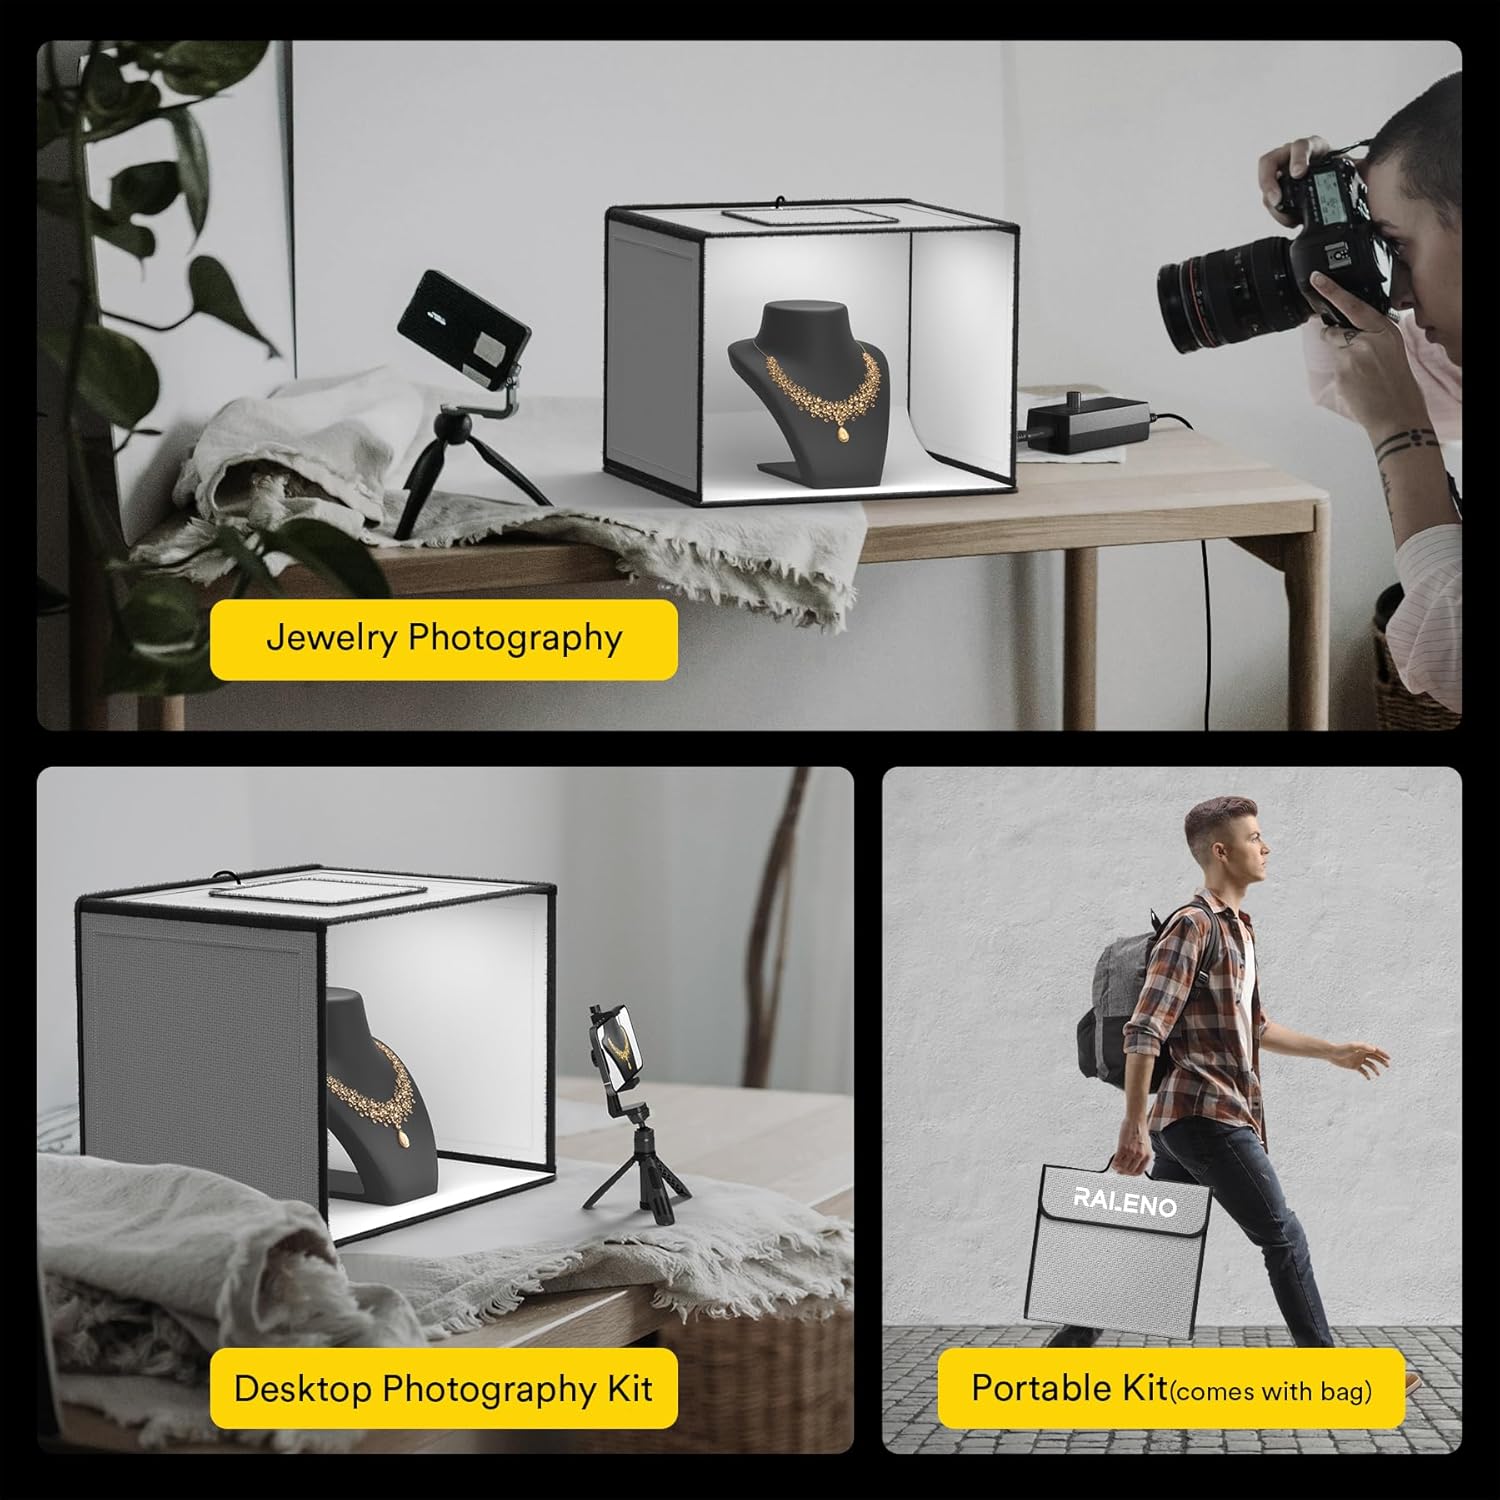
Figure 5.3: Practical applications of the D440 Pro light box, demonstrating its use for jewelry, as a desktop setup, and its portability.
6. Техникалык тейлөө жана кам көрүү
Proper maintenance ensures the longevity and optimal performance of your RALENO Photo Studio Light Box.
- Тазалоо: Gently wipe the interior and exterior surfaces of the light box with a soft, dry, or slightly damp кездеме. Материалга зыян келтириши мүмкүн болгон абразивдүү тазалоочу каражаттардан же эриткичтерден алыс болуңуз.
- Backdrop Care: When changing backdrops, handle them with care to avoid creasing or damage. Store backdrops rolled up or flat to maintain their smooth surface.
- Сактагыч: When not in use, disassemble the light box and store it in the provided storage bag to protect it from dust and damage.
- Кубаттуу адаптер: Always disconnect the power adapter from the outlet when not in use or during cleaning. Do not bend or crimp the power cord excessively.
7. Кыйынчылыктарды
This section addresses common issues you might encounter with your light box.
7.1. Жарыктар күйбөй жатат
- Ensure the power adapter is securely plugged into both the light box and a working electrical outlet.
- Check if the power switch or brightness knob is in the "on" position or turned up from 0%.
- Розетканын иштеп жатканын текшерүү үчүн аны башка түзмөк менен текшериңиз.
7.2. Uneven Lighting or Shadows
- Ensure the soft diffuser is correctly placed inside the light box to evenly spread the light.
- Жарык кутучасынын ичиндеги продуктуңуздун абалын тууралаңыз.
- Experiment with different shooting angles to minimize unwanted shadows.
7.3. Backdrops Not Lying Flat
- Ensure the backdrop is properly inserted and smoothed out.
- If the backdrop has creases from storage, try gently warming it (e.g., with a hairdryer on low heat, keeping a safe distance) or laying it flat under a heavy object for a period to flatten it.
8. Кепилдик жана колдоо
For any product inquiries, technical support, or warranty claims, please contact the seller directly. The seller for this product is RALENO US Store. Please refer to your purchase documentation for specific warranty terms and contact information.
For general information about RALENO products, you may visit the official RaLeno Store on Amazon: RaLeno Store
9. Коопсуздук боюнча маанилүү маалымат
- Ensure the light boxes are placed on a stable surface to avoid tipping during use.
- Do not expose the light box or its electrical components to water or excessive moisture.
- Do not attempt to modify or repair the light box yourself. Refer to qualified personnel for service.
- Балдар жана үй жаныбарлары жетпеген жерде сактаңыз.
10. Видео ресурстар
Currently, there are no official product videos from the seller available for embedding in this manual. Please check the product listing page on Amazon for any available video demonstrations or tutorials.

Figure 10.1: The RALENO light box simplifies product photography, reducing the need for complex traditional setups.


