1. Продукт бүтүп калдыview
The VENTION Displaylink USB C and USB 3.0 to Dual 4K HDMI Adapter is designed to expand your display capabilities, allowing you to connect two external 4K@60Hz monitors to your computer via a single USB 3.0 or USB-C port. This adapter is equipped with a DisplayLink chip, which enables extended display functionality for various operating systems, including macOS (M1/M2/M3 chip models) and Windows, overcoming typical single-stream limitations.
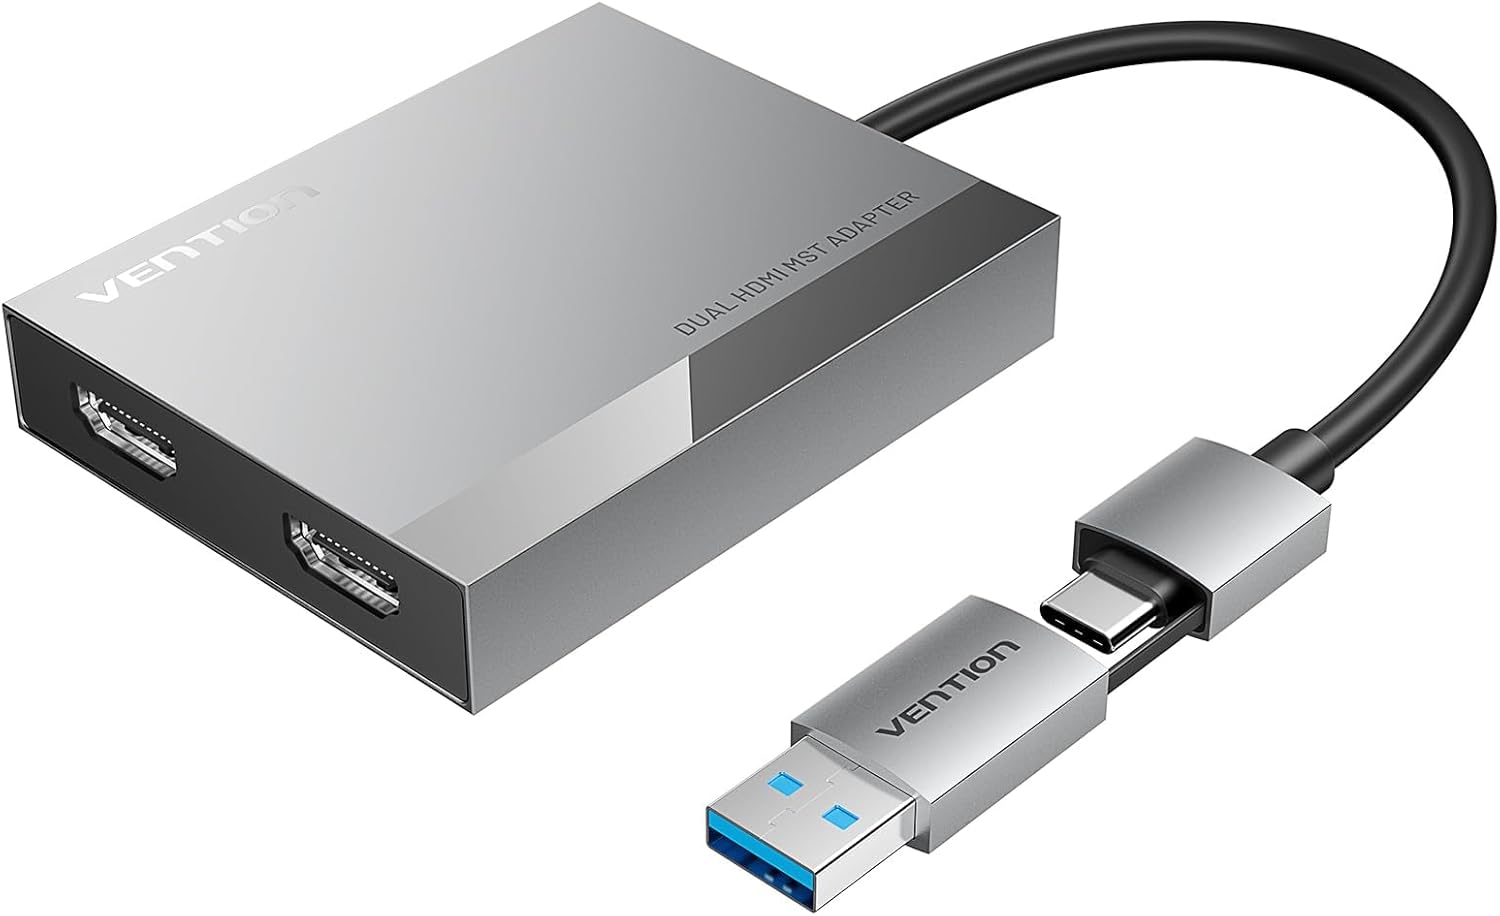
Image 1.1: The VENTION Displaylink USB C and USB 3.0 to Dual 4K HDMI Adapter, showcasing its compact design and dual HDMI ports.
2. Негизги өзгөчөлүктөрү
- Dual 4K@60Hz Monitor Support: Experience high-resolution visuals with support for two external displays, each up to 4096x2160@60Hz. This allows for a significantly expanded workspace.
- Кеңири шайкештик: Compatible with most USB 3.0 devices and a broad range of operating systems including Mac OS X 10.6 or higher, Windows XP/7 or higher, Ubuntu, Chrome OS, and Android systems.
- DisplayLink Chip Technology: Features the latest generation DisplayLink chip, enabling multi-stream (MST) display capabilities and breaking the single-stream limitation often found in macOS, especially for M1/M2/M3 MacBooks.
- USB-A/C Dual Ports: Equipped with both USB-A and USB-C connectors, providing versatile connectivity options for various laptops and devices.
- Aluminum Alloy Design: Constructed with a sturdy aluminum alloy shell for enhanced durability and efficient heat dissipation, ensuring stable performance during extended use.
- Multi-Monitor Productivity: Ideal for professionals, programmers, designers, and editors, allowing for extended, mirrored, or rotated display configurations to boost efficiency.
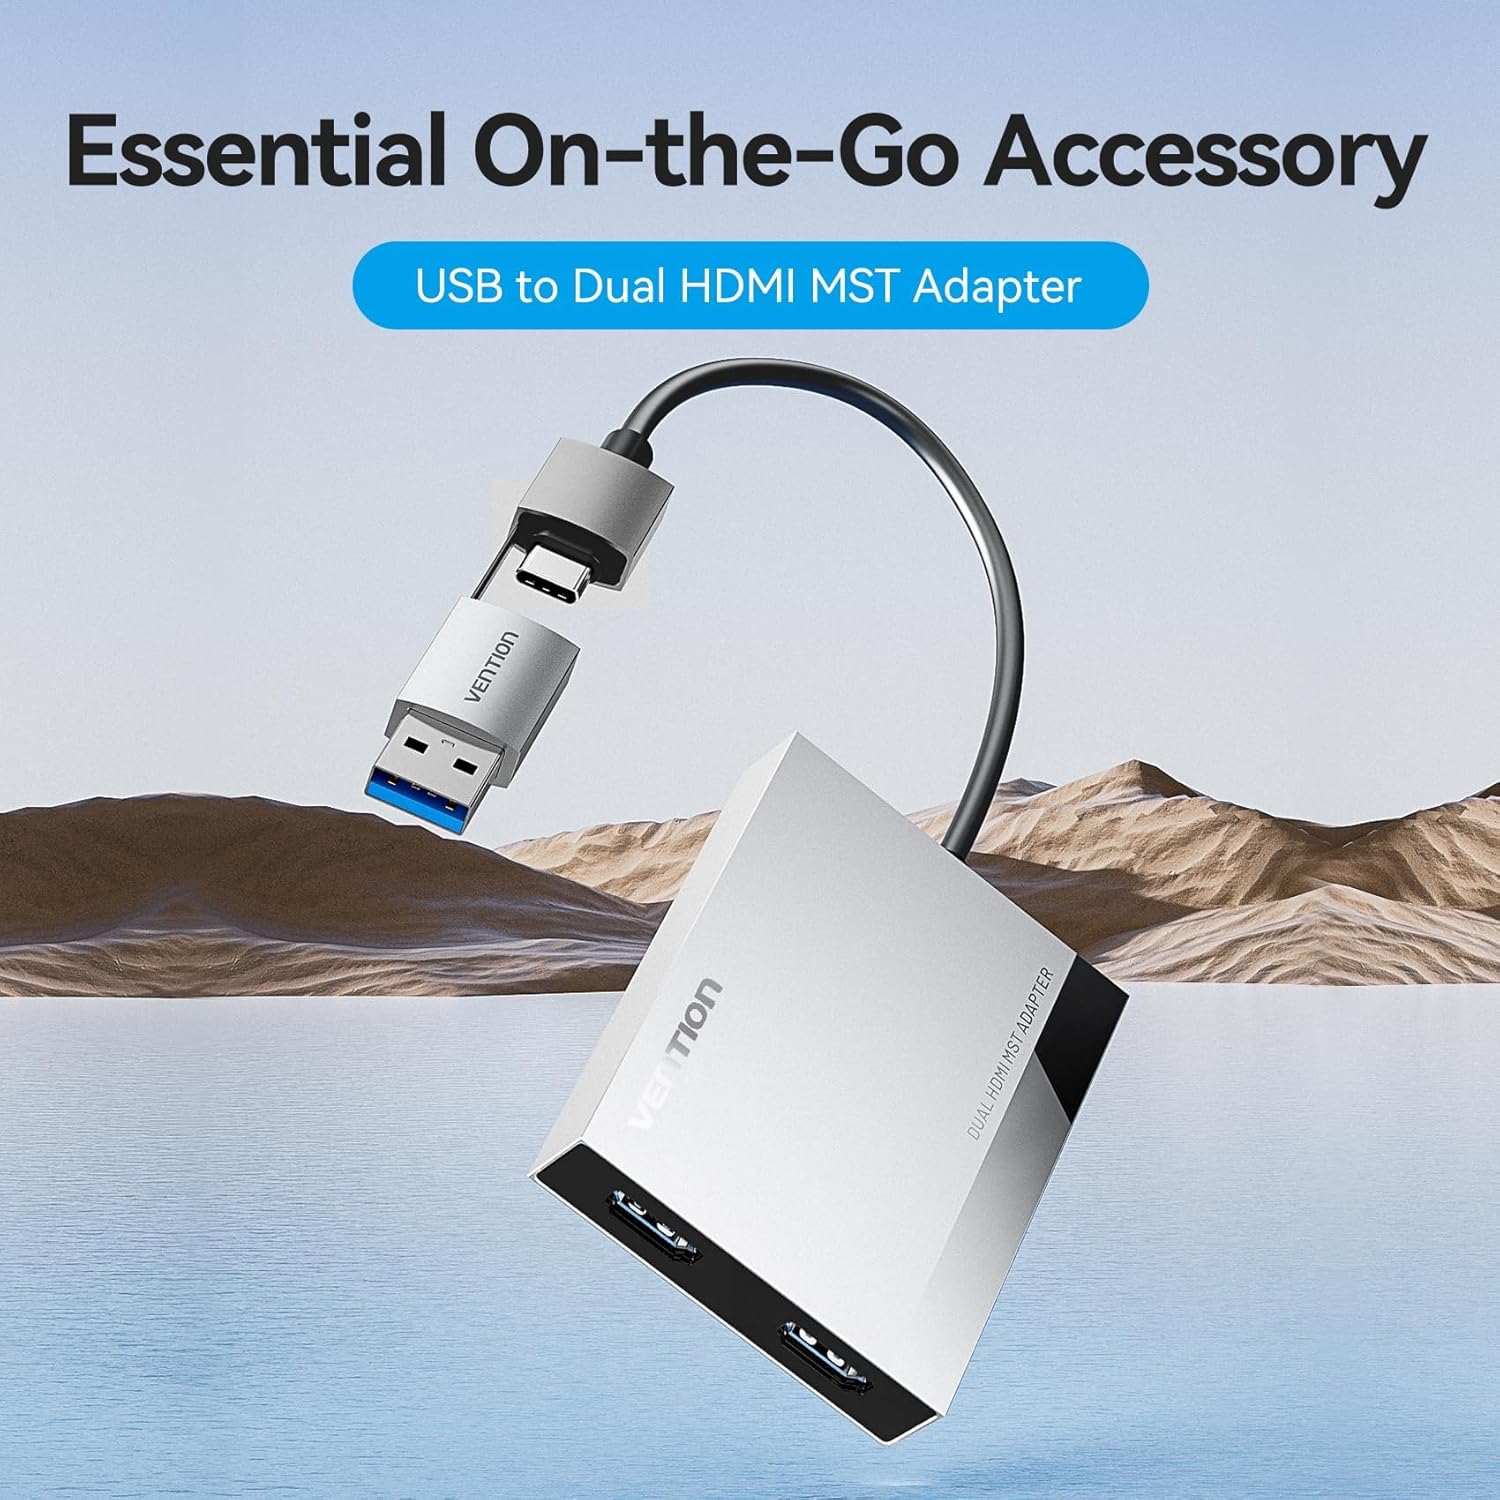
Image 2.1: The VENTION adapter positioned in a landscape, highlighting its portability and utility as an essential accessory.

Image 2.2: Visual representation of the adapter's compatibility with Apple M1, M2, and M3 chip MacBooks, featuring the internal DisplayLink chip for stable conversion.

Сүрөт 2.3: Жакын пландан view of the adapter's versatile USB-A and USB-C dual ports, designed for effortless multi-device connectivity.

Image 2.4: Depiction of the adapter providing vivid 4K@60Hz output, suitable for enjoying high-definition content on external displays.
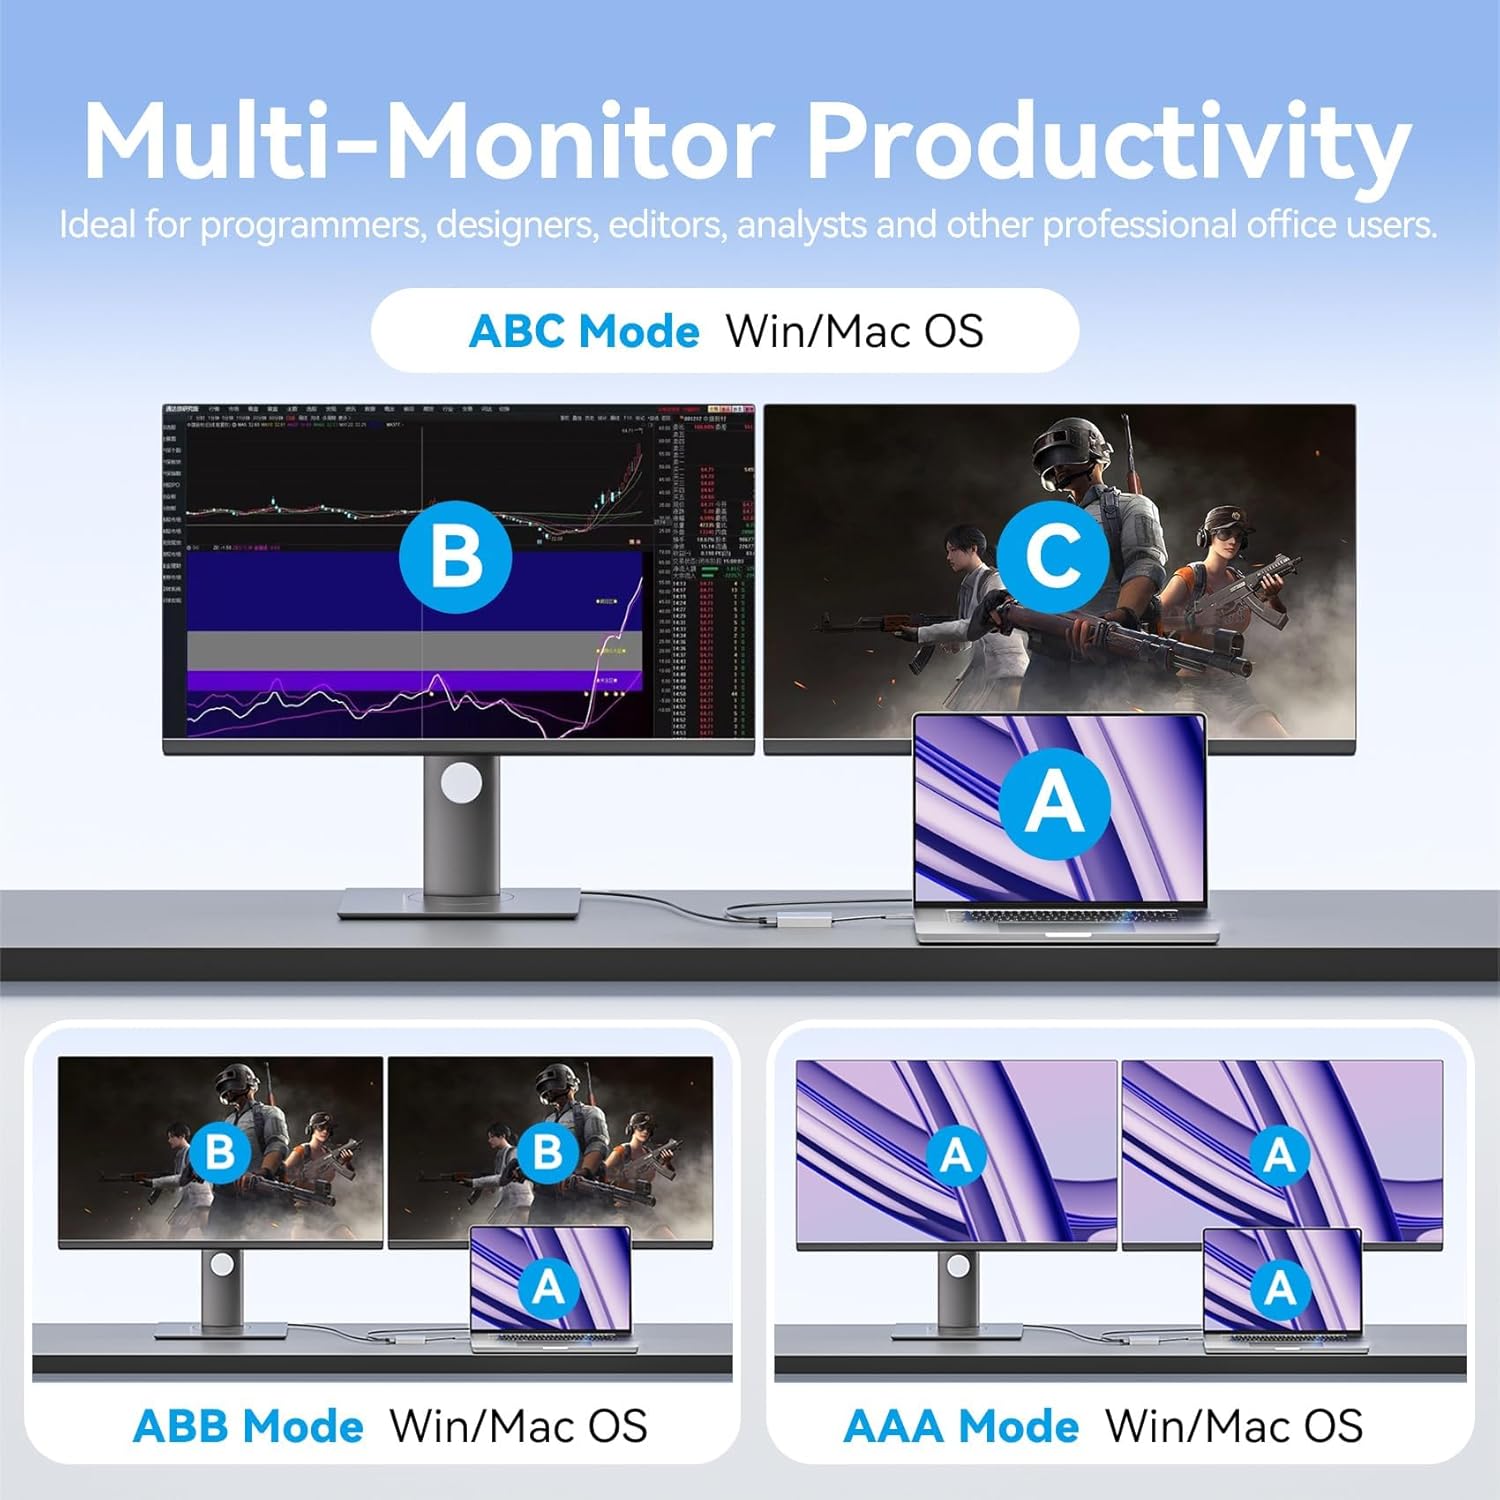
Image 2.5: Illustrations of various multi-monitor configurations (ABC, ABB, AAA modes) supported on Windows and Mac OS, enhancing productivity.

Image 2.6: The adapter's slim profile and powerful capabilities, highlighting its portable size and aluminum alloy shell for effective heat dissipation.

Image 2.7: A compatibility chart showing various source devices (PC, Laptop, AIO, Tablet/Phone) and display devices (Monitor, TV, Projector) supported, along with Windows, macOS, and Android operating systems.
Продукт видеосу
Video 2.1: An official product video demonstrating the VENTION Displaylink HDMI Docking adapter's features, including its design, connectivity, and multi-monitor capabilities.
3. Пакеттин мазмуну
Пакетти ачкандан кийин, төмөндө көрсөтүлгөн нерселердин бардыгы бар экенин жана жакшы абалда экендигин текшериңиз:
- 1 x VENTION Displaylink USB C and USB 3.0 to Dual 4K HDMI Adapter (Model: ACXHB)
- 1 x Quick Start Guide
4. Техникалык шарттар
| Бренд | ВЕНЦИЯ |
| Модель номери | ACXHB |
| Продукциянын өлчөмдөрү | 6.38 x 4.96 x 0.94 дюйм |
| Элемент Салмагы | 7.4 унция |
| Түс | Боз |
| Аппараттык интерфейс | HDMI |
| Өзгөчө өзгөчөлүк | Support MST for macOS, Fast Data Transfer |
| Шайкеш түзмөктөр | MacBook Pro 13"/14"/15"/16", MacBook Air, MacBook Retina, MacBook M1/M2/M3, HP Spectre x360/Pavilion/Envy, Dell XPS/Precision/Latitude, Lenovo ThinkPad/IdeaPad/Yoga/Flex, Surface Pro 7/7+/8/9, Surface Laptop 3/4/5/Go/Go 2/Studio/SE, Surface Go/Go 2/Go 3, LG Gram, Acer Aspire/Swift/Spin, ASUS Zenbook/Vivobook, and Most Windows systems with Windows 10 or newer / Most Chromebooks running ChromeOS 100 or newer. |
| Max Resolution (Single HDMI) | 4096x2160@60Гц |
| Max Resolution (Dual HDMI) | 4096x2160@60Гц |

Image 4.1: Detailed dimensions of the VENTION Displaylink USB C and USB 3.0 to Dual 4K HDMI Adapter.

Image 4.2: A comprehensive table outlining the technical specifications of the adapter, including material, interface, and display capabilities.
5. Орнотуу жана орнотуу
Before using the VENTION Displaylink adapter, it is crucial to install the appropriate DisplayLink driver for your operating system. This driver enables the multi-monitor functionality.
5.1 Driver Installation (General Steps)
- Расмий DisplayLinkке кириңиз webсайт: www.displaylink.com
- Navigate to the "DOWNLOADS" section, typically located in the top right corner of the webсайт.
- Select the correct operating system (Windows, macOS, Ubuntu, Chrome OS, Android) for your device.
- Download the latest DisplayLink driver. For macOS M1/M2/M3 users, ensure you download the dedicated driver version.
- Follow the on-screen instructions to complete the driver installation. This may involve accepting license agreements, running an installer, and potentially restarting your computer.
5.2 Driver Installation for Mac OS
For Mac OS users, follow these specific steps after downloading the DisplayLink Manager:
- Click on "Download" to initiate the download process for DisplayLink Manager.
- Once the download is complete, open the downloaded file and click "Accept" to proceed with the software license agreement.
- Open the downloaded package file and click "Continue" to start the installation.
- Follow the on-screen instructions to complete the installation. You may be prompted to enter your system password for authorization.

Image 5.1: Step-by-step visual guide for installing the DisplayLink driver on Mac OS systems.
5.3 Windows үчүн драйверди орнотуу
For Windows users, follow these specific steps after downloading the DisplayLink driver:
- Click on "Download" to initiate the download process for the Windows DisplayLink driver.
- Once the download is complete, open the downloaded file and click "Accept" to proceed with the software license agreement.
- Locate the downloaded package file and right-click on it. Select "Run as administrator" from the context menu.
- Grant system compatibility approval and follow the on-screen instructions to complete the installation.

Image 5.2: Step-by-step visual guide for installing the DisplayLink driver on Windows systems.
5.4 Адаптерди туташтыруу
- Ensure the DisplayLink driver is successfully installed on your computer.
- Connect the USB-C or USB 3.0 end of the VENTION adapter to an available port on your laptop or computer.
- Connect your HDMI monitors to the HDMI ports on the VENTION adapter using standard HDMI cables.
- Power on your monitors. Your computer should detect the new displays.
6. Иштөө нускамалары
Once the adapter is connected and drivers are installed, you can configure your display settings through your operating system.
6.1 Windows дисплей жөндөөлөрү
- Right-click on an empty area of your desktop and select "Display settings" or "Screen resolution".
- In the Display settings window, you will see representations of your connected displays (e.g., 1, 2, 3).
- Select each display and choose your preferred display mode:
- Бул дисплейлерди кеңейтүү: Each monitor shows a different part of your desktop, expanding your workspace.
- Бул дисплейлердин көчүрмөсүн жасаңыз: All monitors show the same content.
- Show only on 1/2/3: Only the selected monitor will be active.
- Adjust resolution, orientation, and scaling for each monitor as needed.
- Click "Apply" to save your changes.
6.2 Mac OS Display Settings
- "Система жөндөөлөрүнө" (же macOSтун эски версияларында "Система жөндөөлөрүнө") өтүңүз.
- "Көрсөтмөлөрдү" чыкылдатыңыз.
- Here you can arrange your displays by dragging them to the desired positions.
- For each display, you can set its resolution, refresh rate, and arrangement.
- To extend your desktop, ensure "Mirror Displays" is unchecked. To duplicate, check "Mirror Displays".
- For M1/M2/M3 MacBooks, the DisplayLink Manager application will provide additional options for managing the external displays. Ensure it is running in the background.
7. Шайкештик
The VENTION Displaylink adapter is designed for broad compatibility across various devices and operating systems:
- Операциялык системалар:
- Windows 10 or newer (including Windows XP, 7, 8)
- Mac OS X 10.6 or higher (including M1/M2/M3 MacBooks with dedicated DisplayLink driver)
- Ubuntu
- Chrome OS 100 or newer
- Android системалары
- Compatible Devices (Source):
- Laptops: MacBook Pro (13"/14"/15"/16"), MacBook Air, MacBook Retina, HP Spectre x360/Pavilion/Envy, Dell XPS/Precision/Latitude, Lenovo ThinkPad/IdeaPad/Yoga/Flex, Surface Laptop series, LG Gram, Acer Aspire/Swift/Spin, ASUS Zenbook/Vivobook.
- Tablets: Surface Pro series, Surface Go series.
- Desktops: PCs, All-in-One (AIO) computers.
- Compatible Devices (Display):
- Мониторлор
- Телевизорлор (телевизорлор)
- Проекторлор
Note: For optimal performance, especially with macOS M1/M2/M3 chips, ensure the latest DisplayLink driver is installed from the official DisplayLink webсайт.
8. Кыйынчылыктарды
If you encounter issues while using the VENTION Displaylink adapter, please refer to the following common troubleshooting steps:
- Дисплей жок/Кара экран:
- Ensure the adapter is securely connected to both your computer and the monitors.
- Verify that the monitors are powered on and set to the correct HDMI input.
- Confirm that the DisplayLink driver is correctly installed and up to date. Reinstall if necessary.
- Көйгөйдү чечүү үчүн бир эле мониторду туташтырып көрүңүз.
- Test with different HDMI cables.
- Дисплейдин жымыңдашы же туруксуздугу:
- Бош байланыштарды текшериңиз.
- Reduce the display resolution or refresh rate in your system's display settings.
- Компьютериңиздин графикалык драйверлери жаңыртылганын текшериңиз.
- Verify that the adapter is not overheating. The aluminum casing is designed for heat dissipation, but ensure proper airflow.
- "No Signal" Message on Monitor:
- Confirm the monitor's input source is set to the correct HDMI port.
- Ensure the DisplayLink driver is running and recognized by your system.
- Try restarting your computer with the adapter and monitors connected.
- Mac OS M1/M2/M3 Display Issues:
- Ensure you have downloaded and installed the specific DisplayLink driver for M1/M2/M3 chips.
- Verify that the DisplayLink Manager application is open and running in your menu bar.
- Check for any macOS updates that might affect DisplayLink functionality and update your DisplayLink driver accordingly.
- Adapter Not Recognized by Computer:
- Try connecting the adapter to a different USB 3.0 or USB-C port on your computer.
- Компьютериңизди өчүрүп күйгүзүңүз.
- Ensure there are no physical damages to the adapter or its cable.
9. Техникалык тейлөө
To ensure the longevity and optimal performance of your VENTION Displaylink adapter, follow these maintenance guidelines:
- Тазалоо: Use a soft, dry, lint-free cloth to clean the adapter. Avoid using liquid cleaners, aerosols, or harsh chemicals.
- Сактагыч: Адаптерди салкын, кургак жерде күндүн тике тийген нурунан жана экстремалдык температурадан алыс сактаңыз.
- Колдонуу: Avoid dropping the adapter or subjecting it to strong impacts. Do not bend or twist the cable excessively.
- Вентиляция: While the aluminum casing aids in heat dissipation, ensure the adapter is not covered or placed in an enclosed space during operation to allow for proper airflow.
- Кабельге кам көрүү: Always grasp the connector when plugging or unplugging the adapter; do not pull on the cable itself.
10. Кепилдик жана колдоо
The VENTION Displaylink USB C and USB 3.0 to Dual 4K HDMI Adapter comes with a comprehensive warranty and dedicated technical support.
- Кепилдик: Enjoy 12-month replacements for any manufacturing defects or malfunctions.
- Техникалык колдоо: VENTION provides life-long technical support to assist you with any questions or issues you may encounter during the product's lifespan.
For warranty claims or technical assistance, please contact VENTION customer service through the retailer where you purchased the product or visit the official VENTION webбайланыш маалыматы үчүн сайт.