1. Киришүү
Thank you for choosing the VIKIO HOME Wall Mount Range Hood. This manual provides essential information for the safe installation, operation, and maintenance of your new appliance. Please read this manual thoroughly before use and retain it for future reference.

Image 1: VIKIO HOME Wall Mount Range Hood 36-inch.
2. Коопсуздук маалыматы
Өрт, электр шок же адамдардын жаракат алуу коркунучун азайтуу үчүн электр шаймандарын колдонууда ар дайым негизги коопсуздук чараларын сактаңыз.
- Орнотуу: Бардык жергиликтүү коддорго жана мыйзамдарга ылайык квалификациялуу техник тарабынан туура орнотууну камсыз кылыңыз.
- Негиздөө: Бул шайман туура жерге туташтырылышы керек.
- Тазалоо: Clean grease filters regularly to prevent grease fires. Never operate the hood without filters in place.
- Вентиляция: Аба соргучту газ же башка отун менен иштеген шаймандар менен бир убакта колдонгондо, бөлмөнүн жетиштүү желдетилишин камсыз кылыңыз.
- Балдар: Балдарды шаймандан алыс кармаңыз.
- Күйүүчү материалдар: Do not use the range hood to exhaust flammable or explosive materials.
3. Кутуда эмне бар
Carefully unpack your range hood and check that all items are present and undamaged. If any items are missing or damaged, please contact customer service immediately.
- Wall Mount Range Hood Unit
- Stainless Steel Baffle Filter (x2)
- Round Duct Connector
- Колдонуучунун орнотуу колдонмосу
- Charcoal Filter (for ductless conversion, may be sold separately)
- Орнотуу бурамаларынын топтому
- Duct (flexible aluminum duct)

Image 2: Components included with the range hood.
4. Орнотуу жана орнотуу
Proper installation is crucial for the performance and safety of your range hood. It is recommended that installation be performed by two people due to the size and weight of the unit.
4.1 Капотту орнотуу
- Determine the desired mounting height. The recommended distance between the cooking surface and the bottom of the range hood is 24-32 inches.
- Mark the mounting points for the main hood bracket and the chimney bracket on the wall. Use a level to ensure accuracy.
- Drill pilot holes and secure the main hood bracket to the wall studs using appropriate fasteners.
- Carefully lift the range hood and hang it onto the main mounting bracket. Ensure it is securely seated.

Image 3: Proper installation diagram with dimensions.
4.2 Түтүктөрдү туташтыруу
Connect the flexible aluminum duct to the exhaust outlet on the range hood and extend it to your external ventilation system. Ensure all connections are sealed to prevent air leaks.
4.3 Морду орнотуу
Assemble the upper and lower chimney sections. Slide the chimney over the ductwork and secure it to the wall using the provided chimney bracket and screws. Ensure the chimney is flush with the ceiling or cabinet.
4.4 Электрдик туташуу
Connect the range hood to a grounded electrical outlet. Ensure the power supply matches the specifications listed on the product label.
Video 1: Installation overview for the RP30 36 Range Hood. This video demonstrates the steps for setting up and installing the range hood, including mounting and connecting components.
5. Иштөө нускамалары
Your VIKIO HOME Range Hood features advanced gesture sensing and touch control for convenient operation.
5.1 Башкаруу панели
The control panel is located on the front of the hood and includes touch-sensitive buttons and a gesture sensor.
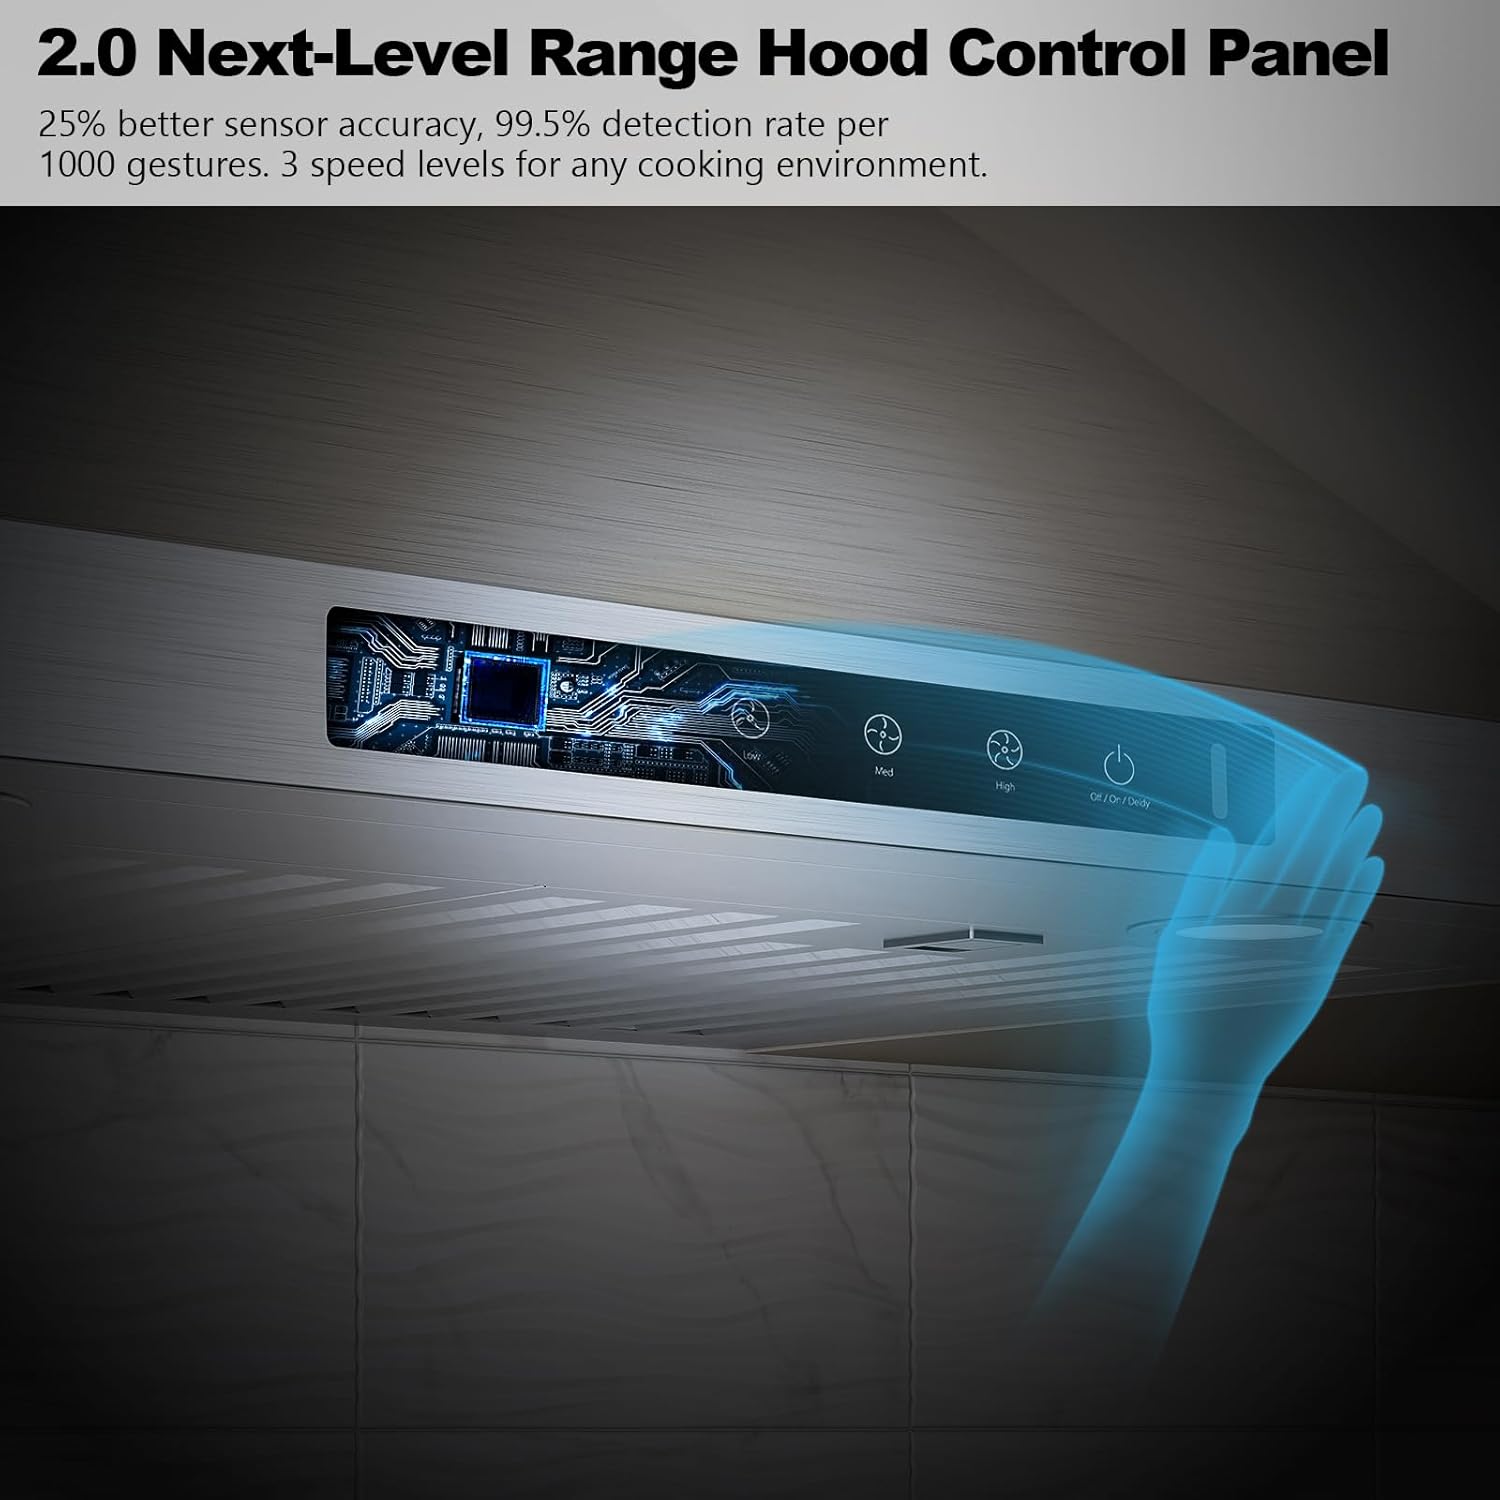
Сүрөт 4: Детальдуу view башкаруу панелинин.
5.2 желдеткич ылдамдыгын көзөмөлдөө
The range hood offers 3 adjustable fan speeds to suit various cooking needs, from light simmering to heavy frying. The 980 CFM motor ensures powerful smoke and odor removal.
- Төмөн ылдамдык: Ideal for light cooking and maintaining air quality.
- Орто ылдамдык: Suitable for everyday cooking.
- Жогорку ылдамдык: For heavy smoke and strong odors.
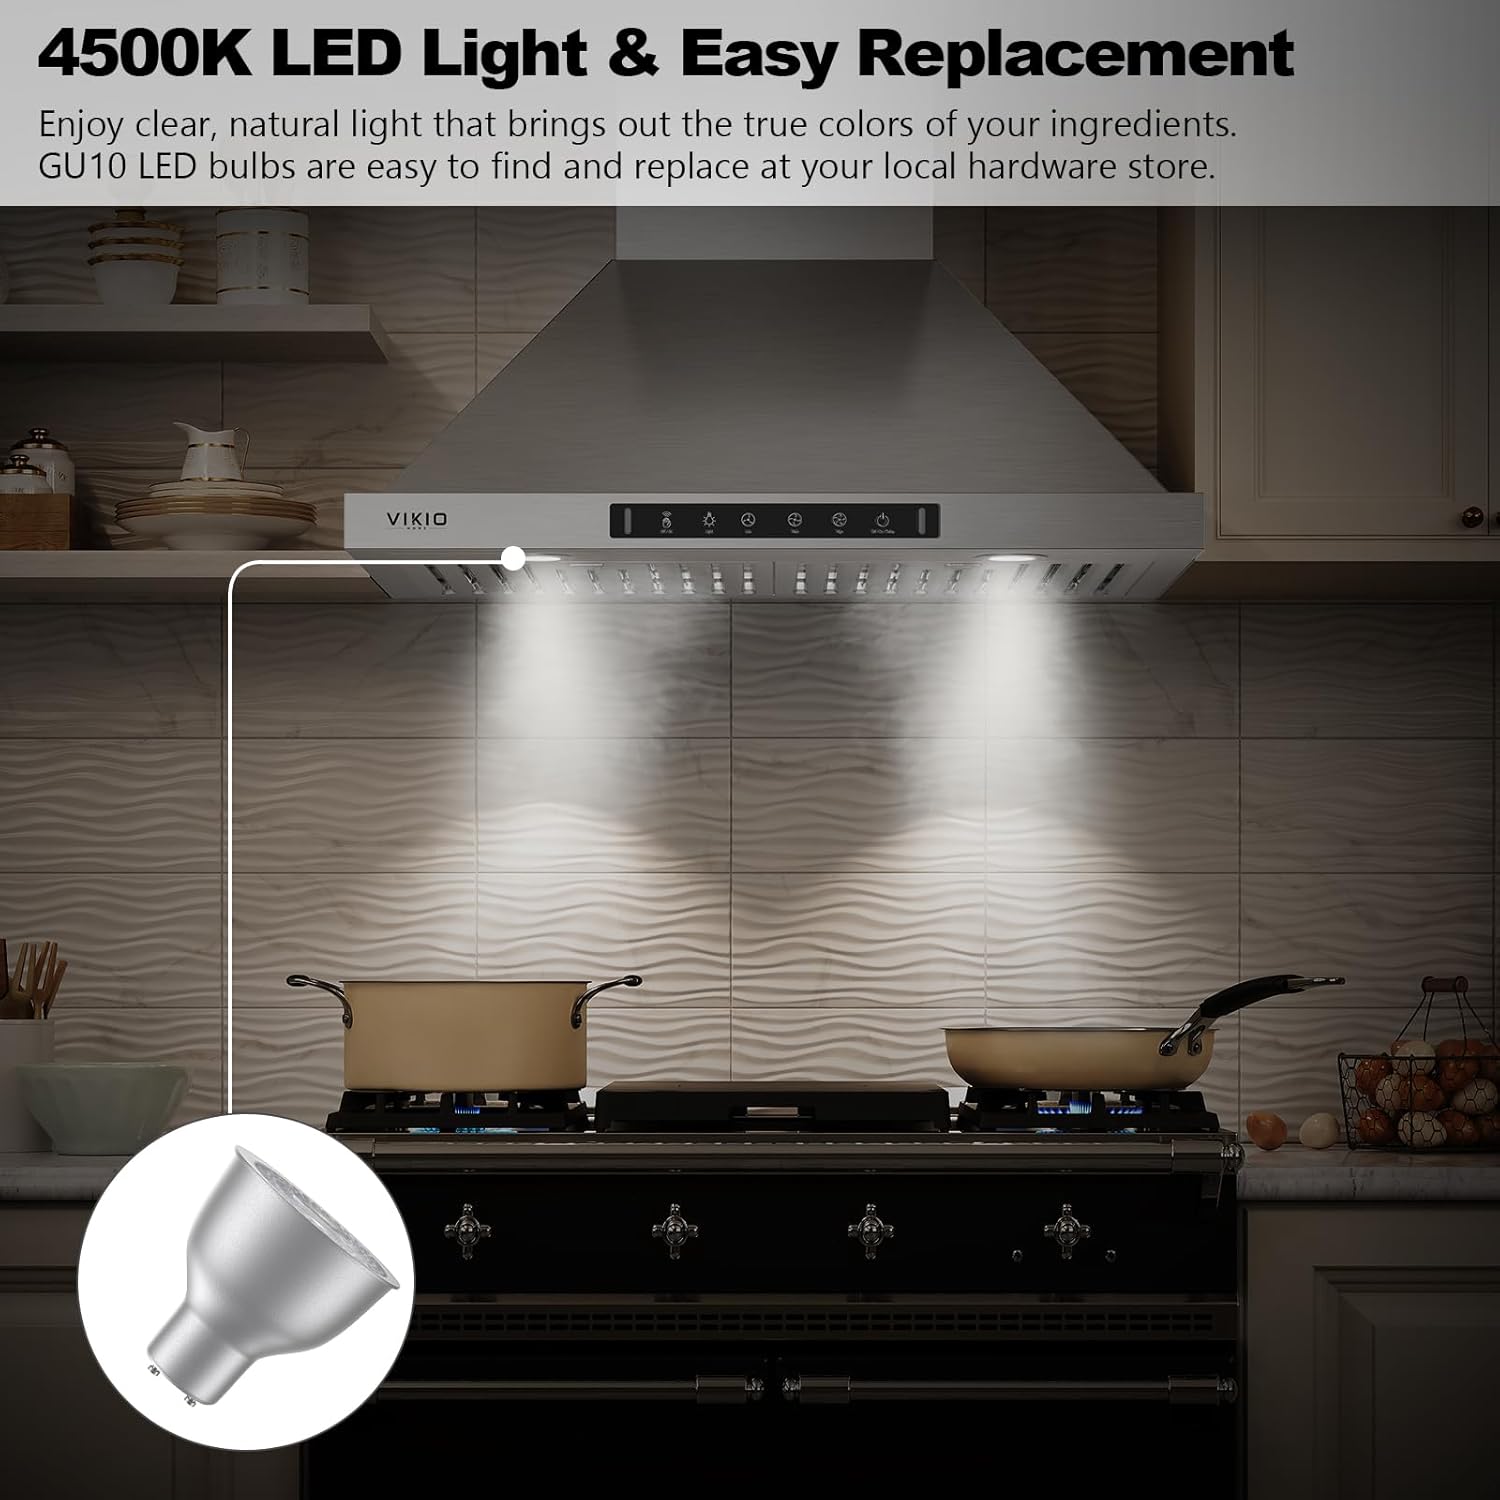
Image 5: The range hood operates quietly, with noise levels as low as 35 dBA at low speeds.
5.3 Жаңсоолорду сезүү
Wave your hand in front of the gesture sensor to control the fan and lights without touching the panel. This feature can be enabled or disabled as desired.

Image 6: Gesture control allows for hands-free operation.
5.4 LED жарыктандыруу
The integrated 4500K LED lights provide clear, natural illumination for your cooking area. The bulbs are designed for easy replacement.
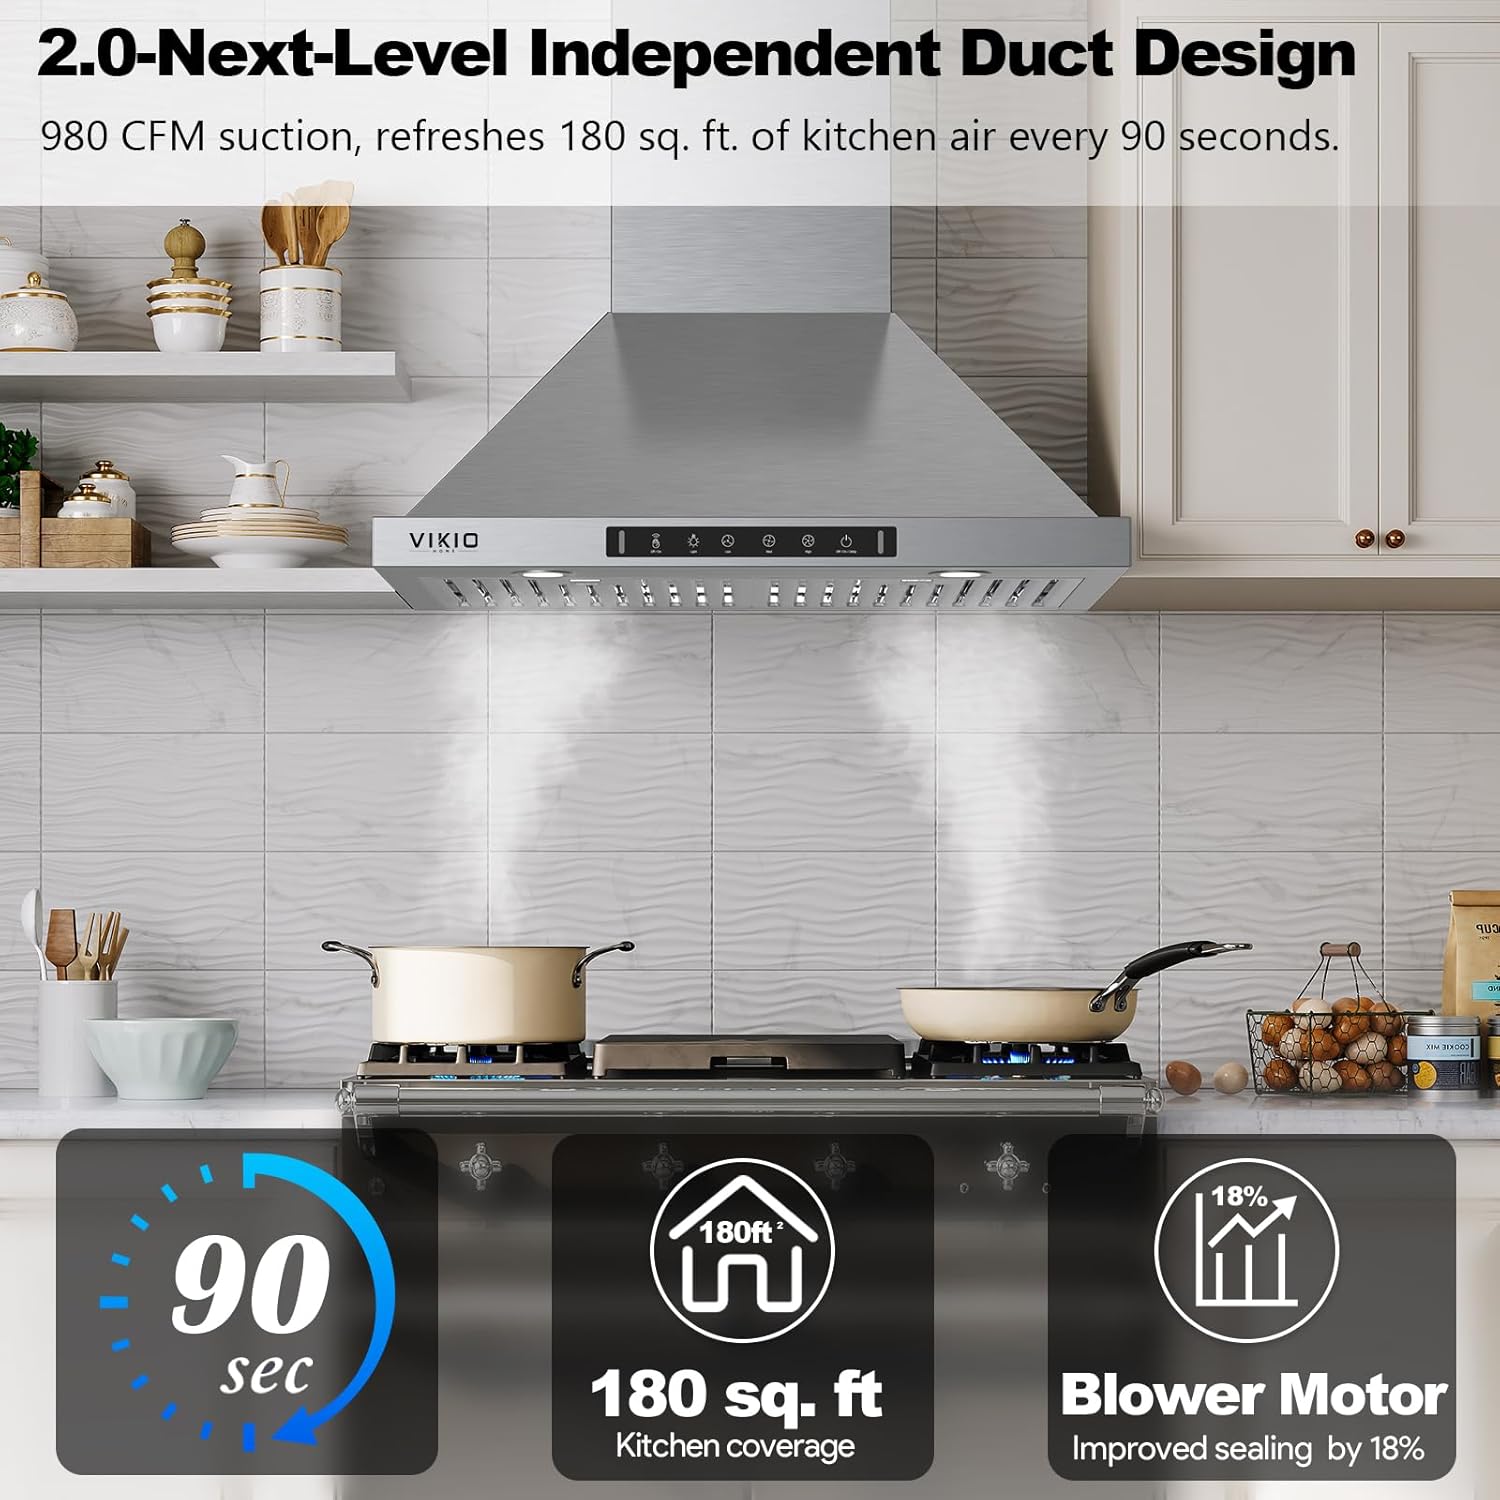
Image 7: Bright 4500K LED lighting for enhanced visibility.
5.5 Delay-Off Timer
Activate the delay-off timer to allow the fan to continue running for a set period after cooking, ensuring all residual odors are cleared from the kitchen.

Image 8: The delay-off timer feature.
6. Техникалык тейлөө
Үзгүлтүксүз тейлөө сиздин капотуңуздун оптималдуу иштешин жана узак иштөөсүн камсыздайт.
6.1 Тосмо чыпкаларын тазалоо
The permanent stainless steel baffle filters are designed to trap grease and are dishwasher safe for easy cleaning. Clean filters regularly (monthly or more frequently depending on cooking habits) to maintain suction power and prevent grease buildup.
- To remove, locate the release latches on each filter and pull down.
- Wash filters in a dishwasher or by hand with hot water and a mild detergent.
- Кайра орнотуудан мурун чыпкаларды толугу менен кургатууга уруксат бериңиз.
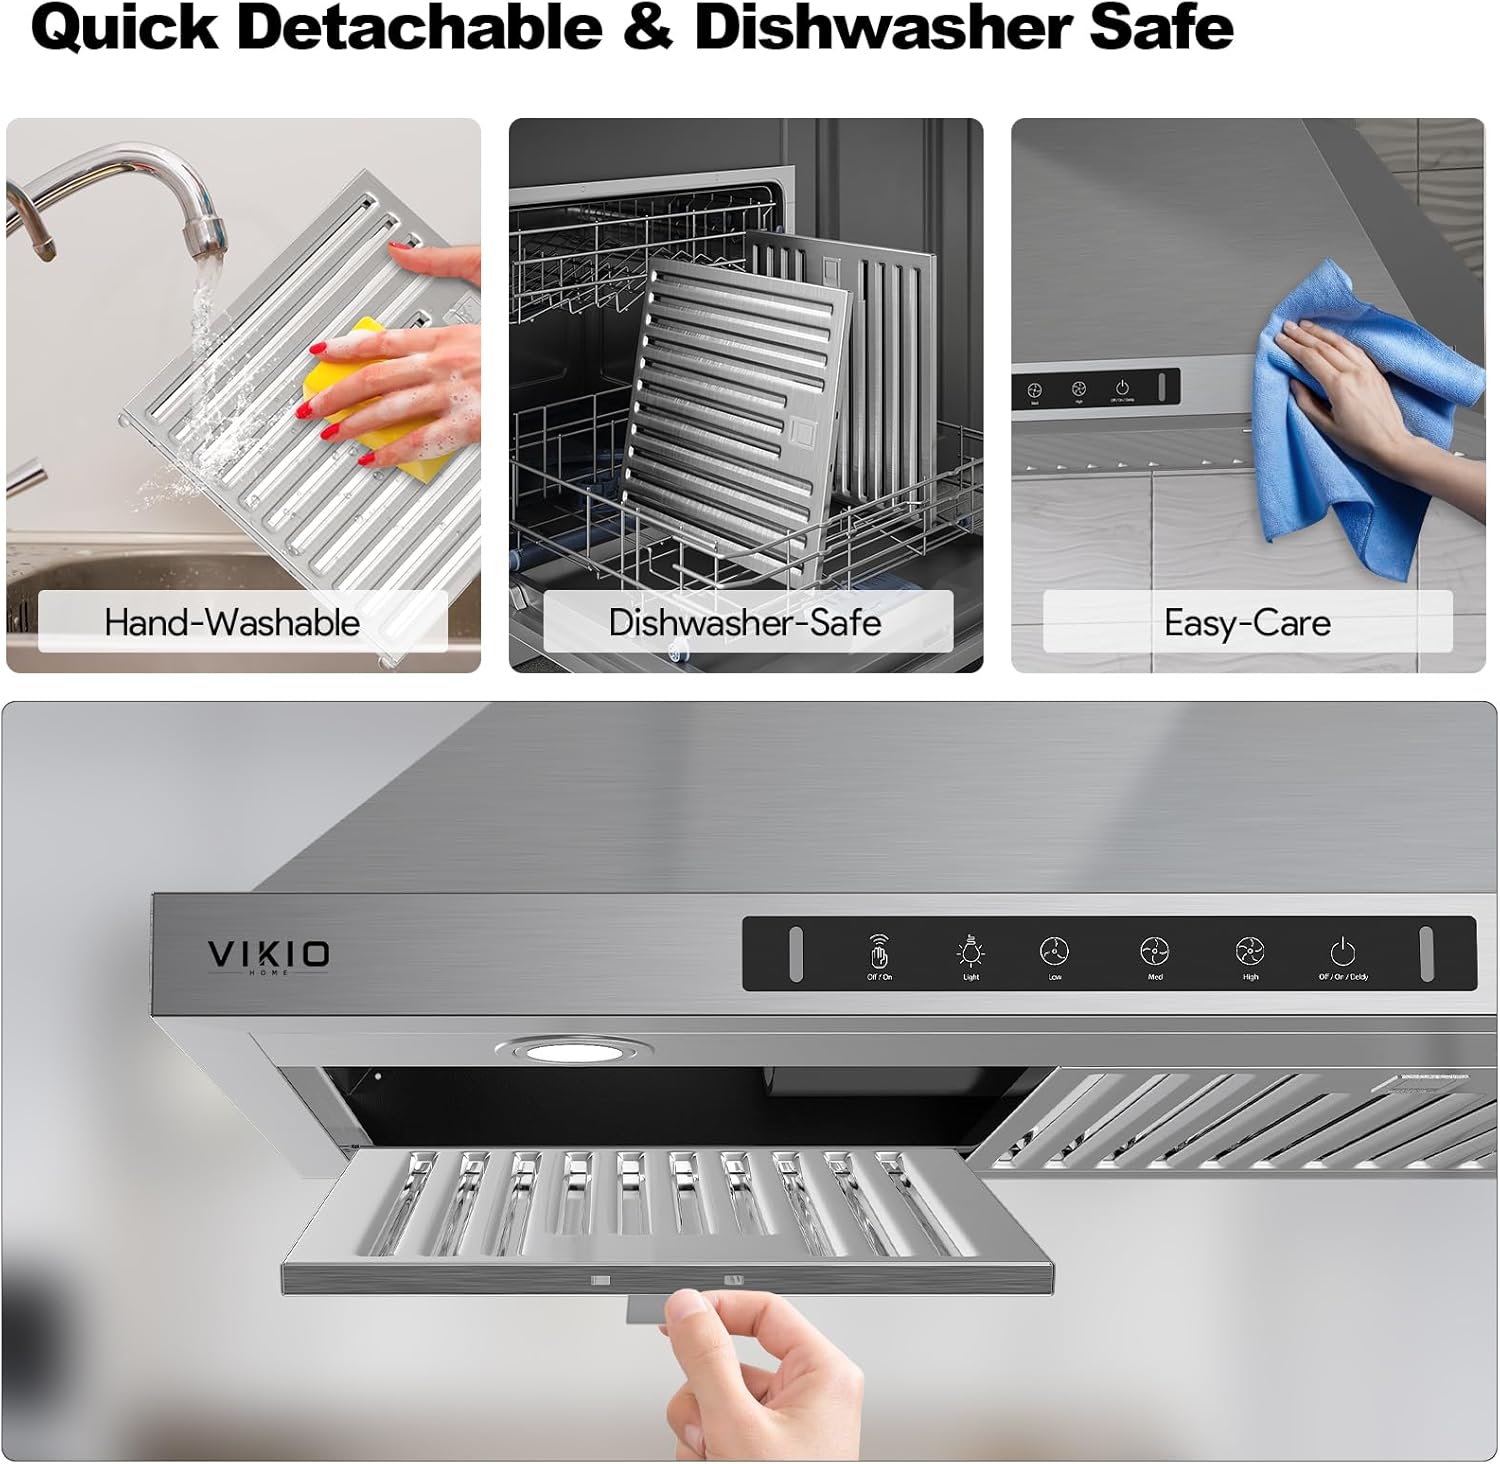
Image 9: Quick detachable and dishwasher-safe filters for easy maintenance.
6.2 Тышкы тазалоо
Wipe the exterior of the range hood with a soft cloth and a non-abrasive stainless steel cleaner. Avoid using harsh chemicals or abrasive pads that could scratch the surface.
7. Кыйынчылыктарды
Капотуңузда көйгөйлөргө туш болсоңуз, төмөнкү жалпы көйгөйлөрдү жана чечимдерди караңыз:
| Көйгөй | Мүмкүн себеп | Чечим |
|---|---|---|
| Желдеткич күйбөйт | No power supply; circuit breaker tripped; control panel issue. | Check power cord connection; reset circuit breaker; contact customer service if control panel is unresponsive. |
| Начар соргуч | Clogged filters; improper ducting; motor issue. | Clean or replace filters; check ductwork for obstructions or leaks; contact customer service. |
| Ашыкча ызы-чуу | Loose parts; motor imbalance; ducting issue. | Check for loose screws or components; inspect ductwork for proper installation; contact customer service. |
| Жарыктар иштебейт | Bulb burnt out; electrical connection issue. | Replace LED bulb; check electrical connections; contact customer service. |
For issues not listed here or if troubleshooting steps do not resolve the problem, please contact VIKIO HOME customer support.
8. Техникалык шарттар
| Бренд | VIKIO HOME |
| Модел маалыматы | VK-RP30-36 |
| Аба агымынын кубаттуулугу | Мүнөтүнө 980 куб фут (CFM) |
| Материал | Дат баспаган болот |
| Ызы-чуу деңгээли | 57 dB (max), as low as 35 dBA |
| Монтаж түрү | Дубалга орнотуу |
| Controls Type | Touch, Gesture Sensing |
| Ылдамдыктын саны | 3 |
| Тtage | 110.0 V |
| Жарык булагы түрү | LED (4500K) |
| Чыпка түрү | Baffle (Permanent Stainless Steel) |
| Вентиляция түрү | Кабралануучу (каналдуу/каналсыз) |
| Продукциянын өлчөмдөрү | 19.69"D x 35.76"W x 50.41"H |
| Элемент Салмагы | 58.1 фунт |
| UPC | 717813999871 |
9. Кепилдик жана колдоо
VIKIO HOME is committed to providing high-quality products and excellent customer service. While specific warranty details are not provided in this manual, our professional customer service team is available to assist with any needs, including replacement of accessories such as filters and lights.
For support, please refer to the contact information provided with your purchase or visit the official VIKIO HOME webсайт.


