1. Киришүү
The GOLOZA Wireless Sync Time Digital Alarm Clock is designed to provide accurate timekeeping and convenient alarm functions for your bedroom. Featuring a large LED display, multiple brightness levels, dual customizable alarms, and a reliable memory function, this clock aims to simplify your daily routine. Its innovative wireless time synchronization capability allows it to automatically adjust time via Bluetooth connection to your smartphone, ensuring precision without manual adjustments.

Figure 1.1: GOLOZA Wireless Sync Time Digital Alarm Clock overview.
2. Пакеттин мазмуну
Сураныч, кутудан чыгарганда пакеттин мазмунун текшерип, бардык буюмдар бар экенин текшериңиз:
- GOLOZA Digital Alarm Clock
- USB Power Cable (60in/1.5m)
- Кубаттуу адаптер
- User Manual
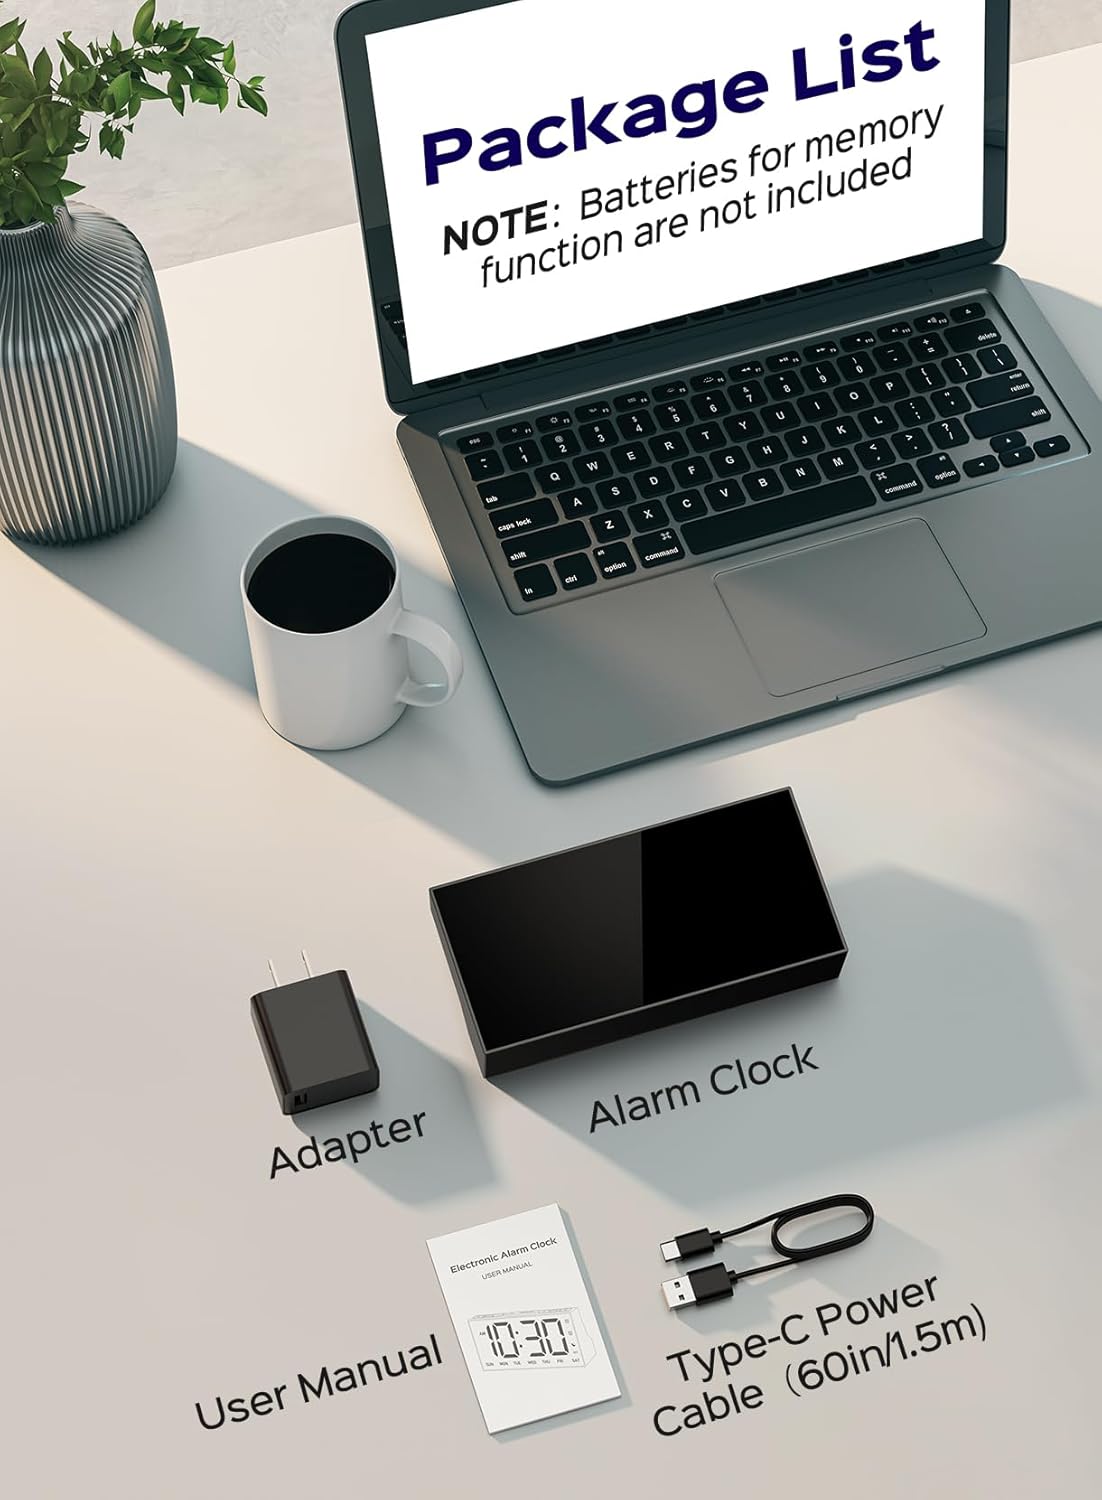
Figure 2.1: Items included in the GOLOZA Digital Alarm Clock package.
3. Орнотуу
3.1 Күйгүзүү
Connect the provided USB power cable to the clock's Type-C power port and plug the adapter into a standard 100-240V household outlet. The clock display will light up, typically showing '12:00 AM' and 'SUN' initially.
3.2 Батареянын резервдик көчүрмөсүн орнотуу
Электр энергиясын өчүрүү учурунда эс тутум функциясы үчүнtages, install 2*AAA batteries (not included) into the battery compartment located at the back of the clock. These batteries will retain time and alarm settings but will not power the display.

Figure 3.1: Battery compartment for memory backup.
4. Иштөө нускамалары
4.1 Wireless Time Synchronization (Bluetooth)
The GOLOZA alarm clock features an innovative wireless time sync function via Bluetooth, eliminating the need for manual time adjustments. This is particularly useful when traveling across different time zones, as the clock will automatically update to your phone's time.
- Ensure the clock is powered on. The Bluetooth icon (☊) on the display will flash, indicating it's in pairing mode.
- On your mobile phone, go to Settings and turn on Bluetooth.
- Издөө available devices and select 'Clock 903' to pair.
- Once paired, the clock will automatically synchronize its time with your phone. The Bluetooth icon will stop flashing and remain solid.
The clock will attempt to re-establish connection and sync time once a day. If the Bluetooth icon is not solid after initial pairing, long press the '+' button on the clock to re-initiate time syncing.

Figure 4.1: Wireless time synchronization via Bluetooth.

Figure 4.2: Effortless setup by syncing time with Bluetooth pairing.

4.3-сүрөт: Bluetooth жупташтыруу үчүн кадам-кадам көрсөтмө.
Video 4.1: Instructions on how to sync time via Bluetooth.
4.2 Setting 12/24H Format & Time
You can switch between 12-hour and 24-hour time formats and manually set the time if needed.
- Press the '12/24H/Time' button to switch the time format.
- Long press the '12/24H/Time' button to enter time setting mode. The hour digits will flash.
- Use the '+' or '-' buttons to adjust the hour. Press the '12/24H/Time' button to confirm and move to minutes.
- Adjust minutes using '+' or '-' buttons. Press '12/24H/Time' to confirm and move to weekday setting.
- Adjust the weekday using '+' or '-' buttons. Press '12/24H/Time' to confirm and exit time setting mode.

Figure 4.4: Displaying 12H, 24H, and DST settings.
Video 4.2: Instructions on how to set 12/24H format and time.
4.3 Ойготкучтарды орнотуу (кош ойготкучтар)
The clock supports dual alarms (Alarm 1 and Alarm 2) that can be set independently.
- Long press the Alarm 1 button (or Alarm 2 button) to enter alarm setting mode. The hour digits will flash.
- Use the '+' or '-' buttons to adjust the hour. Press the Alarm button to confirm and move to minutes.
- Adjust minutes using '+' or '-' buttons. Press the Alarm button to confirm and exit alarm setting mode.
- To activate or deactivate an alarm, simply press the corresponding Alarm button. The alarm icon will appear/disappear accordingly.

Figure 4.5: Dual alarm settings on the clock display.
Video 4.3: Instructions on how to set the alarm.
4.4 Customizing Alarms (Workday Modes)
You can customize your alarms to ring on specific days of the week using the slider at the back of the clock.
- Slide the alarm mode switch at the back of the clock to 'Customize'.
- Long press the Alarm 1 button (or Alarm 2 button) to set the hour and minute as described in Section 4.3.
- When setting the alarm, after confirming the minute, the weekday will flash. Press the '+' or '-' button to select the desired days for the alarm to be active (e.g., Mon-Fri for weekdays, Sat-Sun for weekends, or specific days).
- Long press the Alarm button again to save the setting.

Figure 4.6: Customize alarms for any day of the week.
Video 4.4: Instructions on how to set the customized alarm.
4.5 Brightness and Auto Dimmer
The clock offers 4 levels of brightness and a 'Totally OFF' option. It also features an auto-dimmer function for comfortable viewтүн ичинде.
- Жарыктыкты кол менен жөндөө: Press the 'Dimmer' button to cycle through 100%, 75%, 50%, 25% brightness, and 'OFF'.
- Auto Dimmer: Press the 'Auto Dimmer' button to activate this mode. A moon icon will appear on the display.
- Setting Auto Dimmer Period: Long press the 'Auto Dimmer' button. The start hour will flash. Use '+' or '-' to adjust and press 'Auto Dimmer' to confirm. Repeat for start minute, end hour, and end minute. The default auto dimmer period is 7:00 PM - 7:00 AM at 25% brightness.

Figure 4.7: Four levels of brightness and 'Totally OFF' option.

Figure 4.8: Adjustable auto dimmer for better sleep.

Figure 4.9: No more manual adjustment with auto dimmer.
Video 4.5: Instructions on how to set the auto dimmer's start and end time.
4.6 Тындыруу функциясы
When the alarm rings, press the large 'SNOOZE' button on top of the clock to activate the 9-minute snooze function. The alarm will sound again after 9 minutes. To turn off the alarm completely, press any other button.

Figure 4.10: Reachable snooze button for a gentle wake-up.
4.7 USB кубаттоо порту
The clock includes a built-in USB port (5W) for charging your phone or other small electronic devices. This provides convenient charging right at your bedside, ensuring your devices are ready when you wake up.

Figure 4.11: USB charging port for convenience.
5. Кыйынчылыктарды
5.1 Bluetooth Time Sync Issues
If the clock does not automatically sync time via Bluetooth, consider the following:
- Ensure your phone's Bluetooth is enabled and the clock is within range.
- Verify that 'Clock 903' is correctly paired and connected in your phone's Bluetooth settings.
- Some Android devices may experience compatibility issues with the automatic time sync feature. If you encounter persistent problems, manual time setting (Section 4.2) is an alternative.
- Try disconnecting and reconnecting the Bluetooth connection on your phone.
- Long press the '+' button on the clock to manually initiate a time sync attempt.
5.2 Display Not Lighting Up
Ensure the clock is properly plugged into a working power outlet. The clock requires continuous power to operate the display; batteries only provide memory backup for settings.
5.3 Ойготкуч угулбайт
Check that the alarm is activated (alarm icon visible on the display) and that the volume is not set to zero. Ensure the alarm time is correctly set and the alarm mode switch at the back is in the desired position (ON or Customize).
6. Техникалык шарттар
| Өзгөчөлүк | Description |
|---|---|
| Бренд | ГОЛОЗА |
| Модель номери | HM903 |
| Түс | Sky Blue Digit |
| Дисплей түрү | LED |
| Продукциянын өлчөмдөрү | 6.4"W x 3.2"H |
| Power Source | Электр зымдары |
| Батареянын камдык көчүрмөсү | 2*AAA batteries (not included) for memory |
| USB порту | 5W (for charging devices) |
| Ойготкуч саат | Ооба (кош ойготкучтар) |
| Тындырма функциясы | 9-minute snooze |
| Жарыктык деңгээли | 4 levels + OFF |
| Auto Dimmer | Yes (customizable period) |
| Материал | Акрилонитрил бутадиен стирол (ABS) |
7. Техникалык тейлөө
To ensure the longevity and proper functioning of your GOLOZA Digital Alarm Clock, follow these maintenance guidelines:
- Тазалоо: Wipe away dust and fingerprints with a soft, damp cloth. Do not use liquid or abrasive cleaners, as they may damage the display or casing.
- Жайгашкан жери: Саатты туруктуу, тегиз жерге, күндүн түз нурунан, ашыкча ысыктан же нымдуулуктан алыс коюңуз.
- Күч: Always use the provided power adapter and cable. Avoid using damaged cables or adapters.
8. Кепилдик жана колдоо
The GOLOZA Wireless Sync Time Digital Alarm Clock comes with a 24 айлык продукт кепилдик жана 6 months free return. We are committed to providing lifetime support for our products.
For any questions, technical assistance, or warranty claims, please contact GOLOZA customer service through the platform where you purchased the product or visit the official GOLOZA store online.
Please have your product model number (HM903) and purchase details ready when contacting support for faster service.

