1. Киришүү
Thank you for choosing the ieGeek S2 Outdoor Solar Security Camera. This manual provides comprehensive instructions for the installation, operation, and maintenance of your new security camera. Please read this manual carefully before use to ensure proper functionality and to maximize the benefits of the product. Keep this manual for future reference.
The ieGeek S2 camera is designed for outdoor surveillance, offering features such as a powerful magnetic mount for easy installation, 300° horizontal pan rotation, high-resolution night color vision, accurate PIR human detection, and seamless wireless connectivity. Its IP65 waterproof rating ensures durability in various weather conditions, and Alexa compatibility provides convenient voice control.
2. Продукт бүтүп калдыview
2.1 Пакеттин мазмуну
Орнотууну улантуудан мурун, бардык компоненттердин пакетте бар экендигин текшериңиз:
- ieGeek S2 Outdoor Security Camera (with magnetic bracket) x 1
- Күн панели x 1
- Кубат кабели x 1
- Бурамалар x 3
- Анкерлер x 3
- Негизги плита x 1
- Сленка x 1
- Колдонмо колдонмо x 1

2.1-сүрөт: Камтылган компоненттер
2.2 Камера диаграммасы

Figure 2.2: ieGeek S2 Camera and Solar Panel
The camera unit features a lens, PIR sensor, LED lights for night vision, and a microphone/speaker for two-way audio. The magnetic base allows for flexible positioning.
3. Орнотуу
3.1 Камераны заряддоо
Before initial use, fully charge the camera's built-in battery using the provided power cable. Connect the cable to the camera's charging port and a standard USB power adapter (not included). The camera can also be continuously charged by the solar panel after installation.
3.2 Колдонмону жүктөп алуу жана каттоо эсебин каттоо
Download the ieGeek Cam app from your smartphone's app store (iOS or Android). Follow the on-screen instructions to create an account and log in.
3.3 Камераны жупташтыруу
- Open the ieGeek Cam app and tap 'Add Device'.
- Power on the camera. The camera will enter pairing mode, indicated by a flashing LED.
- Камераны 2.4 ГГц Wi-Fi тармагыңызга туташтыруу үчүн колдонмонун көрсөтмөлөрүн аткарыңыз. Эскертүү: 5GHz Wi-Fi колдоого алынбайт.
- Scan the QR code displayed on your phone with the camera lens. A confirmation sound will indicate successful pairing.

Figure 3.1: App Pairing Interface
3.4 Орнотуу ыкмалары
The ieGeek S2 camera offers flexible installation options, primarily utilizing its powerful magnetic mount. No drilling or complex wiring is required.
- Магниттик орнотуу: Simply attach the camera to any suitable metallic surface. The strong magnet ensures a secure hold. This method allows for quick repositioning.
- Жабышкак орнотуу: For non-metallic surfaces, use the provided adhesive tape to attach the base plate to a clean, flat area. Then, magnetically attach the camera to the base plate.
- Бураманы орнотуу: For permanent installation or on rough surfaces, use the included screws and anchors to secure the base plate. Then, magnetically attach the camera.

Figure 3.2: Magnetic Installation Example

Figure 3.3: Multiple Magnetic Installation Options
3.5 Күн панелин орнотуу
Mount the solar panel in a location that receives direct sunlight for several hours a day to ensure continuous charging. Connect the solar panel cable to the camera's charging port. The upgraded 2.4W solar panel offers 40% higher charging efficiency compared to previous models.

3.4-сүрөт: Күн панелинин туташуусу
4. Камераны иштетүү
4.1 Live View жана PTZ Control
Access the live feed through the ieGeek Cam app. The camera supports 300° horizontal pan rotation, allowing you to adjust the viewing angle remotely from your smartphone. This feature, combined with the 130° ultra-wide angle lens, provides extensive coverage with minimal blind spots.

Figure 4.1: PTZ Pan Function and Live View
4.2 PIR адамдарды аныктоо жана эскертүүлөр
The integrated PIR thermal sensor accurately detects human movement, sending real-time alerts to your smartphone. It is designed to minimize false alarms from non-human movements like falling leaves or insects, achieving up to 99% detection accuracy. You can define multiple detection zones within the app.
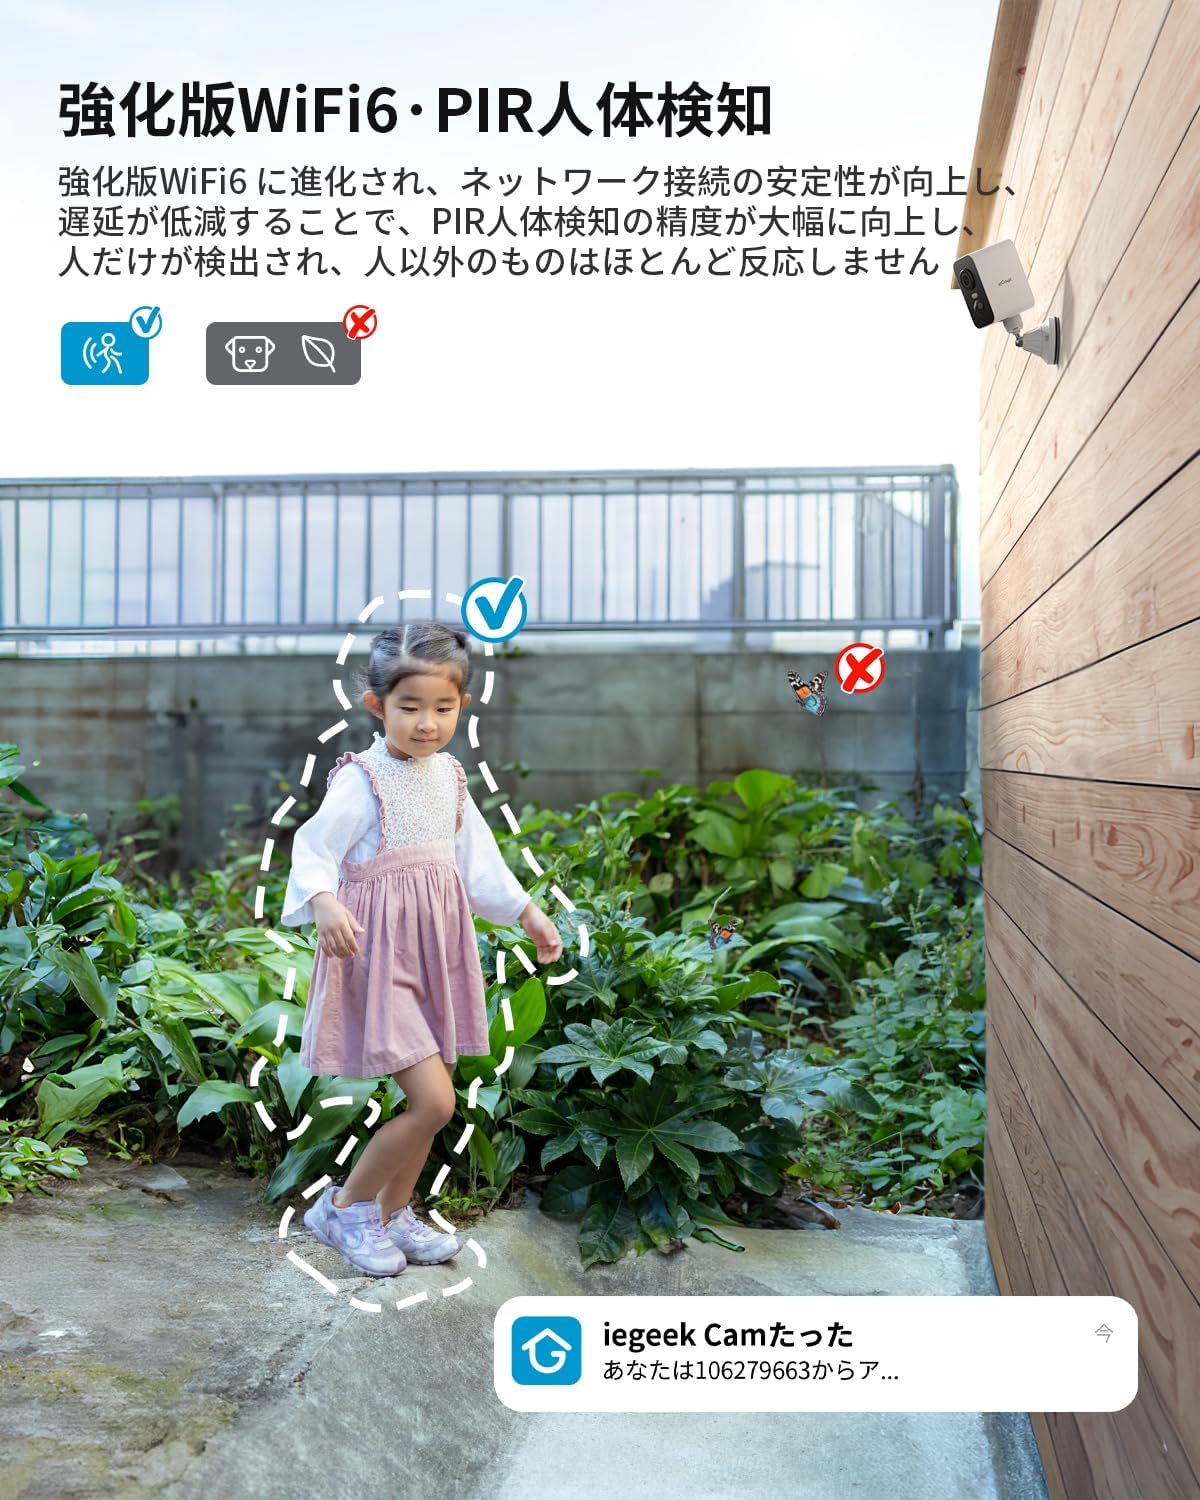
Figure 4.2: PIR Human Detection
4.3 Түнкү көрүү жана түстүү түнкү көрүү
The camera features infrared lamps and white LED lights. It automatically switches to black and white night vision mode, providing clear images up to 15 meters in low light. When human movement is detected, the camera can activate its white LED lights to capture full-color video, enhancing security and providing clearer evidence.

4.3-сүрөт: Түнкү көрүү режимдери
4.4 Two-Way Audio and Deterrent Alarm
With a built-in 360° omnidirectional microphone and speaker, and low-noise reduction technology, the camera supports clear two-way communication. You can speak with visitors or deter intruders remotely. If an intruder enters a defined detection area, the camera can automatically activate an audible alarm and flashing lights to deter them.

4.4-сүрөт: Эки тараптуу аудио байланыш

Figure 4.5: Detection Area and Audible Alarm
4.5 Жазуу жана сактоо
The camera records events triggered by motion detection. Footage can be stored on a local MicroSD card (up to 128GB, sold separately) or via cloud storage (7 days of 6-second recording free). When the memory card is full, the camera will automatically overwrite older recordings. This ensures continuous recording without interruption.

4.6-сүрөт: Жаздыруу жана сактоо параметрлери
4.6 Alexa интеграциясы
The ieGeek S2 camera is compatible with Alexa. Link your camera with Alexa to enable voice control, allowing you to check the status of your garden, entrance, or garage hands-free while performing other tasks.

Figure 4.7: Alexa Voice Control
4.7 Үй-бүлөлүк бөлүшүү
You can easily share access to your camera's live feed and recordings with family members or friends by scanning a QR code within the app. This allows multiple users to monitor the property simultaneously.

Figure 4.8: Camera Sharing with Family
5. Техникалык тейлөө
5.1 Батареяны башкаруу
The camera is equipped with a large-capacity battery. While the solar panel provides continuous charging, it is recommended to periodically check the battery level via the app. If the camera is installed in a location with insufficient sunlight, you may need to remove it (thanks to the magnetic mount) and charge it via the USB power cable.
5.2 Тазалоо
Regularly clean the camera lens and solar panel to ensure optimal performance. Use a soft, damp cloth to gently wipe away dust and dirt. Avoid using harsh chemicals or abrasive materials that could damage the surfaces.
5.3 Аба ырайына туруктуулук
The camera has an IP65 waterproof rating and is designed to operate in temperatures ranging from -20°C to 50°C. This ensures excellent durability against rain, sun, wind, and snow. However, extreme weather conditions may temporarily affect performance or battery life.

5.1-сүрөт: Бардык аба ырайына туруктуулук
6. Кыйынчылыктарды
6.1 Камера Wi-Fiга туташпай жатат
- Wi-Fi тармагыңыз 2.4 ГГц экенин текшериңиз. Камера 5 ГГц Wi-Fi'ды колдоого албайт.
- Check the Wi-Fi signal strength at the camera's installation location. Move the camera closer to the router if the signal is weak.
- Колдонмого киргизилген Wi-Fi сырсөзү туура экенин текшериңиз.
- Restart your router and the camera, then attempt pairing again.
6.2 Сүрөттүн сапаты начар
- Чаңды же тактарды кетирүү үчүн камеранын линзасын тазалаңыз.
- Ensure adequate lighting in the surveillance area, especially during night vision.
- Интернет байланышыңыздын ылдамдыгын текшериңиз. Жай байланыш түз эфирдин сапатына таасир этиши мүмкүн.
6.3 Көп кездешкен жалган сигналдар
- Adjust the PIR detection sensitivity in the app.
- Define specific detection zones to exclude areas with frequent non-human movement (e.g., trees swaying, busy roads).
- Ensure the camera is not pointing directly at heat sources or reflective surfaces.
6.4 Батарея бат эле түгөнөт
- Күн панели жетиштүү түз күн нурун алып жатканын текшериңиз.
- Кыймылды аныктоо окуяларынын жыштыгын азайтыңыз же түз көрүңүз view access, as these consume battery power.
- Check the camera's operating temperature. Extreme cold can reduce battery efficiency.
7. Техникалык шарттар
| Өзгөчөлүк | Спецификация |
|---|---|
| Модель аты | S2 |
| Бренд | ieGeek |
| Түс | Ак |
| Зымсыз байланыш | Wi-Fi (2.4 ГГц гана), Bluetooth |
| Орнотуу түрү | Магниттик, жабышчаак, бурама менен бекиткич |
| Түнкү көрүү диапазону | 15 метр |
| Продукциянын өлчөмдөрү | 17.5 x 6.6 x 5.5 см |
| Продукт Салмагы | 670 г |
| Негизги өзгөчөлүктөрү | HD Resolution, PTZ Pan (300° horizontal), Image Sensor, Two-Way Audio, Night Vision, PIR Human Detection |
| Батарея | Built-in, Rechargeable |
| Ички/тышкы колдонуу | Сыртта |
| Шайкеш түзмөктөр | Смартфон (iOS/Android) |
| Power Source | Батарея менен иштейт, күн энергиясы менен иштейт |
| Видео тартуунун резолюциясы | 1296p (2304 x 1296) |
| Суу өткөрбөйт рейтинги | IP65 |
| Иштөө температурасы | -20°Cден 50°Cге чейин |
8. Кепилдик жана колдоо
8.1 Кепилдик маалыматы
The ieGeek S2 Outdoor Solar Security Camera comes with a standard 1-year warranty from the date of purchase. ieGeek is committed to 100% high quality and reliability. A special 2-year extended warranty plan is also available, potentially extending your total warranty coverage to a maximum of 3 years. Please refer to the product packaging or ieGeek's official website for details on how to register for the extended warranty.
8.2 Техникалык колдоо
If you encounter any issues or have questions regarding your ieGeek S2 camera, please contact our support team:
- Official ieGeek Email: Refer to the email address provided in this instruction manual or on the product packaging.
- Amazon кардарларды тейлөө: Go to your Amazon "Order History," select your purchase, and click "Ask a question." Our team will respond promptly, typically within 1 business day.


