1. Киришүү
This manual provides instructions for the setup, operation, and maintenance of your Apple Magic Mouse (USB-C White). The Magic Mouse is a wireless, rechargeable input device designed for use with Apple Mac computers, featuring a Multi-Touch surface for intuitive gesture control.
Кутуда эмне бар
- Apple Magic Mouse (USB-C White)
- USB-C кубаттоочу кабели (токулган)

Image: The included USB-C Charge Cable, used for charging and initial pairing of the Magic Mouse.
2. Орнотуу
2.1 Charging the Magic Mouse
The Magic Mouse comes with a rechargeable lithium-ion battery. Before first use, or if the battery is low, connect the included USB-C Charge Cable to the USB-C port located on the түбү of the mouse and to a USB-C port on your Mac or a USB-C power adapter. A full charge typically provides power for about a month or more of use. The mouse cannot be used while charging due to the port's placement.
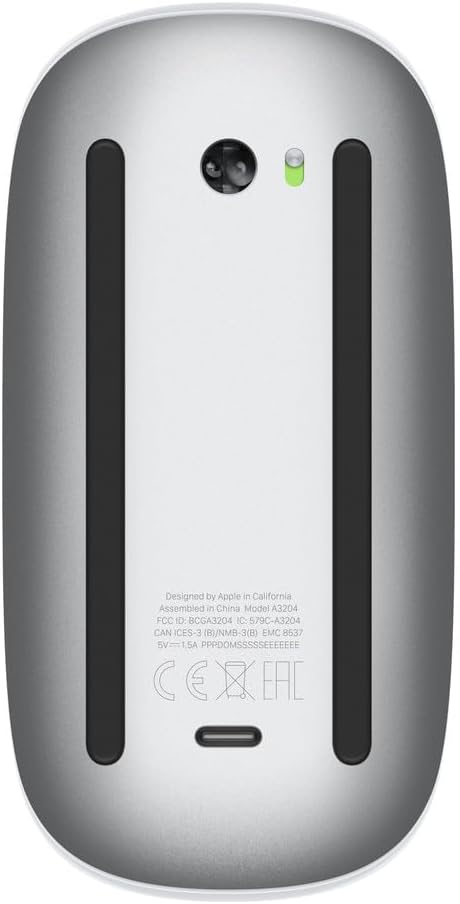
Image: The underside of the Magic Mouse, highlighting the USB-C charging port and power switch.
2.2 Pairing with Your Mac
- Ensure your Mac's Bluetooth is turned on. You can check this in System Settings (macOS Ventura or later) or System Preferences (earlier macOS versions) under Bluetooth.
- Turn on the Magic Mouse using the switch on its bottom surface.
- Connect the Magic Mouse to your Mac using the USB-C Charge Cable. This will automatically pair the mouse with your Mac.
- Once paired, you can disconnect the cable for wireless use. The mouse should appear in your Mac's Bluetooth device list.
- If the mouse does not pair automatically, ensure it is charged and try connecting the cable again. You can also manually add it via Bluetooth settings.

Сүрөт: Жогорку view of the Magic Mouse, showcasing its Multi-Touch surface.
3. Operating the Magic Mouse
The Magic Mouse features a seamless Multi-Touch surface that allows for various gestures in addition to standard cursor control.
3.1 Негизги функциялар
- Click: Press down on the front part of the mouse to perform a left-click.
- Right-Click (Secondary Click): By default, a click on the right side of the mouse performs a secondary click. This can be customized in System Settings/Preferences.
- Көз салуу: Move the mouse across a flat surface to control the cursor on your screen. The optimized foot design ensures smooth gliding.
3.2 Көп тийүү жаңсоолору
The Multi-Touch surface enables intuitive gestures:
- Жылдыруу: Swipe one finger up or down on the surface to scroll vertically. Swipe left or right to scroll horizontally.
- Барактарды сүрүңүз: Swipe one finger left or right to navigate between pages in web browsers or documents.
- Чоңойтуу: Double-tap with one finger to zoom in and out of web pages or PDFs.
- Толук экрандуу колдонмолордун ортосунда серпиңиз: Swipe two fingers left or right to switch between full-screen applications.
- Миссияны көзөмөлдөө: Double-tap with two fingers to open Mission Control.
These gestures can be customized in your Mac's System Settings (or System Preferences) under "Mouse."

Сүрөт: Side profile of the Magic Mouse, illustrating its ergonomic design.
4. Техникалык тейлөө
4.1 Cleaning the Magic Mouse
To clean your Magic Mouse, first turn it off using the switch on the bottom. Use a soft, lint-free cloth slightly dampened with water to wipe the exterior surfaces. Avoid getting moisture into any openings. Do not use aerosol sprays, solvents, or abrasives.
4.2 Батареяга кам көрүү
The Magic Mouse uses a built-in rechargeable lithium-ion battery. For optimal battery life, avoid fully discharging the battery frequently. Charge the mouse when prompted by your Mac or when the battery indicator light (if visible) suggests a low charge. Store the mouse at room temperature when not in use for extended periods.
5. Кыйынчылыктарды
5.1 Mouse Not Connecting or Responding
- Күчтү текшерүү: Ensure the mouse is turned on and sufficiently charged. Connect the USB-C cable to charge it.
- Bluetooth: Verify that Bluetooth is enabled on your Mac. Go to System Settings > Bluetooth.
- Кайра жупташтыруу: If the mouse is listed but not connecting, try removing it from the Bluetooth device list and re-pairing it by connecting the USB-C cable.
- Интерференция: Move the mouse closer to your Mac and away from potential sources of wireless interference (e.g., Wi-Fi routers, other Bluetooth devices).
- Кайра баштоо: Restart your Mac and then try connecting the mouse again.
5.2 Gestures Not Working
- Орнотууларды текшерүү: Go to System Settings > Mouse and ensure that the desired gestures are enabled.
- Таза бети: Ensure the Multi-Touch surface is clean and free of debris.
- Микропрограмма: Ensure your macOS is up to date, as this can sometimes resolve peripheral issues.
5.3 Cursor Movement Issues
- Бети: Use the mouse on a clean, opaque, non-reflective surface. Glass or highly reflective surfaces may affect tracking.
- Сенсор: Чычкандын астыңкы жагындагы оптикалык сенсордо тоскоолдуктар же кирлер бар-жогун текшериңиз.
- Көз салуу ылдамдыгы: Adjust the tracking speed in System Settings > Mouse.
6. Техникалык шарттар
| Модель номери | MXK53AM/A |
| ASIN | B0DL72PK1P |
| Бренд | Apple |
| Түс | Ак |
| Байланыш технологиясы | Bluetooth |
| Кыймылды аныктоо технологиясы | Оптикалык |
| Өзгөчөлүктөр | Lightweight, Portable, Rechargeable, Multi-Touch Surface, Wireless |
| Продукциянын өлчөмдөрү | 5.12 x 2.91 x 1.42 дюйм |
| Элемент Салмагы | 8 унция |
| Батареялар | 1 литий-иондук батарейка (кошулган) |
| Өндүрүүчү | Apple |
| Дата биринчи жеткиликтүү | 28-октябрь, 2024-жыл |
7. Кепилдик жана колдоо
7.1 Продукциянын кепилдиги
Your Apple Magic Mouse is covered by a one-year limited warranty from Apple against defects in materials and workmanship. This warranty is in addition to rights provided by consumer law. For full details, please refer to the warranty information included with your product or visit the official Apple webсайт.
7.2 Техникалык колдоо
For technical assistance, troubleshooting, or service, please visit the official Apple Support website or contact Apple Support directly. You can find comprehensive support resources, including articles, forums, and contact options, at support.apple.com.


