1. Киришүү
The VTech DJ Studio Magic Light is an interactive mixing table designed to introduce children aged 3 to 7 years to the world of music and creativity. This manual provides essential information on how to set up, operate, and maintain your DJ Studio Magic Light, ensuring a safe and enjoyable experience.
With over a thousand unique musical combinations, educational games, and a recording function, this device allows young aspiring DJs to explore different music styles and create their own tracks.
Коопсуздук эскертүүсү:
Not suitable for children under 36 months due to small parts that could be ingested.
2. Продукт бүтүп калдыview
Familiarize yourself with the main components of your VTech DJ Studio Magic Light.
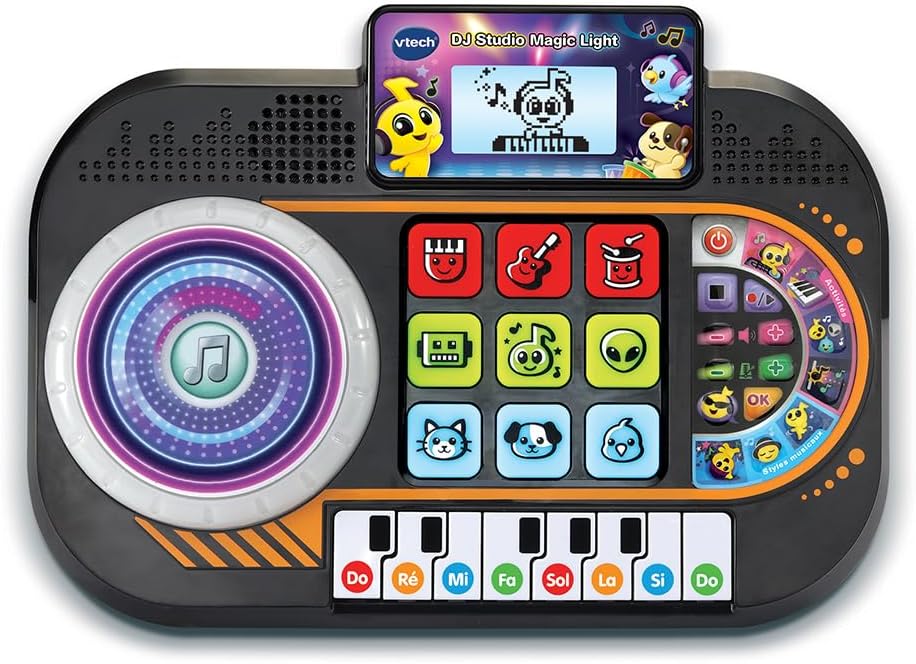
Сүрөт 2.1: Алдыңкы view of the VTech DJ Studio Magic Light, showing the scratch disk, control pads, screen, and piano keys.
- Scratch Disk: Large, illuminated disk for adding sound effects and scratching.
- Control Pads: Nine light-up pads for selecting instruments, characters, and mixing tracks.
- LCD экран: Backlit display showing animations, rhythm patterns, and game progress.
- Пианино баскычтары: Eight piano keys for playing melodies and engaging in educational games.
- Үндү көзөмөлдөө: Жалпы үн деңгээлин тууралайт.
- Темпти көзөмөлдөө: Adjusts the speed of the music.
- DJ Button: Activates DJ mode features.
- Жаздыруу баскычы: Initiates and stops recording of mixes.
3. Орнотуу
3.1 Батареяны орнотуу
The DJ Studio Magic Light requires 3 LR6-AA batteries (included). Follow these steps for proper battery installation:
- Locate the battery compartment on the underside of the unit.
- Бурагычты колдонуп, батарея бөлүмүнүн капкагындагы бураманы бошотуп, капкакты алып салыңыз.
- Insert 3 new LR6-AA batteries, ensuring correct polarity (+/-) as indicated inside the compartment.
- Батарея бөлүмүнүн капкагын кайра ордуна коюп, бураманы бекем бекитиңиз.
Эскертүү: Always use new batteries of the same type. Do not mix old and new batteries or different types of batteries. Remove batteries if the unit will not be used for an extended period.
3.2 Баштапкы күйгүзүү
After installing the batteries, press the Power button (usually located on the top right of the unit) to turn on the DJ Studio Magic Light. The screen will light up, and a welcome sound will play.
4. Иштөө нускамалары
4.1 Негизги функциялар
- Күйгүзүү/өчүрүү: басыңыз Кубат баскычы to turn the unit on or off. The toy features an automatic shut-off function to preserve battery life if left inactive.
- Үндү көзөмөлдөө: колдонуу Үн баскычтары (usually + and -) to adjust the sound output.
- Темпти көзөмөлдөө: колдонуу Tempo buttons to increase or decrease the speed of the music.
4.2 DJ Mode and Creative Play
In DJ Mode, children can experiment with various sounds and create their own mixes.
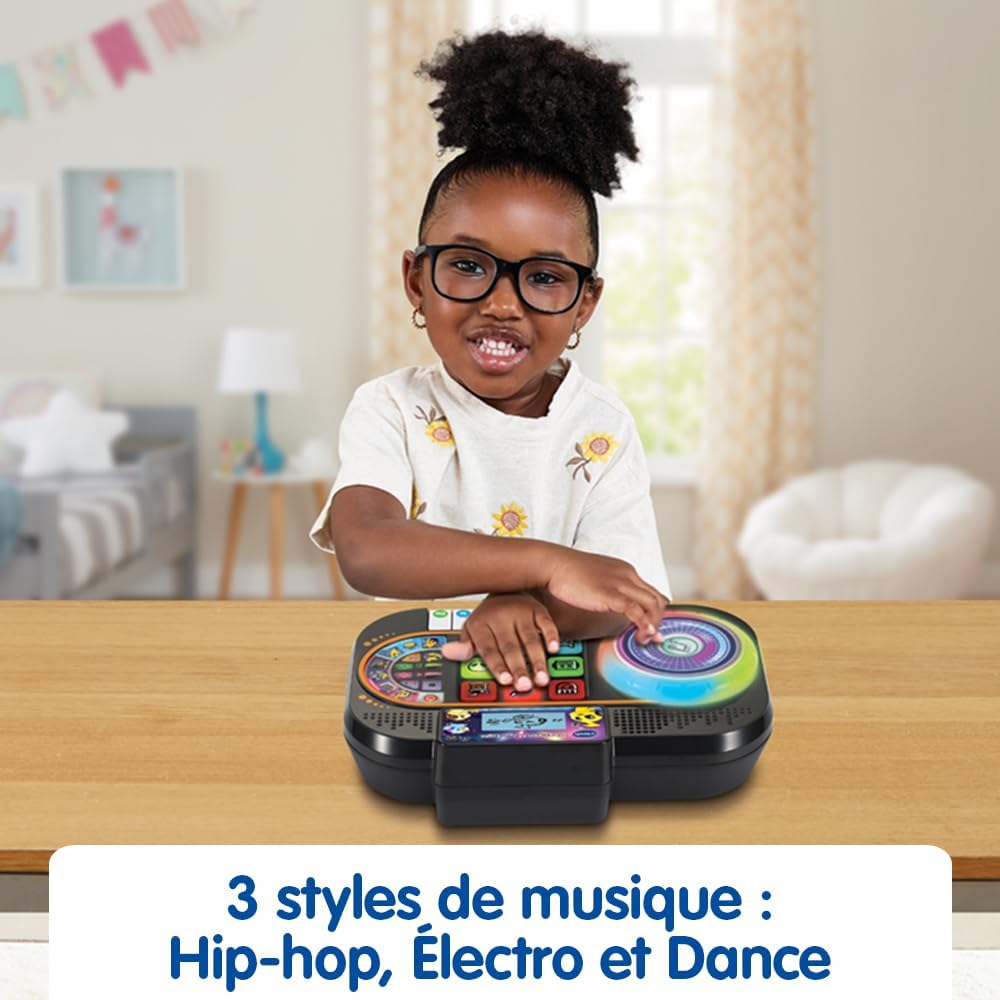
Figure 4.1: A child's hands engaging with the interactive pads and scratch disk, demonstrating active play.
- Scratch Disk: Rotate the illuminated scratch disk to add sound effects and create scratching sounds, mimicking a real DJ.
- Control Pads: Press the nine light-up pads to select different instruments and characters. Combine them to form a musical group and mix up to four musical tracks simultaneously.
- Музыка стилдери: Explore 9 songs and 27 melodies across various styles including Hip-hop, Electro, and Dance.
4.3 Educational Games
The DJ Studio Magic Light includes educational games designed to teach music notes and improve rhythm.

Figure 4.2: The screen displays a character playing the piano, guiding the child through rhythm exercises.
- Rhythm Reproduction: When a rhythm pattern appears on the screen, reproduce it using the piano keys.
- Progressive Levels: Successfully playing at least 50% of the notes correctly advances the child to the next level. The game is won after 4 successful sequences.
4.4 Жазуу функциясы
Children can record their own musical creations in DJ and Creative game modes.
- басыңыз Жазуу баскычы to start recording. All sounds from the scratch disk, piano keys, DJ button, and tempo changes will be saved.
- басыңыз Жазуу баскычы жазууну токтотуу үчүн дагы.
- колдонуу Ойнотуу баскычы (if available, or re-press record button in some models) to listen to the recorded track.
4.5 Screen and Light Adjustments
- Scratch Disk Lights: The illuminated effects of the scratch disk can be deactivated. Refer to the specific button or setting on your unit for this function.
- LCD Screen Brightness: The brightness of the backlit LCD screen can be adjusted for optimal viewing.
5. Техникалык тейлөө
5.1 Тазалоо
To keep your DJ Studio Magic Light clean, wipe the surface with a slightly damp cloth. Do not use harsh chemicals or abrasive cleaners. Ensure the unit is dry before storage or next use.
5.2 Батареяга кам көрүү
Always remove exhausted batteries promptly. If the unit will not be used for an extended period, remove the batteries to prevent leakage and damage.
5.3 Сактоо
Store the DJ Studio Magic Light in a cool, dry place away from direct sunlight and extreme temperatures.
6. Кыйынчылыктарды
| Көйгөй | Мүмкүн себеп | Чечим |
|---|---|---|
| Түзмөк күйбөйт. | Батареялар аз же туура эмес орнотулган. | Туура полярдуулукту камсыз кылуу менен батарейкаларды жаңысына алмаштырыңыз. |
| Үн жок же аз үн. | Үн өтө төмөн же үнсүз. | Increase the volume using the Volume + button. Check battery level. |
| Жарыктар иштебей жатат. | Lights may be deactivated or batteries are low. | Check settings to ensure lights are enabled. Replace batteries. |
| Unit freezes or behaves erratically. | Temporary electronic malfunction. | Turn the unit off and then on again. If problem persists, remove batteries for a few minutes and reinsert. |
7. Техникалык шарттар
| Өзгөчөлүк | Деталь |
|---|---|
| Продукциянын өлчөмдөрү (L x W x Y) | 27.5 x 19.8 x 6.3 см |
| Салмагы | 599 грамм |
| Сунушталган Жаш | 36 ай - 7 жыл |
| Educational Values | Learning music notes, improving rhythm, discovering different music styles |
| Модель номери | 80-581405 |
| Даана саны | 1 |
| Батареялар талап кылынат | Ооба (3 x LR6-AA) |
| Батареялар камтылган | Ооба |
| Негизги материал | Пластик |
| Түс | Кара |
8. Кепилдик жана колдоо
For warranty information and customer support, please refer to the warranty card included with your product or visit the official VTech webсайт. Сатып алганыңыздын далили катары сатып алуу дүмүрчөгүңүздү сактаңыз.
VTech is committed to providing high-quality products. If you encounter any issues not covered in this manual, please contact VTech customer service for assistance.
Көбүрөөк маалыматты жана колдоону төмөнкү даректен таба аласыз: www.vtech.com


