Introduction
This manual provides detailed instructions for the safe and efficient operation of your Bisofice H10 PDA Terminal. Please read this manual thoroughly before using the device and retain it for future reference.
The Bisofice H10 is a versatile handheld PDA terminal featuring Android 14, an Octa-Core 2.3 GHz processor, a 1D/2D barcode scanner, a 58mm thermal receipt printer, NFC functionality, and comprehensive connectivity options including 4G, Wi-Fi, GPS, and Bluetooth. It is designed for various applications such as retail, warehousing, and logistics.

Image: The Bisofice H10 PDA Terminal, showcasing its integrated thermal printer issuing a receipt and its touchscreen interface with various applications.

Image: A visual representation of the H10's core specifications, including its Android 14 operating system, Octa-Core 2.3GHz CPU, and 3GB RAM + 32GB ROM memory configuration.
Пакеттин мазмуну
Кутучаны ачканда таңгактын ичиндегисин текшериңиз. Эгерде кандайдыр бир буюмдар жок болсо же бузулуп калса, кардарларды колдоо кызматына кайрылыңыз.
- Bisofice H10 PDA Terminal
- Rechargeable Lithium Battery (pre-installed or separate)
- Power Adapter (AC 100~240V input, DC 5V/2A output)
- USB Type-C кабели
- Thermal Paper Roll (one pre-installed or included)
- Колдонуучунун Колдонмосу (бул документ)
Түзмөк бүттүview
Familiarize yourself with the various components and ports of the H10 PDA Terminal.

Image: A detailed diagram illustrating the front and back views of the H10 terminal, highlighting the printer, scanner, camera, volume buttons, power button, Type-C port, SIM/SD card slots, and battery compartment.
- Принтер: Integrated thermal printer for receipts.
- Professional 2D Scanner: For reading 1D and 2D barcodes.
- Камера: Rear 5MP Auto Focus with Flash LED.
- Үн баскычтары: Adjust device volume.
- Кубат баскычы: Power on/off, sleep/wake.
- Тип-C Port: Заряддоо жана маалыматтарды өткөрүү үчүн.
- Nano SIM слоту: For cellular network connectivity.
- Micro SIM Slot: For cellular network connectivity.
- Micro SD оюгу: Кеңейтилүүчү сактагыч үчүн.
- Micro PSAM Slot: For secure access modules (if applicable).
- Батарея: Кайра заряддалуучу литий батареясы.
Орнотуу колдонмосу
1. Батареяны орнотуу жана заряддоо
The H10 PDA Terminal comes with a 7.7V/3000mAh (equal to 3.85V/6000mAh) rechargeable lithium battery. It may be pre-installed or require installation.
- If the battery is not installed, open the battery compartment cover on the back of the device.
- Insert the lithium battery, ensuring the contacts align correctly.
- Батарея уясынын капкагын бекем жабыңыз.
- Connect the USB Type-C cable to the device's Type-C port and the other end to the power adapter.
- Plug the power adapter into a wall outlet. The device will begin charging.

Image: The H10 terminal with its battery compartment visible, indicating a 3000mAh rechargeable lithium battery and a charging icon.
2. SIM картаны жана Micro SD картаны орнотуу
To utilize cellular data or expand storage, install the appropriate cards.
- Аппараттын өчүрүлгөнүн текшериңиз.
- Locate the SIM/SD card slots, typically under the battery cover or a dedicated slot.
- Carefully insert your Nano SIM, Micro SIM, and/or Micro SD card into their respective slots, following the orientation indicated on the device.
- Close any covers securely.
3. Баштапкы күйгүзүү
Press and hold the Power button on the side of the device until the screen lights up. Follow the on-screen prompts for initial Android 14 setup.
Иштөө нускамалары
1. Күйгүзүү/өчүрүү жана уйку режими
- Күйгүзүү: Түзмөк титиреп, экран күйгүчө Кубат баскычын басып, кармап туруңуз.
- Өчүрүү: Press and hold the Power button until a power menu appears. Select "Power Off".
- Уйку/Ойгонуу: Түзмөктү уйку режимине өткөрүү же ойготуу үчүн Кубат баскычын кыскача басыңыз.
2. Using the 1D/2D Barcode Scanner
The H10 features an integrated scanner for efficient data capture.
- Түзмөктө сканерлөө колдонмосун ачыңыз.
- Сканер терезесин (түзмөктүн жогору жагында жайгашкан) штрих-кодго багыттаңыз.
- Штрихкод сканердин талаасында экенин текшериңиз view. The device will emit a sound or vibrate upon successful scan.
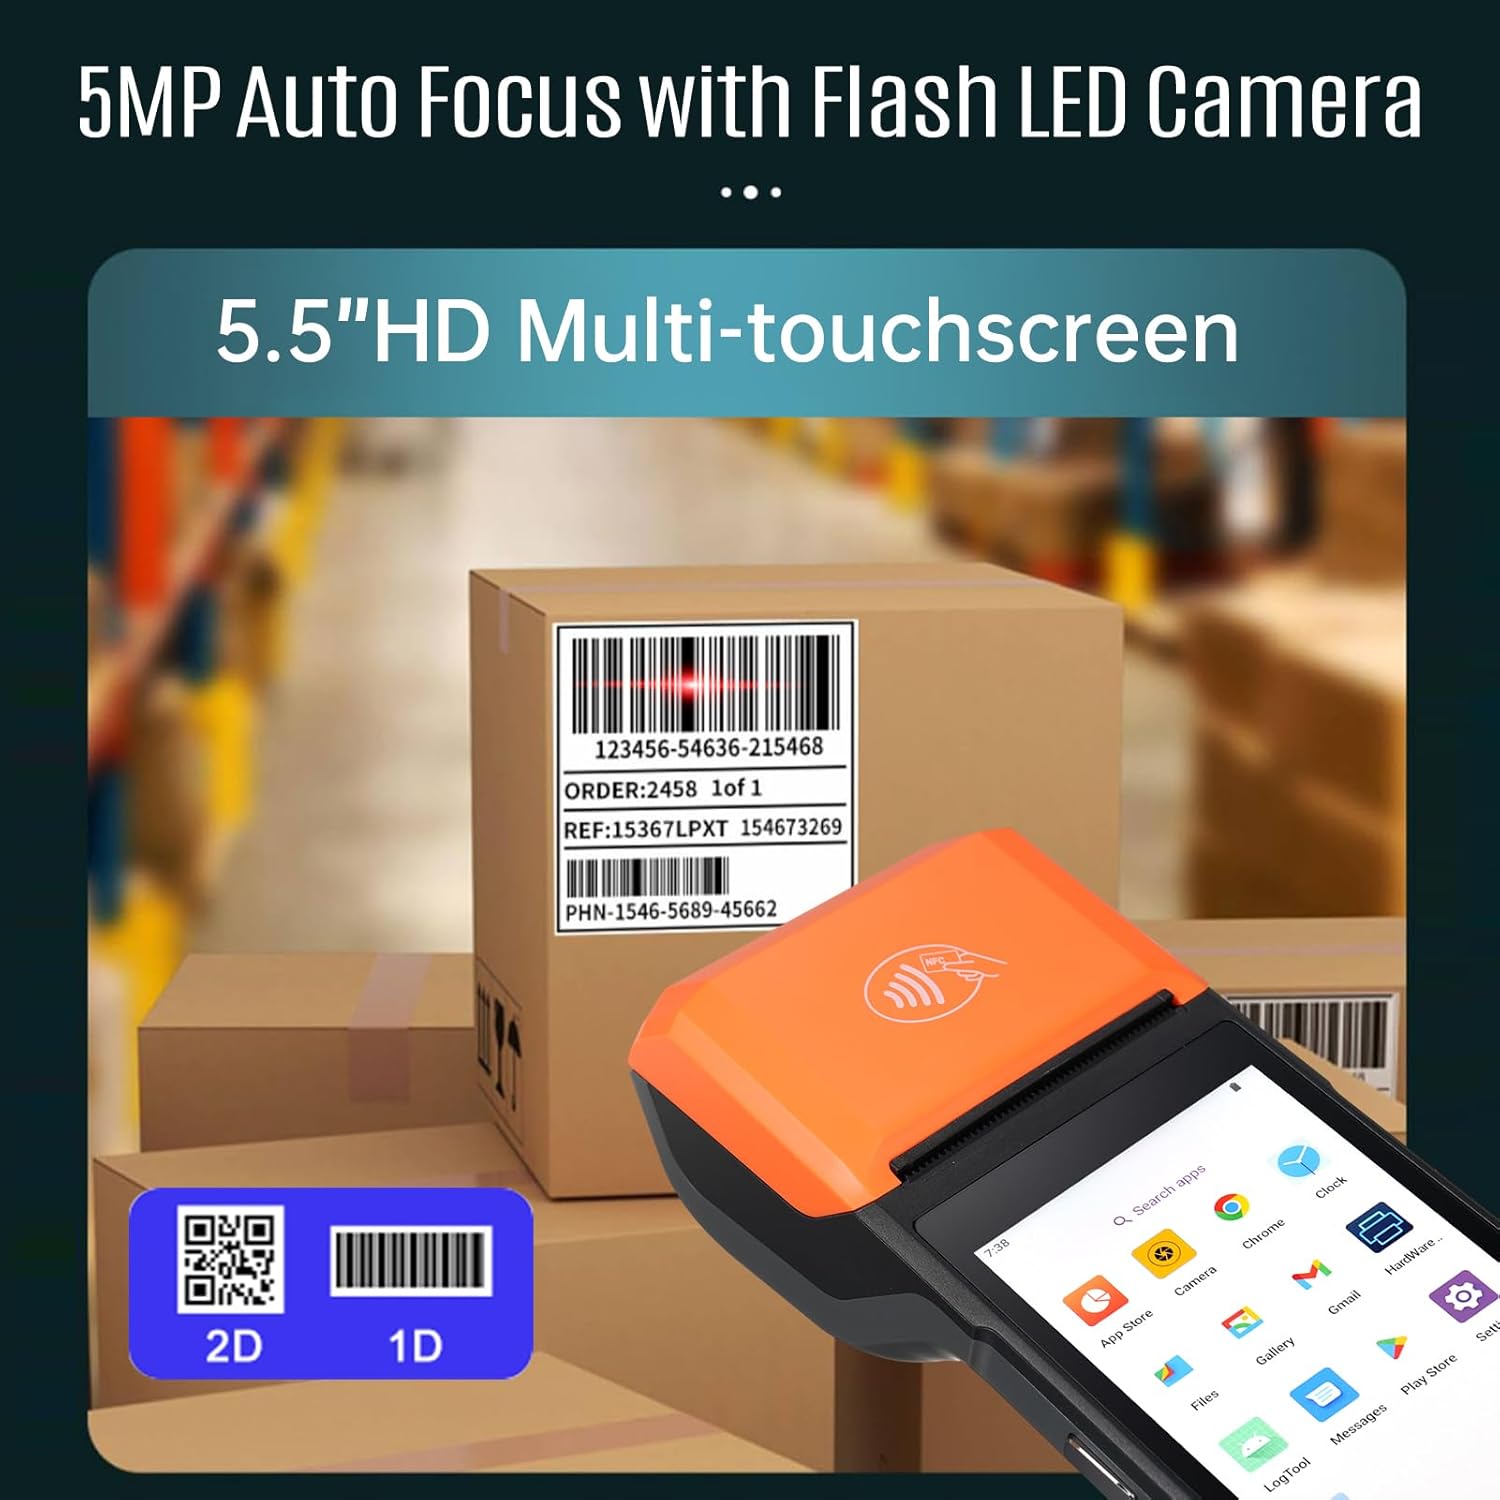
Image: The H10 terminal positioned to scan a 1D barcode on a cardboard box, demonstrating its scanning capability for both 1D and 2D codes.
3. Operating the Thermal Receipt Printer
The built-in 58mm thermal printer allows for on-the-go receipt printing.
- Ensure a thermal paper roll is correctly installed (refer to Maintenance for paper replacement).
- From your application, select the print option.
- Confirm print settings if prompted. The receipt will automatically print from the top slot.
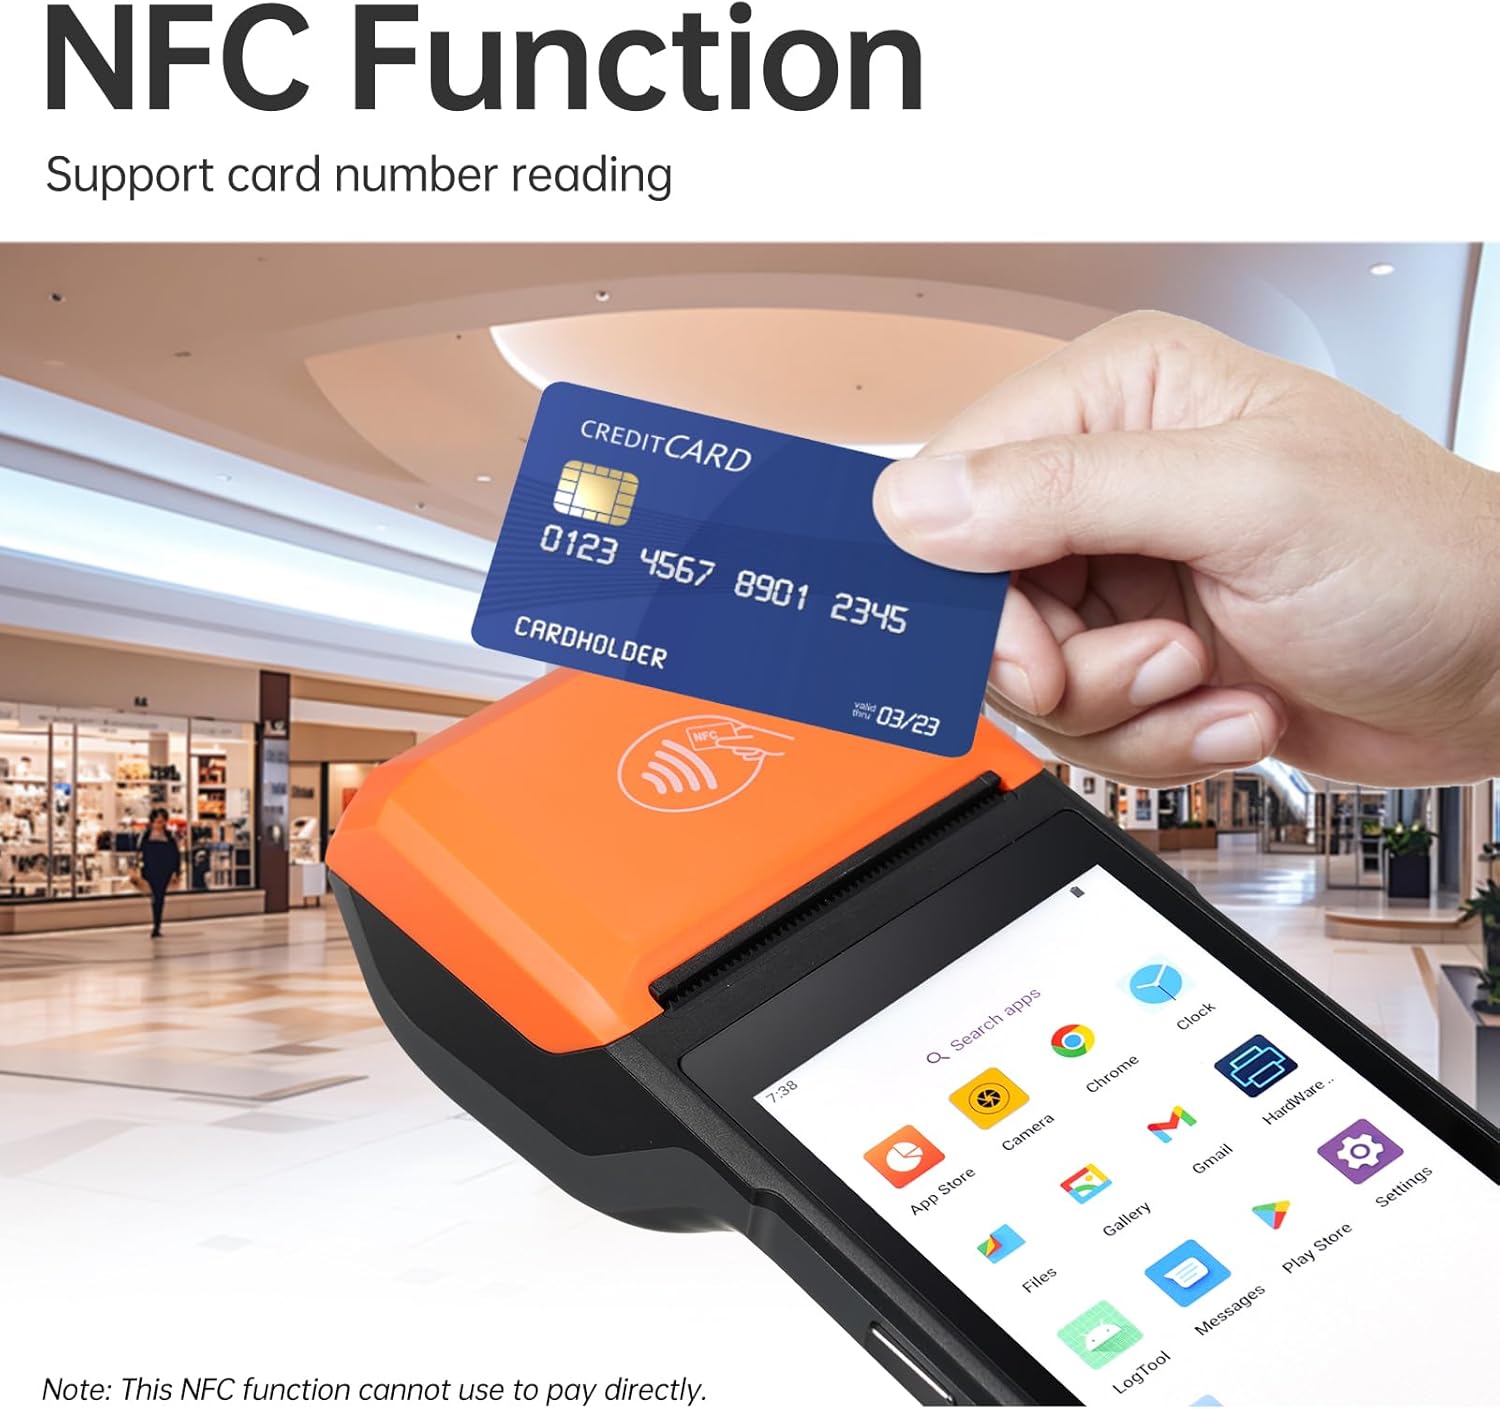
Image: A close-up of the H10's integrated thermal printer, detailing its specifications: 80mm/s printing speed, 58mm paper width, and a recommended 40mm paper roll diameter.
4. Using NFC Functionality
The H10 supports NFC for reading compatible cards (Type A, Type B, Mifare, Felica).
- Open an application that utilizes NFC functionality.
- Hold the NFC-enabled card close to the NFC detection area on the device (usually near the top or back).
- The device will read the card data, and the application will process it accordingly.
Note: This NFC function is primarily for data reading and may not support direct payment transactions without specific application integration.

Image: A hand holding a credit card near the H10 terminal, illustrating its NFC card reading capability.
5. Connectivity (Wi-Fi, 4G, Bluetooth, GPS)
The H10 offers multiple connectivity options:
- Wi-Fi: Жеткиликтүү зымсыз тармактарга туташуу үчүн Орнотуулар > Тармак жана Интернет > Wi-Fi бөлүмүнө өтүңүз.
- 4G: Ensure a valid SIM card is installed. Go to Settings > Network & Internet > Mobile network to enable mobile data.
- Bluetooth: Go to Settings > Connected devices > Bluetooth to pair with Bluetooth peripherals.
- GPS: Location services are enabled via Settings > Location.

Image: The H10 terminal overlaid on a global map, with icons representing 2G, 3G, 4G, Bluetooth, Wi-Fi, and GPS connectivity.
Техникалык тейлөө
1. Аспапты тазалоо
Оптималдуу аткарууну жана көрүнүштү сактоо үчүн:
- Бир аз жумшак, түксүз кездемени колдонуңуз dampened with water or a screen cleaner to wipe the screen and body.
- Катуу химиялык заттарды, абразивдүү тазалагычтарды же эриткичтерди колдонбоңуз.
- Порттарга же тешиктерге эч кандай суюктук кирбесин текшериңиз.
- For the scanner window, use a soft, dry cloth to avoid scratching.
2. Thermal Paper Roll Replacement
When the printer runs out of paper or the print quality degrades, replace the thermal paper roll.
- Gently open the printer cover located at the top of the device.
- Remove the empty paper roll core, if any.
- Insert a new 58mm thermal paper roll, ensuring the paper feeds out from the bottom of the roll and into the printer mechanism.
- Pull a small amount of paper out past the printer slot.
- Принтердин капкагын ордуна чыкылдаган үн чыкканча бекем жабыңыз.

Image: A visual guide demonstrating the process of opening the printer compartment and inserting a new thermal paper roll into the H10 terminal.
Проблемаларды чечүү
| Көйгөй | Мүмкүн себеп | Чечим |
|---|---|---|
| Түзмөк күйбөйт. | Low battery or battery not installed correctly. | Charge the device for at least 30 minutes. Ensure the battery is properly seated. |
| Принтер басылбай жатат. | No paper, paper jammed, or printer cover not closed. | Replace paper roll. Clear any paper jams. Ensure printer cover is securely closed. |
| Штрихкод сканери иштебей жатат. | Scanner application not open, barcode damaged, or poor lighting. | Open the scanning application. Ensure barcode is clear and well-lit. Try scanning a different barcode. |
| Wi-Fi байланышы жок. | Wi-Fi is off, incorrect password, or out of range. | Check Wi-Fi settings. Re-enter password. Move closer to the Wi-Fi router. |
| Түзмөк жай же жооп бербей жатат. | Too many applications running, low memory, or software glitch. | Close unnecessary applications. Restart the device. Clear cache if possible. |
Техникалык шарттар
Below are the key technical specifications for the Bisofice H10 PDA Terminal.

Image: A comprehensive table outlining the technical specifications of the H10 PDA Terminal, including OS, processor, display, memory, camera, printer, card slots, network, battery, adapter, ports, environment, dimensions, weight, NFC, and certifications.
| Өзгөчөлүк | Деталь |
|---|---|
| Модел | H10 |
| Операция системасы | Android 14 (GMS тастыкталган) |
| Процессор | Окта ядролуу 2.3 ГГц |
| Дисплей | 5.5" HD+ (1440x720) IPS Multi-touchscreen |
| Эс | 3GB RAM + 32GB ROM DDR4 |
| Камера | Rear 5.0MP Auto Focus with Flash LED, Support 1D/2D Scanning |
| Принтер | Built-in 58mm thermal printer, Print speed: 80mm/s, Paper roll: Ø40mm |
| Card Slots | Nano SIM×1, Micro SIM×1, Micro SD×1, Micro PSAM×1 |
| Network | 2G/3G/4G, Wi-Fi (2.4G/5G, IEEE 802.11 a/b/g/n), Bluetooth (BT3.0/4.2/5.3 BLE), GPS (GPS, AGPS) |
| Батарея | Removable Lithium Polymer battery 7.7V/3000mAh (equal to 3.85V/6000mAh) |
| Адаптер | Input: AC 100~240V, Output: DC 5V/2A |
| Порттар | 1×Type-C (OTG supported) |
| Курчап турган чөйрө | Operating temp: -10~50°C, Storage temp: -20~60°C |
| Өлчөмдөр | 219×80×17.9мм |
| Салмагы | 345 г (түзмөк гана) |
| NFC | Type A&B card, Mifare card, Felica card; ISO/IEC 1443 and ISO 15693 compliant |
| Сертификаттар | FCC, CE, ROSH, GMS |
Кепилдик жана колдоо
The Bisofice H10 PDA Terminal comes with a standard manufacturer's warranty. Please refer to your purchase documentation for specific warranty terms and conditions.
For technical support, troubleshooting assistance, or warranty claims, please contact Bisofice customer service through their official website or the retailer where the product was purchased. Keep your purchase receipt and product serial number handy when contacting support.
You can visit the Bisofice store on Amazon for more information: Bisofice Amazon Store


