1. Продукт бүтүп калдыview
The CAIWEI A10Q Smart Projector is designed to provide a high-quality visual and audio experience for home entertainment. It features 4K decoding, 2300 ANSI lumens brightness, ToF CMOS auto-focus, and integrated Google TV with Netflix certification.

Сүрөт: алдыңкы view of the CAIWEI A10Q Smart Projector, showcasinанын линзасы жана жарашыктуу дизайны.
Пакеттин мазмуну
Кутучаны ачканда, төмөнкү нерселердин бардыгы бар экенине ынаныңыз:
- CAIWEI A10Q Auto Focus Projector (1 unit)
- HDMI кабели
- Электр кабели
- Колдонуучунун Колдонмосу (бул документ)
- Алыстан башкаруу (батареялар камтылган эмес)
2. Орнотуу колдонмосу
2.1 Орнотуу
Optimal placement is crucial for the best viewing experience. Consider the projection distance and angle.
- Сунушталган аралык: For a 100-inch screen, a distance of approximately 2.8 meters (9.18 feet) is recommended. For a 120-inch screen, approximately 3.2 meters (10.49 feet).
- Ыңгайлуу ViewДистанция: For eye comfort, a 100-inch screen is best viewed from 3 meters (9.84 feet), and a 120-inch screen from 4 meters (13.12 feet).
- Ийкемдүү орнотуу: The projector supports various installation methods including table placement, tripod installation, and ceiling mounting. For ceiling mounting, ensure compatibility with universal ceiling mounts using a 4-screw pattern (M4 size screw holes).

Image: Diagram illustrating various projector installation methods: table placement, tripod, and ceiling mount.
2.2 Кубат туташтыруу
- Берилген кубат шнурун проектордун кубат киргизүүсүнө туташтырыңыз.
- Электр шнурунун экинчи учун ылайыктуу электр розеткасына сайыңыз.
2.3 Initial Power On and Auto-Adjustment
Once powered on, the projector will automatically adjust the image for optimal display.
- Auto Focus: Laser-powered ToF sensors and a high-precision CMOS camera enable instant auto-focus, ensuring a sharp image.
- Автоматтык негизги ташты оңдоо: The projector automatically corrects image distortion, providing a perfectly aligned rectangular image.
- Auto Obstacle Avoidance & Screen Alignment: The AI-powered system can detect obstacles and automatically fit the image to your screen area.

Image: Visual representation of the projector's AI-powered 3D ToF Technology and CMOS Camera for fast auto-focus and keystone correction.

Сүрөт: Мисamples of the projector's automatic adjustments, including keystone correction, obstacle avoidance, and screen fitting.
2.4 Тармактык туташуу
Connect the projector to your home network for access to online content.
- дегенге өтүңүз Орнотуулар menu on the projector.
- Тандоо Тармак жана Интернет.
- Choose your Wi-Fi network from the list and enter the password. The projector supports Wi-Fi 6 for faster and more stable connections.
2.5 Google Каттоо эсебин орнотуу
To access Google TV features and apps, you will need to log in with your Google account during the initial setup process or via the settings menu.
3. Иштөө нускамалары
3.1 Негизги навигация
Use the provided remote control to navigate the Google TV interface. The remote allows you to select apps, adjust settings, and control playback.
3.2 Агымдуу тиркемелер
The projector comes with Android TV 14.0, providing access to the Google Play Store. You can download and use various streaming apps, including Netflix, YouTube, and Amazon Prime Video.
- Netflix Certified: Enjoy official Netflix content directly from the projector.
- Access over 700,000 movies, TV episodes, and live TV from 10,000+ licensed apps.
3.3 Google Жардамчысы менен үн менен башкаруу
The projector integrates Google Assistant for hands-free control.
- Пультуңуздагы Google Жардамчы баскычын басыңыз.
- Speak commands such as "What's the weather?" or "Play an action movie."
3.4 Экранды чагылдыруу жана чагылдыруу
Share content from your mobile devices to the projector.
- NFC One-Tap Mirroring: Tap your NFC-enabled phone or tablet to the projector for instant screen mirroring.
- Google Cast: Use the built-in Google Cast feature to stream content from compatible apps on your device.
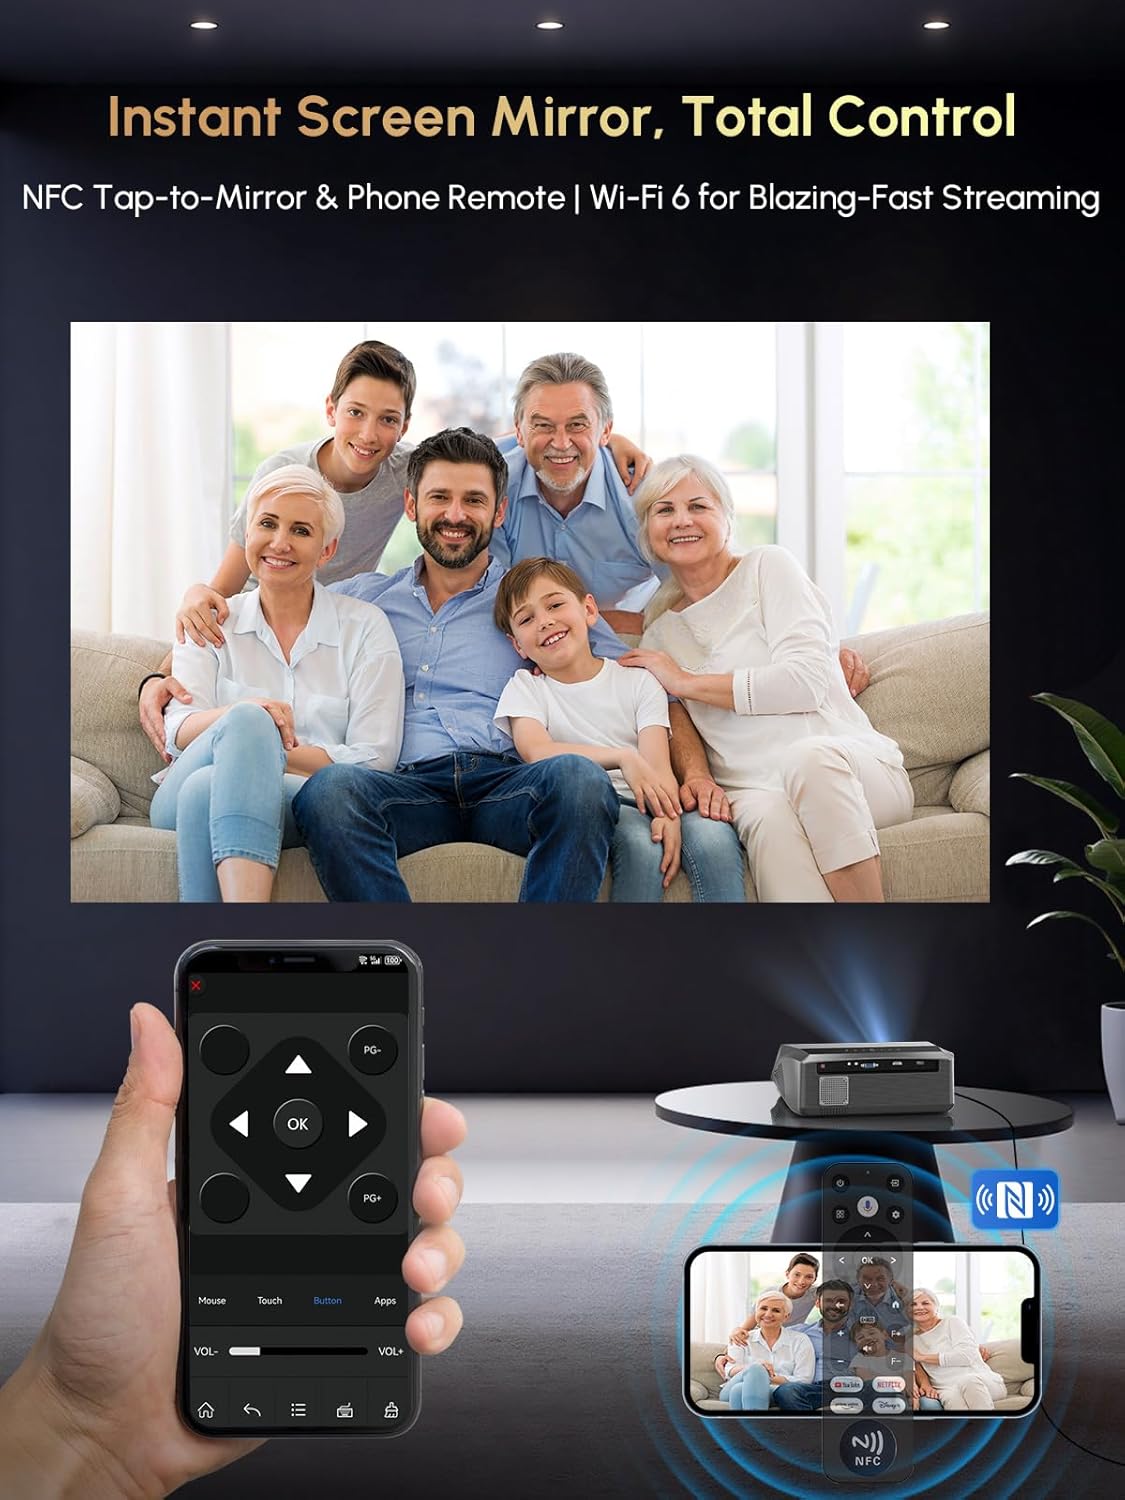
Image: A user mirroring their phone screen to the projector using NFC, and controlling the projector with a phone app.
3.5 Bluetooth байланышы
Connect external audio devices or use the projector as a Bluetooth speaker.
- Connect to Bluetooth Speakers/Headphones: Pair your Bluetooth audio devices via the projector's settings for enhanced sound.
- Use as Bluetooth Speaker: The projector can function as a standalone Bluetooth speaker, playing audio from your phone or other devices.
3.6 Тышкы түзмөктү туташтыруу
The projector offers multiple ports for connecting various devices.
- HDMI ARC: Connect laptops, gaming consoles, Fire Stick, Roku, and other HDMI-enabled devices. HDMI ARC supports audio return channel functionality.
- USB: Медиа ойнотуу fileтүздөн-түз USB сактагыч түзмөктөрүнөн.
- OF: Эски түзмөктөрдү AV кабели аркылуу туташтырыңыз.
3.7 Жарыктык режимдери
The projector offers selectable brightness modes to suit different viewчөйрөлөр.
- Экономикалык режим: Reduces brightness for extended lamp life and lower power consumption, suitable for dark environments.
- Жогорку жарык режими: Provides maximum brightness (2300 ANSI lumens) for clearer viewing in moderately lit rooms.

Image: Visual comparison of the projector's 'Economic Mode' and 'High Bright' mode, showing the difference in light output.
4. Техникалык тейлөө
4.1 Чаңдан коргоо
The projector features a fully sealed optical engine and an air filtration level dust filter, designed to block up to 95% of dust. This helps maintain brightness and extends the projector's lifespan.

Image: Illustration of the projector's fully sealed optic engine and air filtration system for dust protection.
4.2 Тазалоо
- Сырткы: Use a soft, dry cloth to wipe the exterior of the projector. Avoid abrasive cleaners or solvents.
- Объектив: Gently clean the projector lens with a lens cleaning cloth or specialized lens cleaning solution. Do not touch the lens directly with your fingers.
- Аба желдеткичтери: Periodically check and clean the air vents to ensure proper airflow and prevent overheating.
4.3 Тынч иштөө
The full sealed optical engine also contributes to lower operational noise, rated at approximately 25 dB, ensuring a quiet viewтажрыйбасы.

Image: A visual showing the projector operating quietly at 25 dB, suitable for use in a bedroom.
5. Кыйынчылыктарды
5.1 Re-calibrating Auto Keystone & Focus
If the auto keystone or focus appears inaccurate, you can manually re-calibrate it.
- Place the projector approximately 6.56 feet (2 meters) away from the screen, facing it directly.
- Click the "Menu" button on your remote.
- Navigate using the directional buttons: "Left" → "Up" → "Left" → "Up" → "Left".
- In the factory aging mode, select "Horizontal reference correction".
- Click "Camera calibration".
- The projector will automatically re-calibrate.

Image: Step-by-step guide for re-calibrating the projector's auto keystone and focus settings.
5.2 Re-pairing Remote Control with Projector
If the remote control is unresponsive or app shortcuts/voice assistant features are not working, re-pair the remote.
- барыңыз Орнотуулар проектордо.
- Тандоо Алыстан башкаруу жана аксессуарлар.
- If the remote is listed, select it and choose Жупташуу.
- To re-pair, hold the Үй жана Артка keys on the remote simultaneously for about 3 seconds, while holding the remote near the projector (within 20 cm). The remote will connect automatically.

Image: Illustrated steps for re-pairing the projector's remote control, including navigating settings and the pairing button combination.
5.3 Жалпы маселелер
- Сүрөт жок: Ensure the power cord is securely connected, the projector is turned on, and the correct input source is selected. Check HDMI cable connections if using an external device.
- Үн жок: Verify volume levels on both the projector and any connected external audio devices. Check Bluetooth connections if using wireless speakers. Ensure Dolby Audio is enabled if desired.
- Тармакка туташуу маселелери: Confirm your Wi-Fi password is correct. Try restarting your router and the projector. Ensure the projector is within range of your Wi-Fi signal.
6. Техникалык шарттар
| Өзгөчөлүк | Спецификация |
|---|---|
| Бренд | CAIWEI |
| Модел | A10Q |
| Display Resolution | 1920 x 1080 (Full HD), 4K Decoding |
| Жарыктык | 2300 ANSI челинин |
| Байланыш технологиясы | WiFi 6, Bluetooth 5.4, HDMI ARC, USB, AV |
| Операция системасы | Android TV 14.0 (Google TV) |
| Өзгөчөлүктөр | Netflix Officially Licensed, Google Voice Control, ToF Sensor Auto Focus & Auto Keystone, Electronic Focus & 6D Keystone, Auto Obstacle Avoidance, Auto Screen Alignment, NFC Casting/Mirroring, Dolby Audio, Dust-proof Engine, Digital Zoom, Ceiling Mountable |
| Аудио | Dolby Audio, 38W HiFi speaker, DSP chip, 360-degree surround sound |
| Элемент Салмагы | 5.68 фунт |
| Продукциянын өлчөмдөрү | 12.4 x 9.84 x 5.19 дюйм |

Сүрөт: жарылган view illustrating the projector's DSP chip, 38W multi-compound diaphragm cavity, and 360-degree surround sound capabilities.
7. Кепилдик жана колдоо
CAIWEI provides comprehensive support for your A10Q Smart Projector.
- Кепилдик: Продукцияга 2 жылдык кепилдик берилет.
- Кардарларды колдоо: 24-hour customer support is available.
- Техникалык колдоо: Lifetime technical support is included with your purchase.
Байланыш маалыматы
Суроолор же колдоо муктаждыктары боюнча биз менен байланышыңыз:
- Электрондук почта: renjingym@outlook.com


