1. Коопсуздук маалыматы
Please read and understand all safety information before operating this multimeter. Failure to follow these instructions may result in electric shock, fire, or damage to the meter.
- Always ensure the multimeter is in good working condition and that the test leads are not damaged.
- Баалангандан ашык колдонбоңузtage, as marked on the meter, between the terminals or between any terminal and earth ground. The maximum voltage between measurement end and ground is 1000V DC or 750V AC.
- Том менен иштөөдө өтө этият болуңузtages above 60V DC or 30V AC RMS, as these present a shock hazard.
- Функцияларды же диапазондорду өзгөртүүдөн мурун ар дайым сыноо өткөргүчтөрүн чынжырдан ажыратыңыз.
- Do not operate the meter if the battery cover is open or not properly secured.
- Replace the batteries as soon as the low battery indicator appears to ensure accurate readings.
- Adhere to the specified pollution grade (Grade 2) and operating environment conditions.
2. Продукт бүтүп калдыview
The Irfora T58D is a 60000 counts digital multimeter designed for accurate measurement of various electrical parameters. It features a large LCD display with backlight, flashlight, NCV (Non-Contact Voltage) detection, and automatic shutdown.

Сүрөт 2.1: Алдыңкы view of the T58D Multimeter with labeled components.
Негизги компоненттер:
- LED дисплей: 60000 counts display for readings.
- Жарыктандыруу: Flashlight for dark environments.
- NCV сенсордук аймагы: Байланышсыз том үчүнtage аныктоо.
- NCV and Buzzer Indicator Light: Visual alerts for NCV and continuity.
- MAX MIN баскычы: For maximum and minimum value switching.
- PEAK баскычы: For peak to peak measurement.
- RANGE баскычы: For manual range switching.
- FUNC баскычы: For function switching within a rotary switch position.
- Lighting/Backlight Button: Дисплейдин арткы жарыгын жана фонарьды иштетет.
- AREL HOLD Button: For data hold and relative value measurement.
- Gear Rotary Switch: Негизги өлчөө функциясын тандайт.
- Киргизүү розеткалары: μA mA L, 10A, VΩHz°C, and COM for test lead connections.

Figure 2.2: Physical dimensions of the T58D Multimeter.
3. Орнотуу
3.1 Батареяны орнотуу
The T58D multimeter requires three (3) 1.5V AAA batteries (not included) for operation. Ensure the batteries are installed correctly according to polarity markings.
- Мультиметрдин артындагы батарея бөлүкчөсүн табыңыз.
- Батареянын капкагын ачыңыз.
- Insert three 1.5V AAA batteries, observing the correct polarity (+ and -).
- Батареянын капкагын бекем жабыңыз.
3.2 Сыноо өткөргүчтөрүн туташтыруу
Сыноо өткөргүчтөрүн туура туташтыруу так жана коопсуз өлчөө үчүн абдан маанилүү.
- Кара сыноо зымын ар дайым туташтырыңыз COM (Жалпы) киргизүү уячасы.
- Көпчүлүк үчүн томtage, resistance, frequency, capacitance, and temperature measurements, connect the red test lead to the VΩHz°C киргизүү уячасы.
- 600мАга чейинки ток өлчөөлөрү үчүн кызыл тестирлөө өткөргүчтү туташтырыңыз μA mA L киргизүү уячасы.
- 10А чейинки ток күчүн өлчөө үчүн кызыл сыноо зымын туташтырыңыз 10A киргизүү уячасы.

Figure 3.1: Multimeter with support stand and test lead storage.
4. Иштөө нускамалары
Өлчөөлөрдү баштоо үчүн айланма которгучту керектүү функцияга буруңуз.
4.1 AC/DC Voltage Өлчөө
- Кызыл тест учун туташтырыңыз VΩHz°C джек жана кара тест алып барат COM джек.
- Которгучту буруңуз V~ (AC томtagд) же V- (DC Voltagд) кызмат орду.
- Сыноочу зонддорду чынжырдын чекиттерине тийгизиңиз, анда тtagе өлчөө керек.
- Томду окуңузtage мааниси дисплейде.
4.2 AC/DC Ток өлчөө
To measure current, the multimeter must be connected in series with the circuit. Ensure the circuit is de-energized before connecting the meter.
- Кара сыноо тилкесин төмөнкүгө туташтырыңыз COM джек.
- 600 мА чейинки ток үчүн кызыл сыноо зымын туташтырыңыз μA mA L 10А чейинки ток үчүн кызыл сыноочу зымын туташтырыңыз 10A джек.
- Которгучту буруңуз μA mA~ (AC Current), μA mA- (DC Current), A~ (AC Current), or A- (DC Current) position, matching the input jack used.
- Ток өлчөнө турган чынжырды ачып, сыноо зонддорун катар менен туташтырыңыз.
- Чынжырды кайра күйгүзүп, токтун маанисин окуңуз.
4.3 Каршылыкты өлчөө
- Кызыл тест учун туташтырыңыз VΩHz°C джек жана кара тест алып барат COM джек.
- Которгучту буруңуз Ω позиция.
- Каршылыкты өлчөөдөн мурун чынжыр же тетиктин энергиясы өчүрүлгөнүн текшериңиз.
- Өлчөнө турган компонент боюнча сыноо зонддоруна тийиңиз.
- Дисплейдеги каршылык маанисин окуп чыгыңыз.
4.4 Сыйымдуулукту өлчөө
- Кызыл тест учун туташтырыңыз VΩHz°C джек жана кара тест алып барат COM джек.
- Которгучту буруңуз Сыйымдуулук position (often shared with Ω or Hz). Use the FUNC button if necessary to select capacitance.
- Эсептегичке зыян келтирбөө үчүн өлчөөнүн алдында конденсатордун толук зарядсыздангандыгын текшериңиз.
- Touch the test probes to the capacitor terminals.
- Дисплейдеги сыйымдуулуктун маанисин окуңуз.
4.5 Жыштыктарды өлчөө
- Кызыл тест учун туташтырыңыз VΩHz°C джек жана кара тест алып барат COM джек.
- Которгучту буруңуз Гц% позиция.
- Touch the test probes to the circuit points where frequency is to be measured.
- Дисплейдеги жыштыктын маанисин окуңуз.
4.6 Температураны өлчөө
- Термопараны туташтырыңыз VΩHz°C жана COM уюлдуулукту байкоо.
- Которгучту буруңуз ° C / ° F позиция.
- Термопаранын учун температурасы өлчөнүүчү объекттин үстүнө же жанына коюңуз.
- Дисплейдеги температуранын маанисин окуңуз.
4.7 Диоддун сыноосу
- Кызыл тест учун туташтырыңыз VΩHz°C джек жана кара тест алып барат COM джек.
- Которгучту буруңуз Диод position (often shared with continuity). Use the FUNC button if necessary.
- Кызыл зондту анодка, кара зондду диоддун катодуна тийгизиңиз. Алга томtage тамчы көрсөтүлөт.
- Reverse the probes. An open circuit (OL) should be displayed for a good diode.
4.8 Баззер (үзгүлтүксүздүк) тести
- Кызыл тест учун туташтырыңыз VΩHz°C джек жана кара тест алып барат COM джек.
- Которгучту буруңуз Buzzer position (often shared with diode). Use the FUNC button if necessary.
- Touch the test probes to the component or circuit path.
- Эгерде каршылык белгилүү бир босогодон төмөн болсо (адатта 50Ω), анда звонок иштейт, бул үзгүлтүксүздүктү билдирет.
4.9 NCV (контактсыз томtagд) Тест
NCV функциясы AC көлөмүн аныктоого мүмкүндүк беретtagд түз байланышсыз.
- Rotate the rotary switch to the NCV позиция.
- Place the top of the meter (NCV sensing area) close to the conductor.
- Эгерде AC voltage is detected, the corresponding signal strength indicator (low-yellow, high-red) will light up, and the buzzer will emit alarms of varying frequency.

4.1-сүрөт: NCV томtage Measurement in progress.
4.10 Фонар жана Фонар
басыңыз Жарыктандыруу/Арткы жарык button to activate the display backlight for improved visibility in low-light conditions. Press it again to activate the flashlight located at the top of the meter for illuminating the work area.
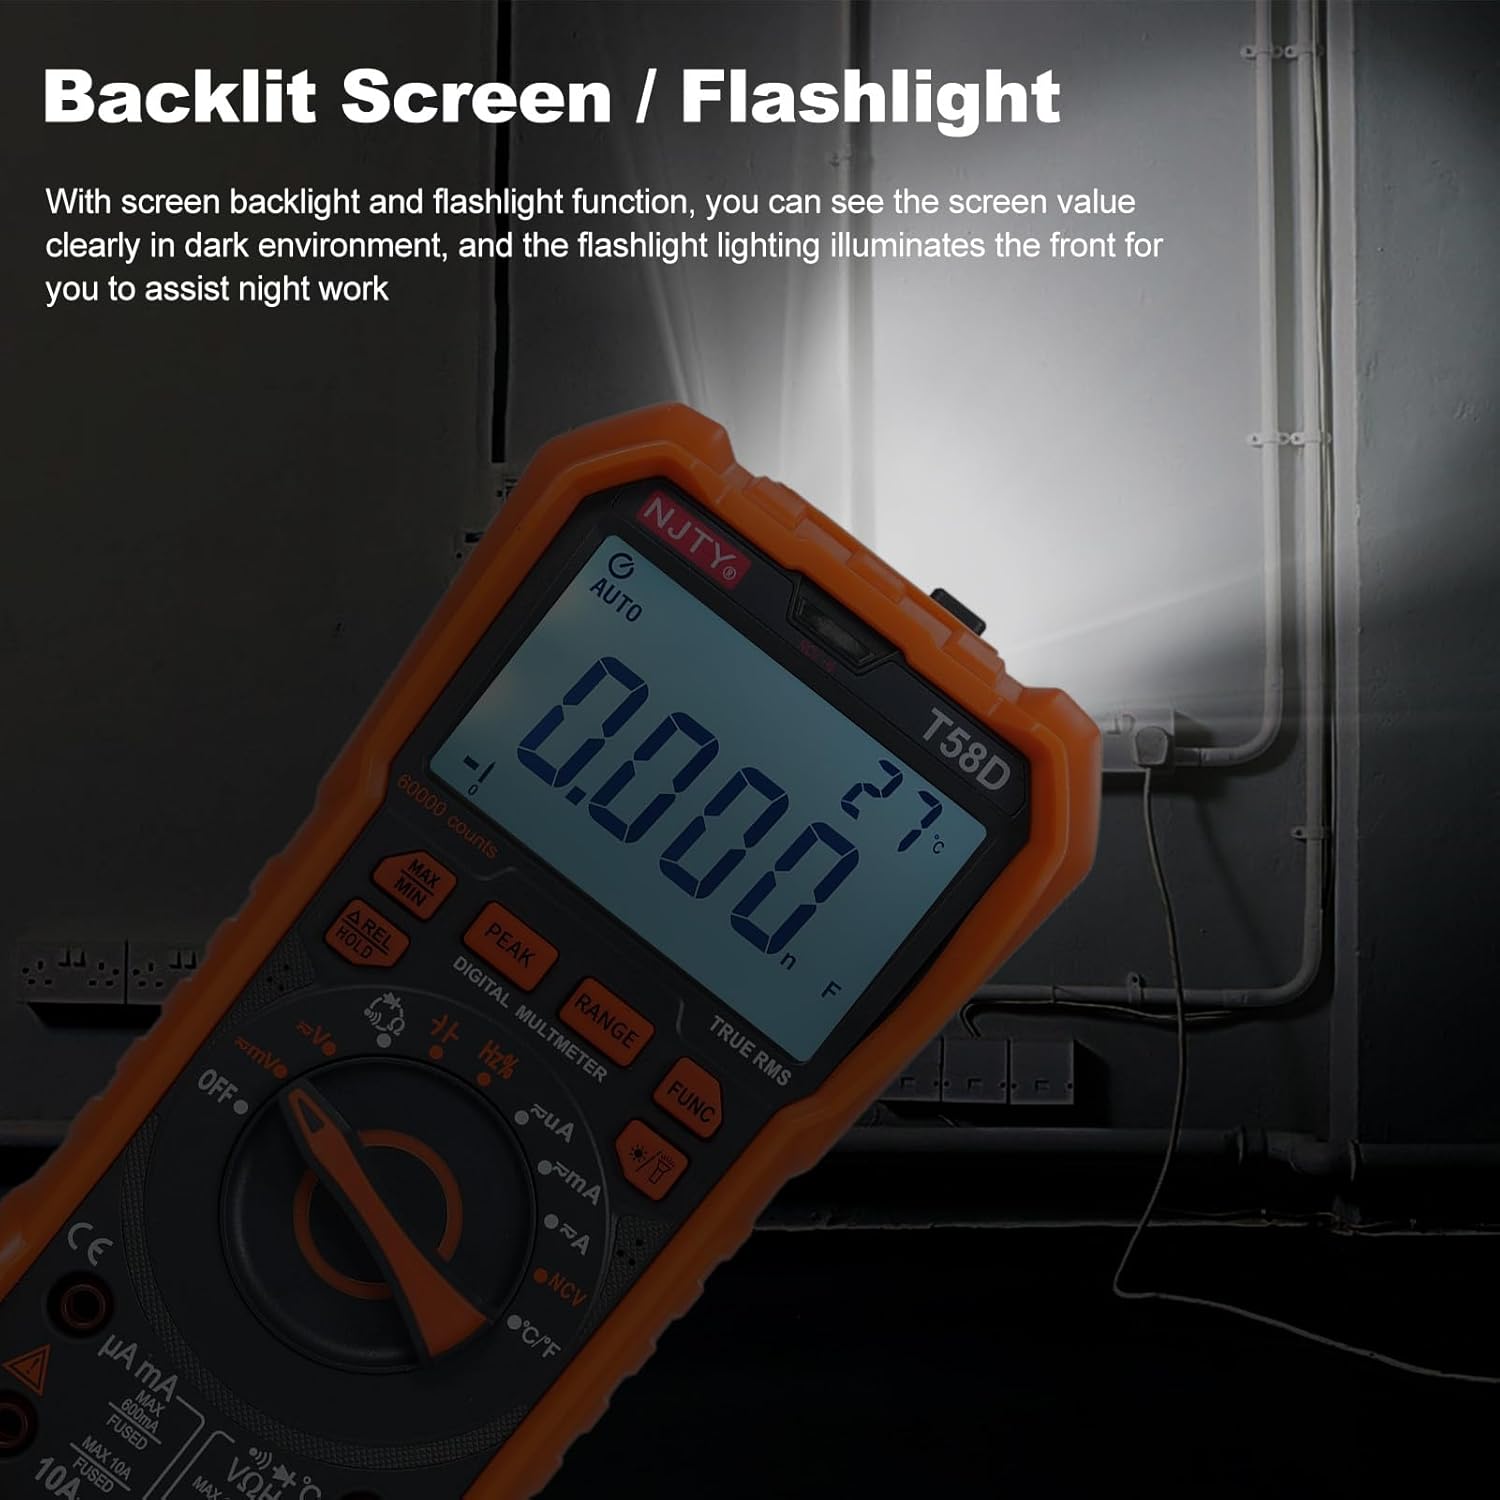
Figure 4.2: Backlit screen and flashlight in use.
4.11 Автоматтык өчүрүү
To conserve battery life, the multimeter features an automatic shutdown function. If there is no operation for approximately 15 minutes after power-on, the instrument will emit audible prompts and then automatically power off, entering hibernation mode. Any button press will restart the meter.

4.3-сүрөт: 15 мүнөт аракетсиз болгондон кийин автоматтык түрдө өчүрүү.
5. Техникалык тейлөө
5.1 Тазалоо
Жарнама менен эсептегичти сүртүңүзamp кездеме жана жумшак жуугуч. Абразивдерди же эриткичтерди колдонбоңуз.
5.2 Батареяны алмаштыруу
When the low battery indicator appears on the display, replace the batteries promptly to ensure accurate readings and proper operation. Refer to Section 3.1 for battery installation steps.
5.3 Сактагычты алмаштыруу
If the current measurement function fails, the fuse may need replacement. Always use fuses of the specified type and rating.
- For mA current measurements, use a fuse rated F 600mA/250V.
- For 10A current measurements, use a fuse rated F 10A/250V.
Fuse replacement should only be performed by qualified personnel. Disconnect all test leads and power before opening the meter casing.
6. Кыйынчылыктарды
If the multimeter does not function correctly, check the following common issues:
- Дисплей жок же күңүрт дисплей: Батареянын деңгээлин текшерип, зарыл болсо, алмаштырыңыз. Батареялардын туура полярдуулукта орнотулганын текшериңиз.
- Туура эмес окуулар: Verify that the correct function and range are selected. Ensure test leads are properly connected and not damaged. Check for blown fuses if measuring current.
- "OL" көрсөтүлөт: This indicates an overload or out-of-range measurement. Select a higher range or ensure the measured value is within the meter's capabilities.
- Үзгүлтүксүздүк сигналы жок: Ensure the continuity function is selected and the circuit resistance is below the threshold.
Эгер көйгөйлөр чечилбесе, кардарларды колдоо кызматына же квалификациялуу техникке кайрылыңыз.
7. Техникалык шарттар
The following table details the technical specifications of the Irfora T58D Digital Multimeter.

Figure 7.1: T58D Parameters Table.
| Параметр | Диапазон/маани |
|---|---|
| DC Voltage | 100mV, 600mV, 1V, 60V, 600V, 1000V |
| AC Voltage | 100mV, 600mV, 1V, 60V, 600V, 750V |
| Туруктуу ток | 600μA, 6mA, 60mA, 600mA, 6A, 10A |
| AC тогу | 600μA, 6mA, 60mA, 600mA, 6A, 10A |
| Жыштык | 100Hz, 1KHz, 10KHz, 100KHz, 1MHz, 10MHz, 25MHz |
| Каршылык | 600Ω, 6kΩ, 60kΩ, 600kΩ, 6MΩ, 60MΩ |
| Сыйымдуулук | 6nF, 60nF, 600nF, 6μF, 60μF, 600μF, 6mF, 60mF |
| Температура | -50 ℃ ~ 1000 ℃ / -58 ℉ ~ 1832 ℉ |
| Диод сыноо | Ооба |
| Баззер (үзгүлтүксүздүк) | Ооба |
| Электр камсыздоо | 3 * 1.5V AAA батарейкалар (кошулбайт) |
| Дисплей | 60000 counts LED display |
| Ашыкча жүктөө дисплей | 'OL' көрсөтүлөт |
| Conversion Rate | Секундасына болжол менен 3 окуу |
| Коопсуздук рейтинги | 600V CAT III and 1000V CAT II |
| Булгануу даражасы | 2 |
| Иштөө бийиктиги | 2000 метрден төмөн |
| Иштөө температурасы | 0-40℃ (<80%RH, not considered <10℃) |
| Сактоо температурасы | -10~60℃ (<80%RH, батарейканы алып салыңыз) |
| Элементтин өлчөмү | 187 * 95 * 55 мм / 7.36 * 3.74 * 2.16 дюйм |
| Элемент Салмагы | 331 г / 11.67 унция |