1. Киришүү
The Mini FPV DVR is a compact and versatile digital video recorder designed for capturing and digitizing analog video footage. It supports multiple recording resolutions and is compatible with both NTSC and PAL video formats, making it ideal for converting content from various analog sources such as VHS, Hi8, and Betamax camcorders.
Негизги өзгөчөлүктөрү:
- Multi-Resolution Recording: Selectable video resolutions including VGA (640x480), D1 (720x480), and HD (1280x720) for versatile video capture.
- Кеңири шайкештик: Supports NTSC and PAL video formats for broad analog source compatibility.
- Built-in Battery & Compact Design: Features a 3.7V/400mAh rechargeable Li-ion polymer battery for up to 2 hours of continuous recording. Ultra-portable at 53mm x 33mm x 9mm and 24.5g.
- Easy AV Connectivity: Equipped with 3.5mm AV input/output interfaces and a micro USB charging port for direct connection to monitors or TVs.
- Ыңгайлуу File Башкаруу: Supports up to 32GB TF cards (Class 10 recommended) with adjustable cyclic recording times (10/20/30 minutes).
Пакеттин мазмуну:
Пакетиңизде бардык буюмдар бар экенин текшериңиз:
- Mini FPV DVR Unit
- AV Cables (3.5mm to RCA)
- USB заряддоо кабели
- User Manual
- Accessories (e.g., Velcro strap)
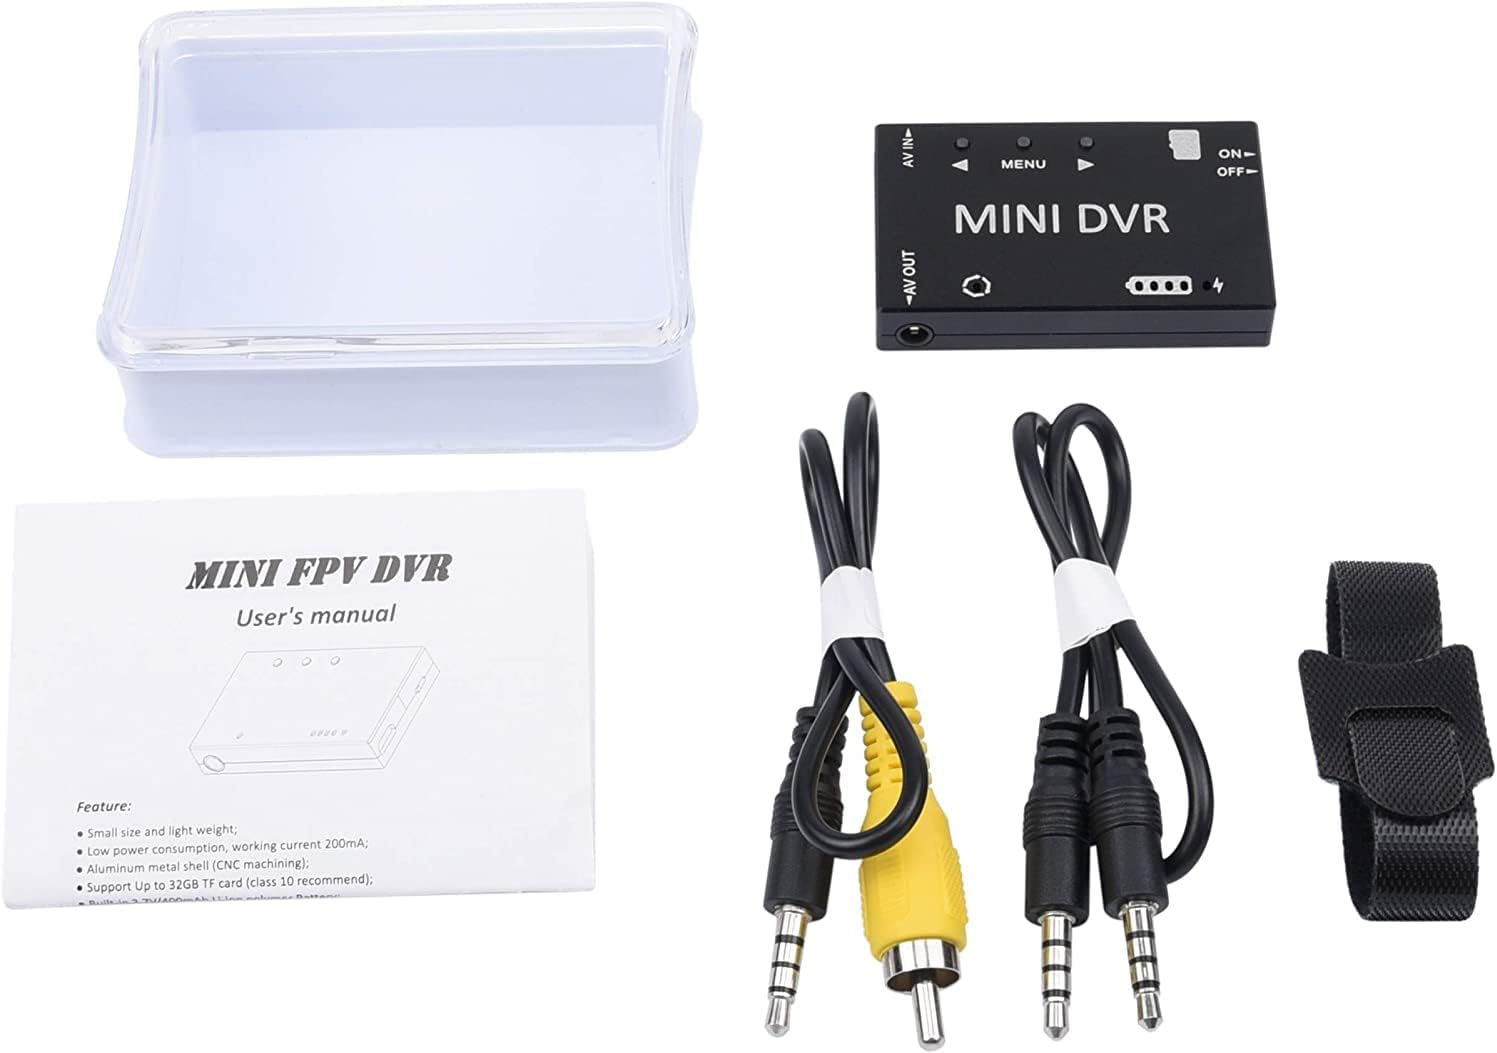
Figure 1.1: Package Contents of the Mini FPV DVR.
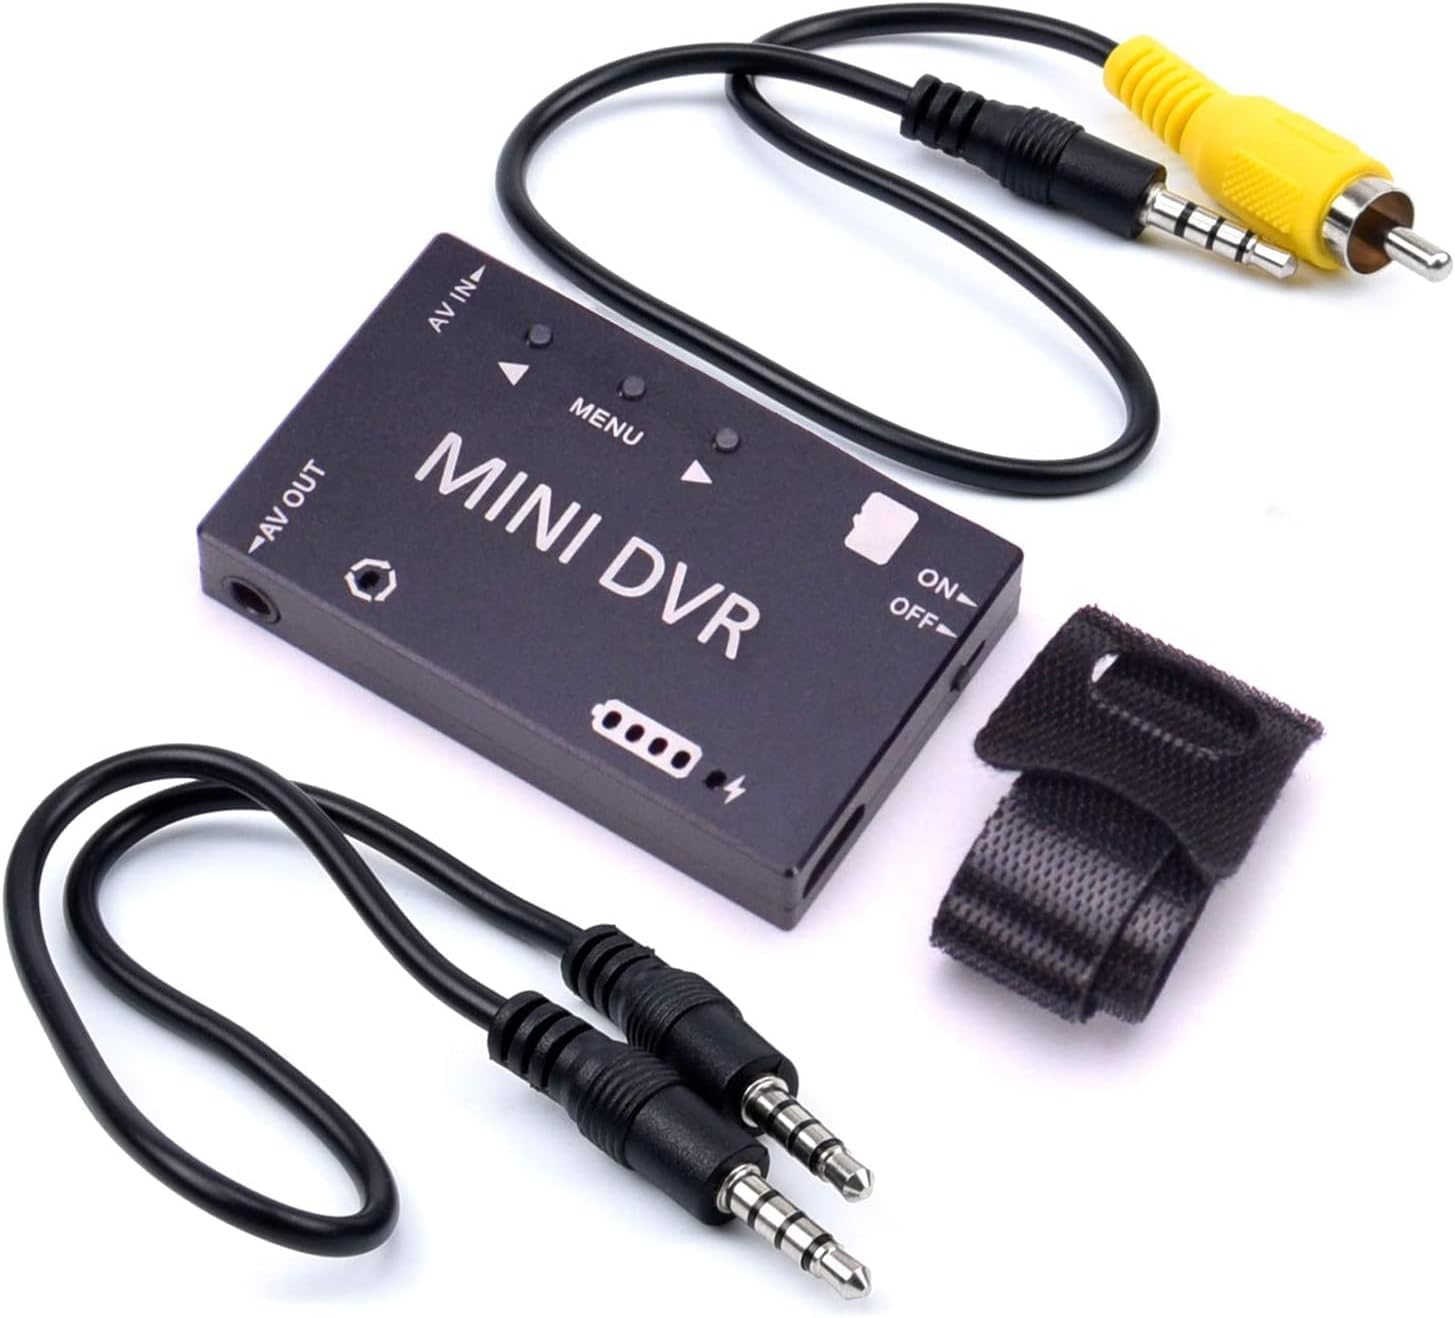
Figure 1.2: Mini FPV DVR with included accessories.

Figure 1.3: The compact size of the Mini FPV DVR.
2. Орнотуу
2.1 Батареяны заряддоо
Before first use, fully charge the built-in 3.7V/400mAh Li-ion polymer battery. Connect the Mini FPV DVR to a 5V DC power source (e.g., a computer USB port or a USB wall adapter) using the provided Micro USB cable. The charging current is 500mA Max. A full charge provides approximately 1.5 to 2 hours of working time.
2.2 TF картасын салуу
The device supports TF cards up to 32GB (Class 10 recommended). Locate the TF card slot on the side of the DVR. Gently insert the TF card with the gold contacts facing down until it clicks into place. To remove, push the card in slightly until it springs out.
2.3 Түзмөктөргө туташуу
The Mini FPV DVR features 3.5mm AV input and output interfaces. Use the provided AV cables to connect to your source and display devices.
- AV IN: Connect your analog video source (e.g., camcorder, VCR) to the AV IN port using the appropriate 3.5mm to RCA cable.
- AV OUT: Connect a monitor or TV to the AV OUT port to view live video feed or recorded playback.

Figure 2.1: Mini FPV DVR ports and controls.

2.2-сүрөт: Мисample connection of the Mini FPV DVR.
3. Иштөө нускамалары
3.1 Күйгүзүү/өчүрүү
To power on the device, slide the ON/OFF switch to the 'ON' position. The system startup time is approximately 3 seconds. To power off, slide the switch to the 'OFF' position.
3.2 Меню Навигациясы
The Mini FPV DVR features a simple button interface for menu navigation:
- MENU баскычы: Press to enter or exit the menu, and to confirm selections.
- ▲ (Жогору) баскычы: Navigate up through menu options or increase values.
- ▼ (Төмөн) баскычы: Navigate down through menu options or decrease values.

Figure 3.1: Control panel layout.
3.3 Видеону жаздыруу
Once the device is powered on and an AV input source is connected, you can begin recording:
- Ensure a formatted TF card is inserted.
- Navigate to the 'Record File Resolution' option in the menu to select your desired resolution: VGA (640x480), D1 (720x480), or HD (1280x720).
- Set 'Record Sound' to ON or OFF as desired.
- Adjust 'Cyclic Record Time' (10Min / 20Min / 30Min) if you wish for the DVR to automatically create new files after a set duration.
- Press the appropriate button (refer to on-screen prompts or manual for specific record button) to start recording. Press again to stop. Recorded files are saved in AVI format.
3.4 Видеону ойнотуу
Жаздырылган видеолорду ойнотуу үчүн:
- Connect the AV OUT port to a monitor or TV.
- Navigate to the playback mode or file browser within the DVR's menu.
- Керектүү видеону тандаңыз file from the list on the TF card.
- Press the MENU button to start playback.
4. Техникалык тейлөө
4.1 Тазалоо
Wipe the device with a soft, dry cloth. Do not use liquid cleaners or solvents, as they may damage the surface or internal components.
4.2 Сактоо
Store the Mini FPV DVR in a cool, dry place away from direct sunlight and extreme temperatures. If storing for extended periods, ensure the battery is partially charged (around 50%) to prolong its lifespan.
4.3 Батареяга кам көрүү
To maximize battery life, avoid fully discharging the battery frequently. Recharge the battery when the low battery indicator appears. Do not expose the device to temperatures below -10°C or above 60°C.
5. Кыйынчылыктарды
5.1 Түзмөк күйбөйт
- КҮЙГҮЗҮҮ/ӨЧҮРҮҮ баскычы "КҮЙГҮЗҮҮ" абалында экенин текшериңиз.
- Check if the battery is charged. Connect the device to a power source using the USB cable and allow it to charge for at least 30 minutes before attempting to power on again.
5.2 No Video Signal on AV OUT / No Recording from AV IN
- Verify that the AV cables are securely connected to both the DVR and the source/display device.
- Ensure the correct AV input is selected on your monitor/TV.
- Check the video input format setting (NTSC/PAL) on the DVR matches your source device. The DVR supports both, but the setting must correspond.
- Confirm that the source device (e.g., camcorder) is powered on and outputting a video signal.
- If recording, ensure a TF card is inserted and has sufficient free space. Try formatting the TF card through the DVR's menu (this will erase all data).
5.3 Видеонун сапаты начар
- Check the selected recording resolution in the menu. For higher quality, select HD (1280x720).
- Ensure the AV cables are not damaged and are properly connected.
- The quality of the original analog source will affect the recorded digital file.
6. Техникалык шарттар
The following table outlines the technical specifications for the Mini FPV DVR:

Figure 6.1: Mini FPV DVR Specifications Table.
| Категория | Параметр | Нарк |
|---|---|---|
| Электрдик параметрлер | System Startup Time | 3 секунд |
| Видео киргизүү форматы | NTSC/PAL | |
| Видео киргизүү импедансы | 75Ω Typ. | |
| Video Compress Format | MJPEG | |
| Жаздыруу File Резолюция | VGA (640×480) / D1 (720×480) / HD (1280×720) selectable | |
| Жаздыруу File Формат | AVI | |
| Жаздыруу орнотуулары | Үн жаздыруу | ON/OFF тандалган |
| Cyclic Record Time | 10Min / 20Min / 30Min selectable | |
| Frame Rate | 30 алкак | |
| Video Output | Видео чыгаруу форматы | NTSC/PAL switchable |
| Video Output Impedance | 75Ω Typ. | |
| Video ойнотуу | CVBS output (connect to monitor) | |
| Memory & Language | Эстутум картасы | TF-Card, Support Up to 32GB (Class 10 recommended) |
| Меню тили | 11 kinds of language choices | |
| Light Frequency | 50Hz / 60Hz selectable | |
| Interfaces | AV киргизүү интерфейси | 3.5mm AV Jack |
| AV Output Interface | 3.5mm AV Jack | |
| Заряддоо интерфейси | Микро USB интерфейси | |
| Шайкеш түзмөктөр | Laptop, Monitor, Personal Computer, Smartphone, Tablet, Television | |
| Кубат жана Батарея | Заряддоо Voltage | 5V DC |
| Заряддоо агымы | Max 500mA | |
| Battery (not detachable) | Built-in 3.7V/400mAh Li-ion polymer Battery | |
| Батареянын иштөө мөөнөтү | Each full charge provides around 1.5~2 hours working time | |
| Курчап турган чөйрө | Иштөө температурасы | -10~60°C |
| Иштөө нымдуулугу | 85% RH | |
| Физикалык мүнөздөмөлөрү | Өлчөм | 53 мм * 33 мм * 9 мм |
| Салмагы | 24.5г | |
| Түс | Кара |
7. Кепилдик жана колдоо
For warranty information, technical support, or service inquiries, please contact the manufacturer, RunCam, or your authorized reseller. Keep your purchase receipt as proof of purchase for any warranty claims.
You can visit the official RunCam store for more information: RunCam Store on Amazon


