Introduction
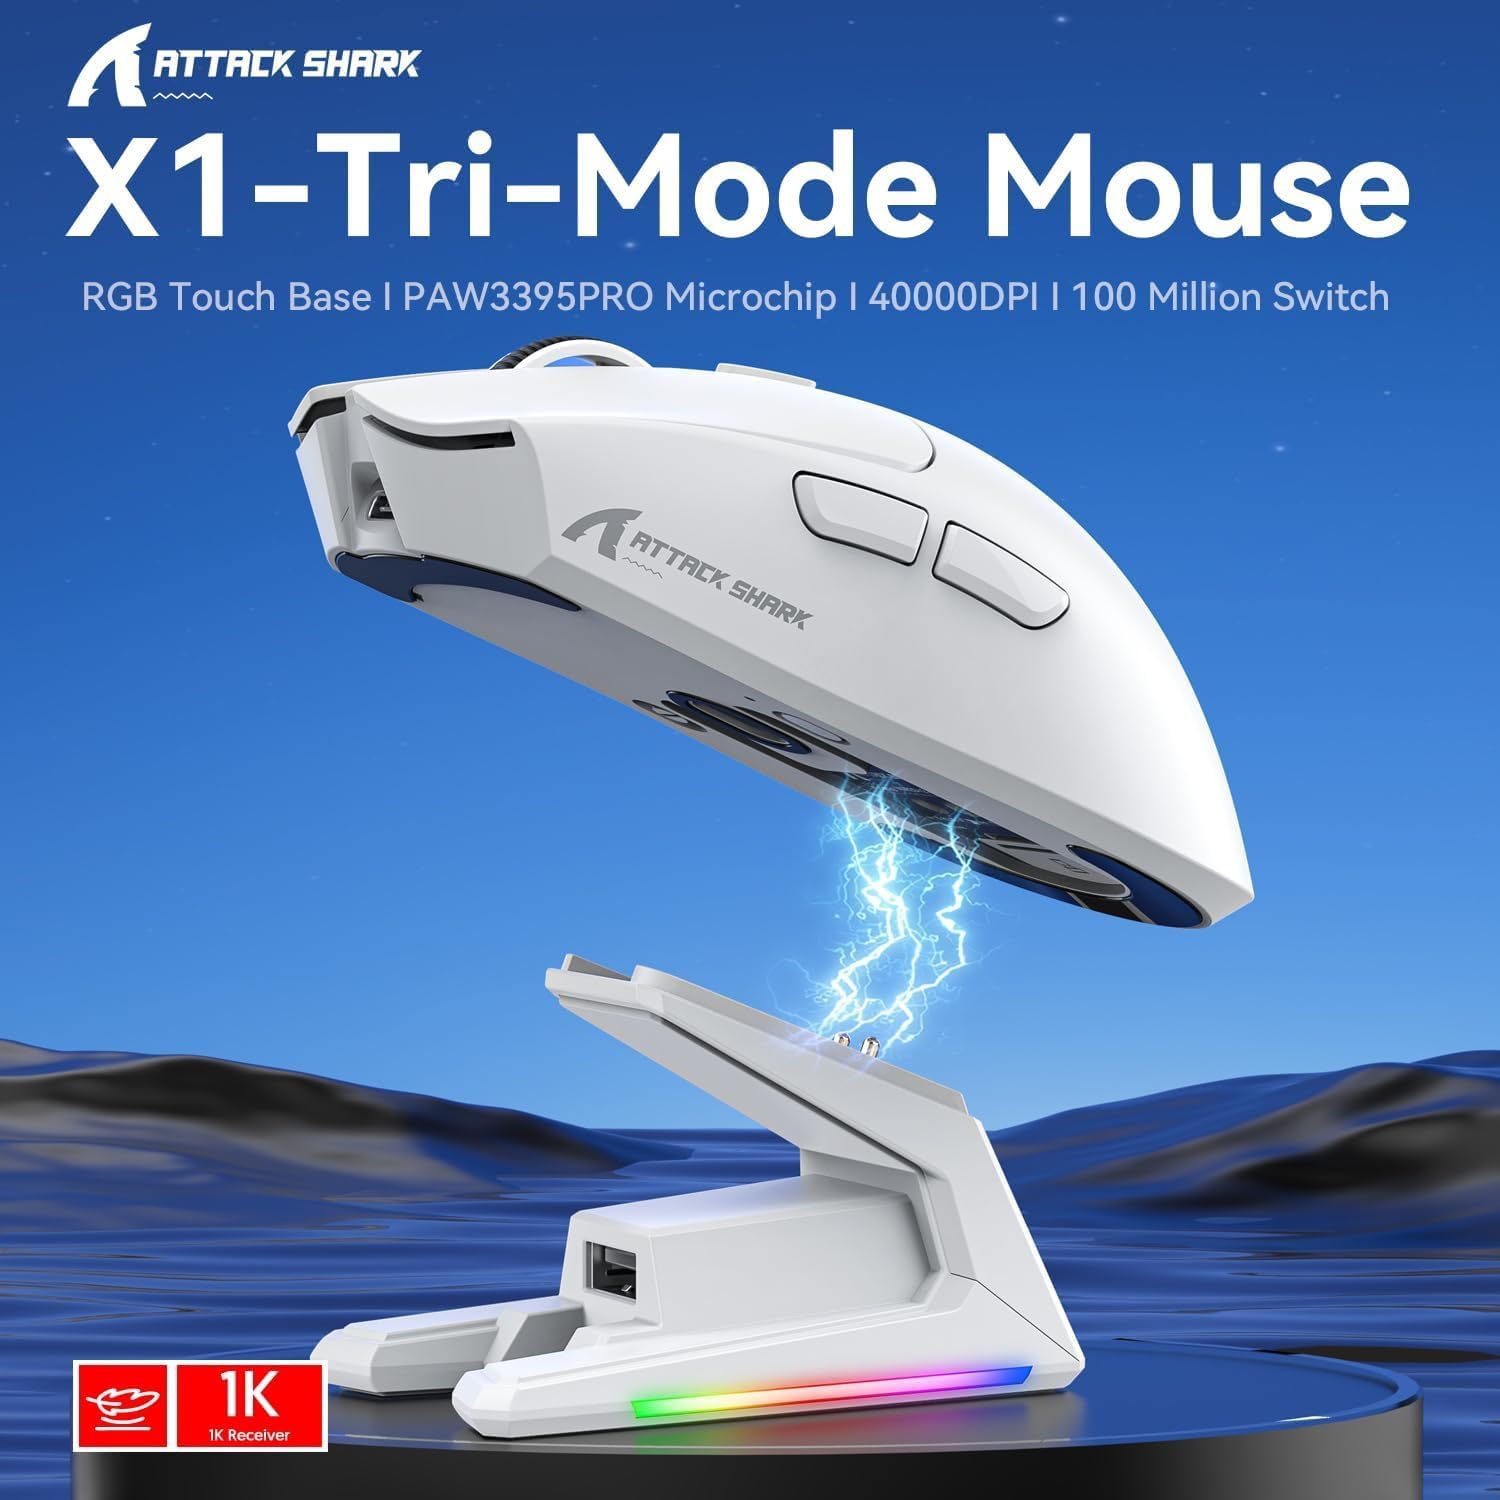
The ATTACK SHARK X1 Superlight Wireless Gaming Mouse is engineered for high-performance gaming and versatile daily use. Featuring a PAW3395PRO gaming sensor, tri-mode connectivity (2.4G wireless, Bluetooth, and wired USB-C), and an innovative magnetic charging dock with RGB lighting, the X1 mouse provides precision, speed, and convenience. Its ultra-lightweight design and durable switches ensure comfort and longevity for extended use.
Пакеттин мазмуну
- ATTACK SHARK X1 Superlight Wireless Gaming Mouse
- Магниттик RGB кубаттоочу док
- USB-C - USB-A кабели
- 2.4GHz Wireless Receiver (Nano Dongle)
- Колдонуучунун Колдонмосу (бул документ)

Image: The ATTACK SHARK X1 mouse shown alongside its magnetic charging dock.
Продукт бүттүview
The X1 mouse features a lightweight ergonomic design with programmable buttons and a high-precision optical sensor. The accompanying magnetic charging dock provides convenient charging and also houses the 2.4GHz wireless receiver.
Сүрөт: бүттүview of the X1 Tri-Mode Mouse highlighting its key features.
Чычкандын компоненттери:
- Сол/оң баскычтары: Standard mouse buttons with durable OMRON switches.
- Жылдыруу дөңгөлөгү: Тик жылдыруу жана ортоңку чыкылдатуу функциялары үчүн.
- DPI баскычы: Located on top for quick sensitivity adjustments.
- Каптал баскычтары: Two programmable buttons on the left side for forward/backward navigation or custom macros.
- USB-C порту: Зымдуу туташуу жана кубаттоо үчүн.
- Кубат/режим которуштуруу: Located on the bottom, allows switching between OFF, 2.4G, and Bluetooth modes.
- PAW3395PRO Sensor: High-performance optical sensor for precise tracking.
Charging Dock Components:
- Magnetic Charging Pins: Align with the mouse for effortless charging.
- RGB Lighting Strip: Ыңгайлаштырылуучу жарык эффекттери.
- Сенсордук панели: For controlling RGB lighting on the dock.
- USB-A порту: For connecting the 2.4GHz wireless receiver.
- USB-C заряддоо порту: For powering the dock.

Сүрөт: Жакын план view of the charging dock's USB data interface for the 2.4G receiver and the Type-C charging interface.
Жайгашуу
1. Зымдуу туташуу:
- Connect the USB-C end of the provided cable to the mouse's USB-C port.
- Кабелдин USB-A учунун компьютериңиздеги жеткиликтүү USB портуна туташтырыңыз.
- Ensure the power/mode switch on the bottom of the mouse is set to the 'OFF' position. The mouse will function in wired mode and charge simultaneously.

Image: The X1 mouse connected to a laptop via its USB-C cable, demonstrating wired mode and charging capability.
2. 2.4 ГГц зымсыз туташуу:
- Plug the 2.4GHz wireless receiver into an available USB-A port on your computer or into the USB-A port on the charging dock.
- Set the power/mode switch on the bottom of the mouse to the '2.4G' position.
- Чычкан автоматтык түрдө ресиверге туташып турушу керек.
3. Bluetooth туташуу:
- Set the power/mode switch on the bottom of the mouse to the 'BT' position.
- The mouse will enter pairing mode (indicator light may flash).
- Компьютериңизде же түзмөгүңүздө Bluetooth жөндөөлөрүнө өтүп, жаңы түзмөктөрдү издеңиз.
- Select 'ATTACK SHARK X1' (or similar name) from the list of available devices to pair. The mouse supports memory for up to 3 Bluetooth devices.
Иштөө нускамалары
DPI жөндөө:
The X1 mouse features a dedicated DPI button on its top surface. Press this button to cycle through the preset DPI levels. The mouse supports up to 40,000 DPI with 6 programmable sensitivity presets. The current DPI level may be indicated by an LED color change (refer to the Web Cloud Driver for specific indications).

Сүрөт: деталдуу view of the PAW3395PRO gaming sensor, emphasizing its high precision.
Web Булут драйверинин программасы:
The ATTACK SHARK X1 utilizes an innovative web-based cloud driver for customization, eliminating the need for software installation. Access the driver through your web browser to configure advanced functions such as:
- DPI adjustment and custom profiles
- Добуш берүү ылдамдыгынын жөндөөлөрү
- Competitive mode activation
- Custom button assignments
- Macro recording and personalized key mapping
The open-source driver automatically identifies your computer system. Refer to the product packaging or official webконкреттүү сайт URL кирүү үчүн Web Cloud Driver.

Image: Screenshot of the X1 Web Cloud Driver interface, showing options for key settings, macros, and other functions.
RGB Lighting Customization (Dock):
The magnetic charging dock features an integrated touch-sensitive panel that allows you to customize its RGB lighting effects. Tap the panel to cycle through different lighting modes. Press and hold the panel to turn the RGB lighting on or off.
Заряддоо жана батареянын иштөө мөөнөтү
The X1 mouse can be charged via the included USB-C cable or by placing it on the magnetic charging dock. The dock provides effortless charging; simply align the mouse with the charging pins for instant power-up. A full charge typically takes approximately 2 hours and provides up to 65 hours of continuous working time.

Image: The X1 mouse magnetically docked for charging, showcasing the RGB lighting of the dock.

Image: An illustration depicting the optimized battery life of the X1 mouse, indicating efficient power usage.
Техникалык тейлөө
To ensure the longevity and optimal performance of your ATTACK SHARK X1 mouse and charging dock, follow these maintenance guidelines:
- Тазалоо: Use a soft, dry cloth to wipe down the mouse and dock. For stubborn dirt, a slightly damp cloth can be used, but ensure no moisture enters the internal components or charging pins. Avoid harsh chemicals or abrasive materials.
- Сенсорго кам көрүү: Keep the optical sensor on the bottom of the mouse clean and free of dust or debris to maintain accurate tracking.
- Сактагыч: When not in use for extended periods, store the mouse and dock in a cool, dry place away from direct sunlight and extreme temperatures.
- Заряддоо пиндери: Periodically inspect the charging pins on the dock and the corresponding contacts on the mouse for any residue or corrosion. Clean gently with a cotton swab if necessary.
Проблемаларды чечүү
If you encounter issues with your ATTACK SHARK X1 mouse, refer to the following common troubleshooting steps:
- Чычкан жооп бербейт:
- Чычкандын заряддалганын текшериңиз.
- Check the power/mode switch on the bottom of the mouse is set to the correct connection mode (2.4G, BT, or OFF for wired).
- For 2.4G wireless, ensure the receiver is properly plugged into a USB port. Try a different USB port.
- For Bluetooth, ensure Bluetooth is enabled on your device and the mouse is paired. Try re-pairing the mouse.
- Чычканды USB-C кабели аркылуу туташтырууга аракет кылып көрүңүз, ал зымдуу режимде иштейт.
- Inconsistent Tracking or Cursor Lag:
- Чычкандын түбүндөгү оптикалык сенсорду тазалаңыз.
- Чычканды ылайыктуу жерде (мисалы, чычкан аянтчасында) колдонуп жатканыңызды текшериңиз.
- Check for interference in 2.4G wireless mode (e.g., other wireless devices).
- Adjust DPI settings using the DPI button or Web Cloud Driver.
- кубаттоо маселелери:
- Ensure the USB-C cable is securely connected to the charging dock and a power source.
- Verify the mouse is correctly seated on the magnetic charging dock, ensuring the pins make proper contact.
- Try charging directly via the USB-C cable connected to the mouse.
- Web Cloud Driver Not Accessible:
- Ensure your computer has an active internet connection.
- Текшериңиз URL үчүн Web Cloud Driver is entered correctly.
- Башкасын байкап көрүңүз web браузер.
Техникалык шарттар
| Өзгөчөлүк | Description |
|---|---|
| Модел | X1 |
| Байланыш | Tri-Mode: 2.4G Wireless, Bluetooth 5.2, Wired USB-C |
| Сенсор | PixArt PAW3395PRO Optical Gaming Sensor |
| DPI диапазону | Up to 40,000 DPI (6 programmable presets) |
| IPS | 650IPS |
| Ылдамдатуу | 50G |
| Которгучтар | OMRON Mechanical Switches (100 Million Clicks lifespan) |
| Салмагы | Approx. 53g (Ultra-light) |
| Батареянын иштөө мөөнөтү | 65 саатка чейин (үзгүлтүксүз колдонуу) |
| Заряддоо | Magnetic Charging Dock / USB-C Wired |
| Добуш берүү көрсөткүчү | 1000Hz (1ms response) |
| Өлчөмдөрү (пакет) | 7.09 x 4.53 x 2.17 дюйм |
| Item Weight (Packaged) | 7.7 унция |
Кепилдик жана колдоо
Кепилдик жөнүндө маалымат жана техникалык колдоо алуу үчүн, расмий ATTACK SHARK сайтына кайрылыңыз webсайтка же түздөн-түз кардарларды тейлөөгө кайрылыңыз. Сатып алуу квитанциясын кепилдик дооматтары үчүн сатып алуунун далили катары сактаңыз.
Кошумча жардам алуу үчүн, баш багыңыз Amazon'догу ATTACK SHARK дүкөнү.


