1. Киришүү
This instruction manual provides detailed guidance for the proper use and care of your 3-piece Rolled Hem Presser Foot set. Designed for creating professional-looking narrow hems, these presser feet are compatible with most low shank snap-on sewing machines, including popular brands such as Singer, Brother, Babylock, Euro-Pro, White, and Elna. Please read this manual thoroughly before first use to ensure optimal performance and longevity of the product.
2. Продукт бүтүп калдыview
The Rolled Hem Presser Foot set includes three different sizes to accommodate various fabric weights and desired hem widths. Each foot is designed to curl the fabric edge as it feeds into the needle, creating a neat, narrow rolled hem without the need for pre-folding or ironing.
The set typically includes:
- 3mm Rolled Hem Foot: Ideal for very fine fabrics and delicate hems.
- 4mm Rolled Hem Foot: A versatile size for light to medium-weight fabrics.
- 6mm Rolled Hem Foot: Suitable for medium to heavier fabrics, creating a more pronounced rolled hem.
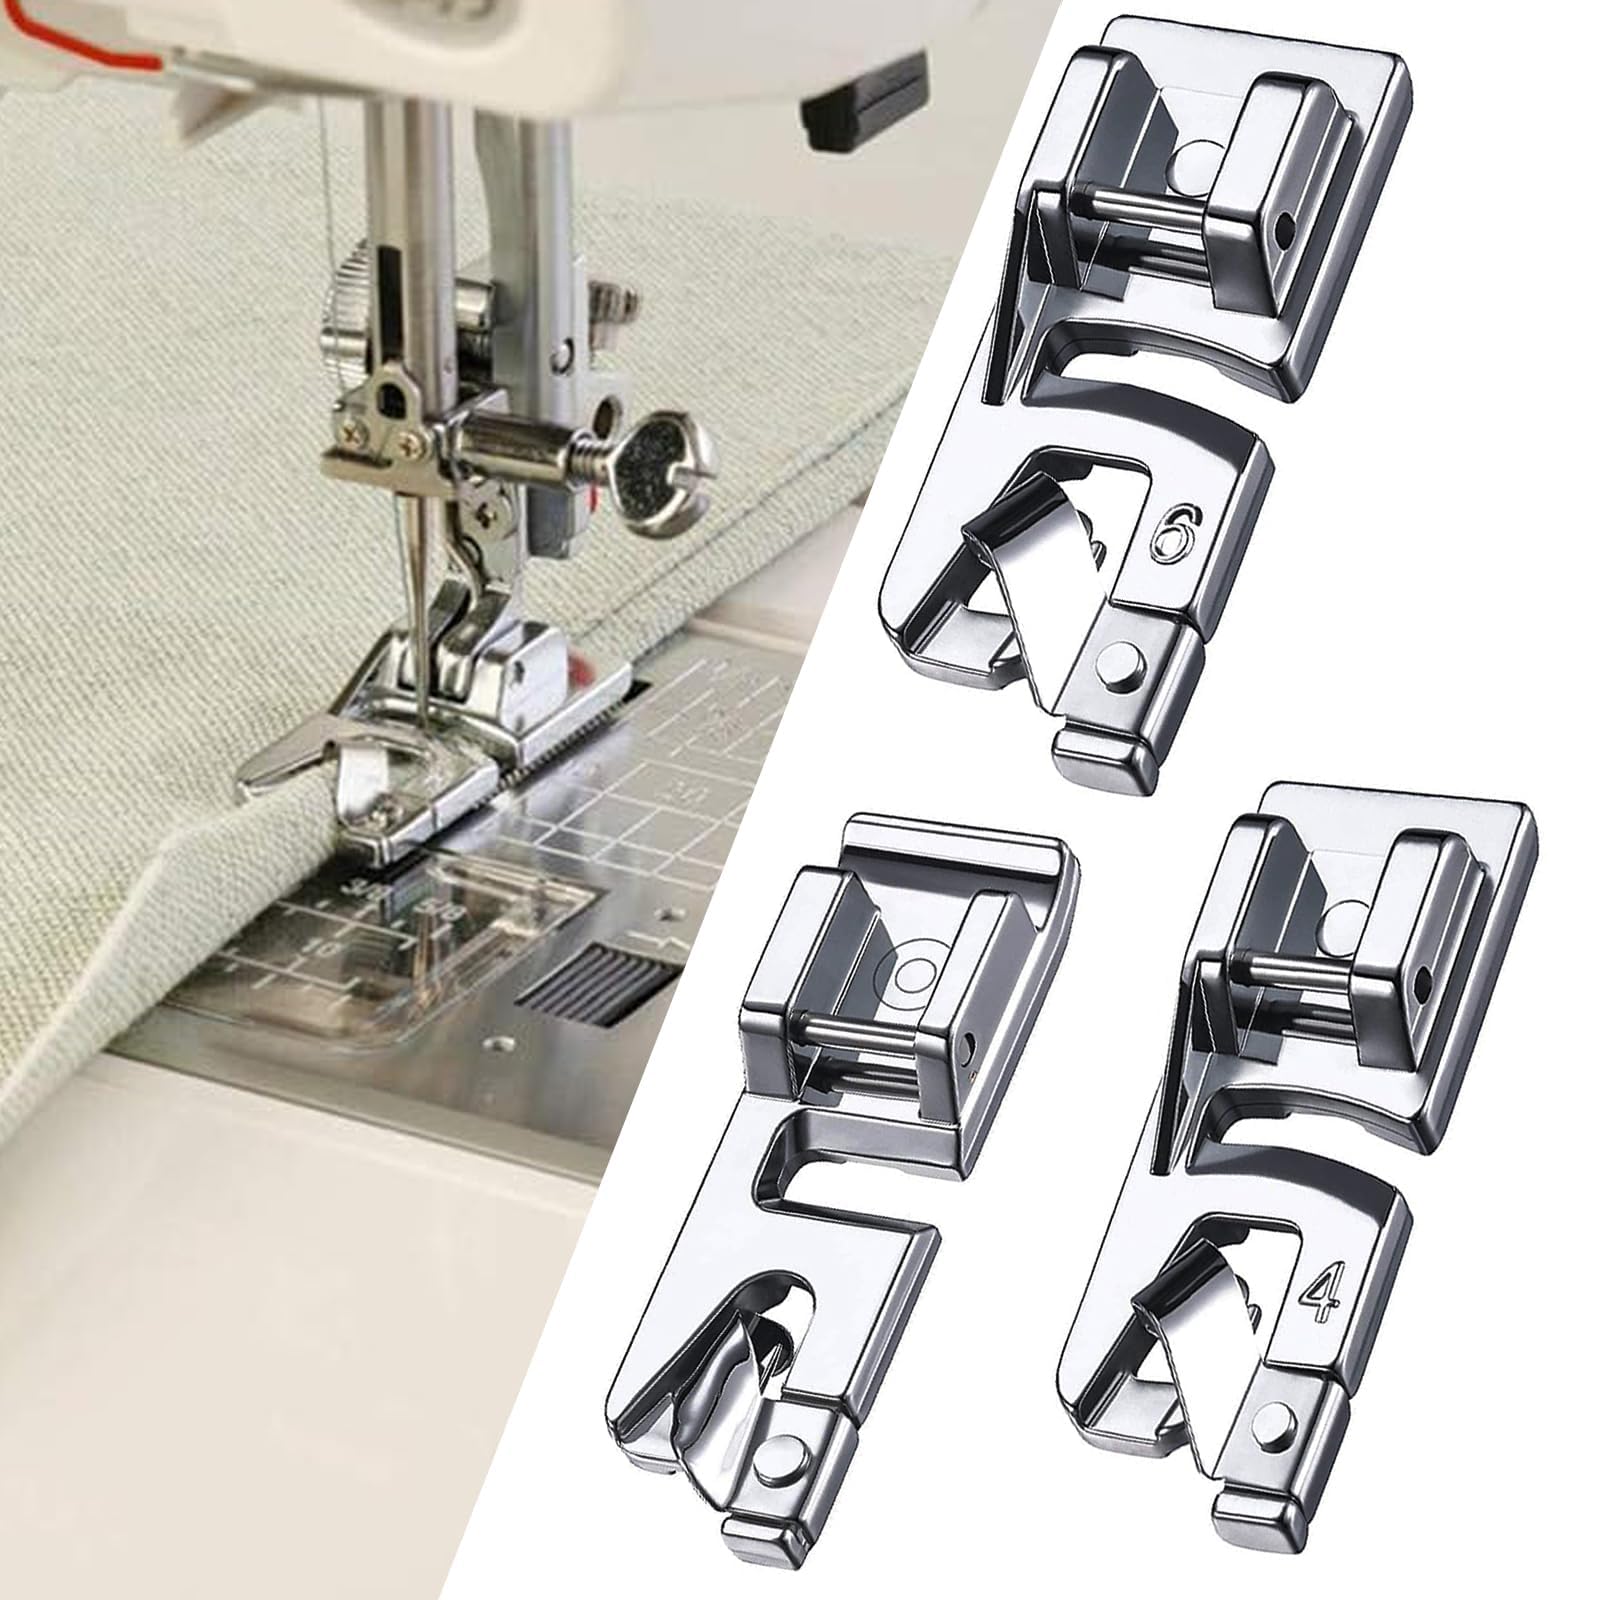
Image: The 3-piece rolled hem presser foot set shown alongside a sewing machine actively creating a hem. The individual feet are chrome-plated, with two of them clearly marked with '6' and '4' indicating their hem width in millimeters.
3. Орнотуу
Before attaching the rolled hem presser foot, ensure your sewing machine is turned off and the needle is in the highest position.
- Identify Your Machine Type: These presser feet are designed for low shank snap-on sewing machines. Verify your machine's shank type before proceeding.
- Учурдагы басуучу бутту алып салуу: Lift the presser foot lever. Locate the small lever or button at the back of the presser foot holder and press it to release the currently attached foot.
- Туура бутту тандаңыз: Choose the rolled hem presser foot with the desired hem width (3mm, 4mm, or 6mm) for your project.
- Attach the Rolled Hem Foot: Position the chosen rolled hem foot directly under the presser foot holder, aligning the bar on the foot with the snap-on mechanism. Lower the presser foot lever until the foot snaps securely into place.
- Thread Your Machine: Thread your sewing machine as usual, ensuring the thread passes correctly through all guides and the needle.
4. Иштөө нускамалары
Using the rolled hem presser foot requires a slightly different technique than standard hemming. Practice on scrap fabric before working on your final project.
Steps for Creating a Rolled Hem:
- Prepare Fabric Edge: For best results, trim the fabric edge straight. No need to pre-fold or iron.
- Initial Stitching: Place the fabric under the presser foot. For the first few stitches, it can be helpful to manually fold the very edge of the fabric (about 1/8 inch or 3mm) twice and place it under the foot, guiding it into the scroll of the foot. Stitch 2-3 stitches to secure.
- Engage the Scroll: With the needle down, lift the presser foot slightly. Gently guide the raw edge of the fabric into the spiral scroll on the front of the presser foot. The scroll will automatically turn the fabric edge twice.
- Тигүү баштоо: Lower the presser foot. Start sewing slowly, ensuring the raw edge of the fabric continues to feed smoothly into the scroll. Maintain a consistent, gentle tension on the fabric to keep it feeding correctly.
- Guide the Fabric: Use your right hand to guide the fabric from the side, keeping the raw edge aligned with the scroll. Use your left hand to gently pull the fabric from behind the needle, ensuring it feeds evenly. Avoid pulling too hard, as this can distort the hem.
- Бүтүрүү: Continue until the end of the fabric edge. Backstitch to secure the hem.
Мыкты натыйжалар үчүн кеңештер:
- Кездеме түрү: Works best on light to medium-weight woven fabrics. Knits and very thick fabrics can be challenging.
- Needle and Thread: Use a sharp needle appropriate for your fabric and good quality thread.
- Тигүү узундугу: A slightly longer stitch length (e.g., 2.5mm to 3.0mm) often works well for rolled hems.
- Көнүгүү: Practice on scrap fabric to get a feel for guiding the fabric into the scroll.
5. Техникалык тейлөө
Proper maintenance ensures the longevity and smooth operation of your presser feet.
- Тазалоо: After each use, gently brush off any lint or fabric fibers that may have accumulated on the foot. A soft cloth can be used to wipe the metal surface.
- Сактагыч: Store the presser feet in a dry, clean place, preferably in their original packaging or a dedicated sewing accessory box, to prevent dust accumulation and damage.
- Катуу химиялык заттардан алыс болуңуз: Do not use abrasive cleaners or harsh chemicals, as these can damage the finish of the metal.
6. Кыйынчылыктарды
If you encounter issues while using the rolled hem presser foot, consider the following common problems and solutions:
| Көйгөй | Мүмкүн себеп | Чечим |
|---|---|---|
| Uneven or crooked hem | Fabric not feeding evenly into the scroll; pulling fabric too hard or not enough. | Practice guiding the fabric consistently. Ensure the raw edge stays aligned with the scroll. Adjust fabric tension. |
| Fabric jams or doesn't feed | Fabric too thick or too thin for the foot; incorrect initial setup; lint buildup. | Ensure fabric is suitable for rolled hems. Re-engage the fabric into the scroll carefully. Clean the foot. |
| Stitches skipping or breaking | Incorrect needle size/type; improper threading; tension issues. | Check needle compatibility with fabric. Re-thread the machine. Adjust upper and bobbin thread tension. |
| Hem is too wide or too narrow | Using the wrong size presser foot for the desired hem width. | Select the appropriate 3mm, 4mm, or 6mm foot for your project. |
7. Техникалык шарттар
- Продукт түрү: Rolled Hem Presser Foot Set
- Саны: 3 даана
- Hem Sizes: Approximately 3mm, 4mm, and 6mm
- Материал: Chrome-plated metal
- Шайкештик: Most low shank snap-on sewing machines (e.g., Singer, Brother, Babylock, Euro-Pro, White, Elna)
8. Кепилдик маалыматы
This product is typically covered by a standard manufacturer's warranty against defects in materials and workmanship. Please refer to the product packaging or contact the seller for specific warranty terms and conditions, as these may vary.
9. Колдоо
For technical assistance, troubleshooting beyond this manual, or inquiries regarding your purchase, please contact the seller or manufacturer directly through the platform where the product was purchased. Provide your order number and a detailed description of the issue for prompt support.


