1. Киришүү
This manual provides detailed instructions for the Geevon Model 256258 Wireless Weather Station. This device features an HD color display, atomic clock functionality, indoor and outdoor temperature and humidity monitoring, a barometer, comfort indicator, and adjustable backlight. Please read this manual thoroughly before operating the device to ensure proper use and longevity.

Image: The Geevon Model 256258 Wireless Weather Station main unit with its vibrant color display and the accompanying remote outdoor sensor.
2. Пакеттин мазмуну
Пакетте бардык буюмдар бар экенин текшериңиз:
- Аба ырайы станциясынын башкы блогу
- TX19 Remote Outdoor Sensor
- Кубаттуу адаптер
- Колдонуучунун Колдонмосу (бул документ)
3. Продукциянын өзгөчөлүктөрү
- Large 5.9-inch Color VA Display for clear viewing of time, date, indoor/outdoor temperature and humidity, weather forecast, barometric pressure, and moon phases.
- WWVB Atomic Clock with Daylight Saving Time (DST) adjustment and 7 selectable time zones (AST, EST, CST, MST, PST, AKST, HST).
- Supports up to 3 remote sensors (one TX19 sensor included) for multi-location temperature and humidity monitoring within a 200ft/60m wireless range.
- Adjustable 3-level backlight (requires AC power adapter).
- Dual power modes: AC power adapter for continuous backlight, or 3x AAA batteries for temporary backlight (15 seconds).
- Integrated alarm clock with 5-minute snooze function.
- Customizable temperature alerts for indoor and outdoor readings.
- Air comfort level indicator.
- Weather forecast for the next 12-24 hours based on atmospheric pressure changes.
- Tabletop stand and wall-mount holes for flexible placement.

Сүрөт: Арткы view of the main unit, highlighting control buttons (MODE, ALARM, ALERT, CH, UP, DOWN) and the battery compartment.
4. Орнотуу
4.1 Негизги блокту электр менен камсыздоо
- Insert 3 AAA batteries (not included) into the battery compartment on the back of the main unit. Observe correct polarity (+/-).
- For continuous backlight and optimal performance, connect the included AC power adapter to the main unit and plug it into a standard electrical outlet.
Эскертүү: When powered by batteries only, the backlight will illuminate for 15 seconds after a button press to conserve power. The backlight remains continuously on when using the AC power adapter.

Image: Illustration of the two power modes: AC adapter for constant backlight and AAA batteries for temporary backlight.
4.2 Remote Sensor Setup and Placement
- Open the battery compartment of the TX19 remote sensor and insert 2 AA batteries (not included), observing correct polarity.
- Place the remote sensor outdoors in a shaded, dry location, protected from direct sunlight and precipitation. Ensure it is within 200 feet (60 meters) of the main unit.
- The main unit will automatically attempt to connect with the remote sensor. If connection is not established, press and hold the "CH" button on the main unit to initiate a manual search for the sensor.
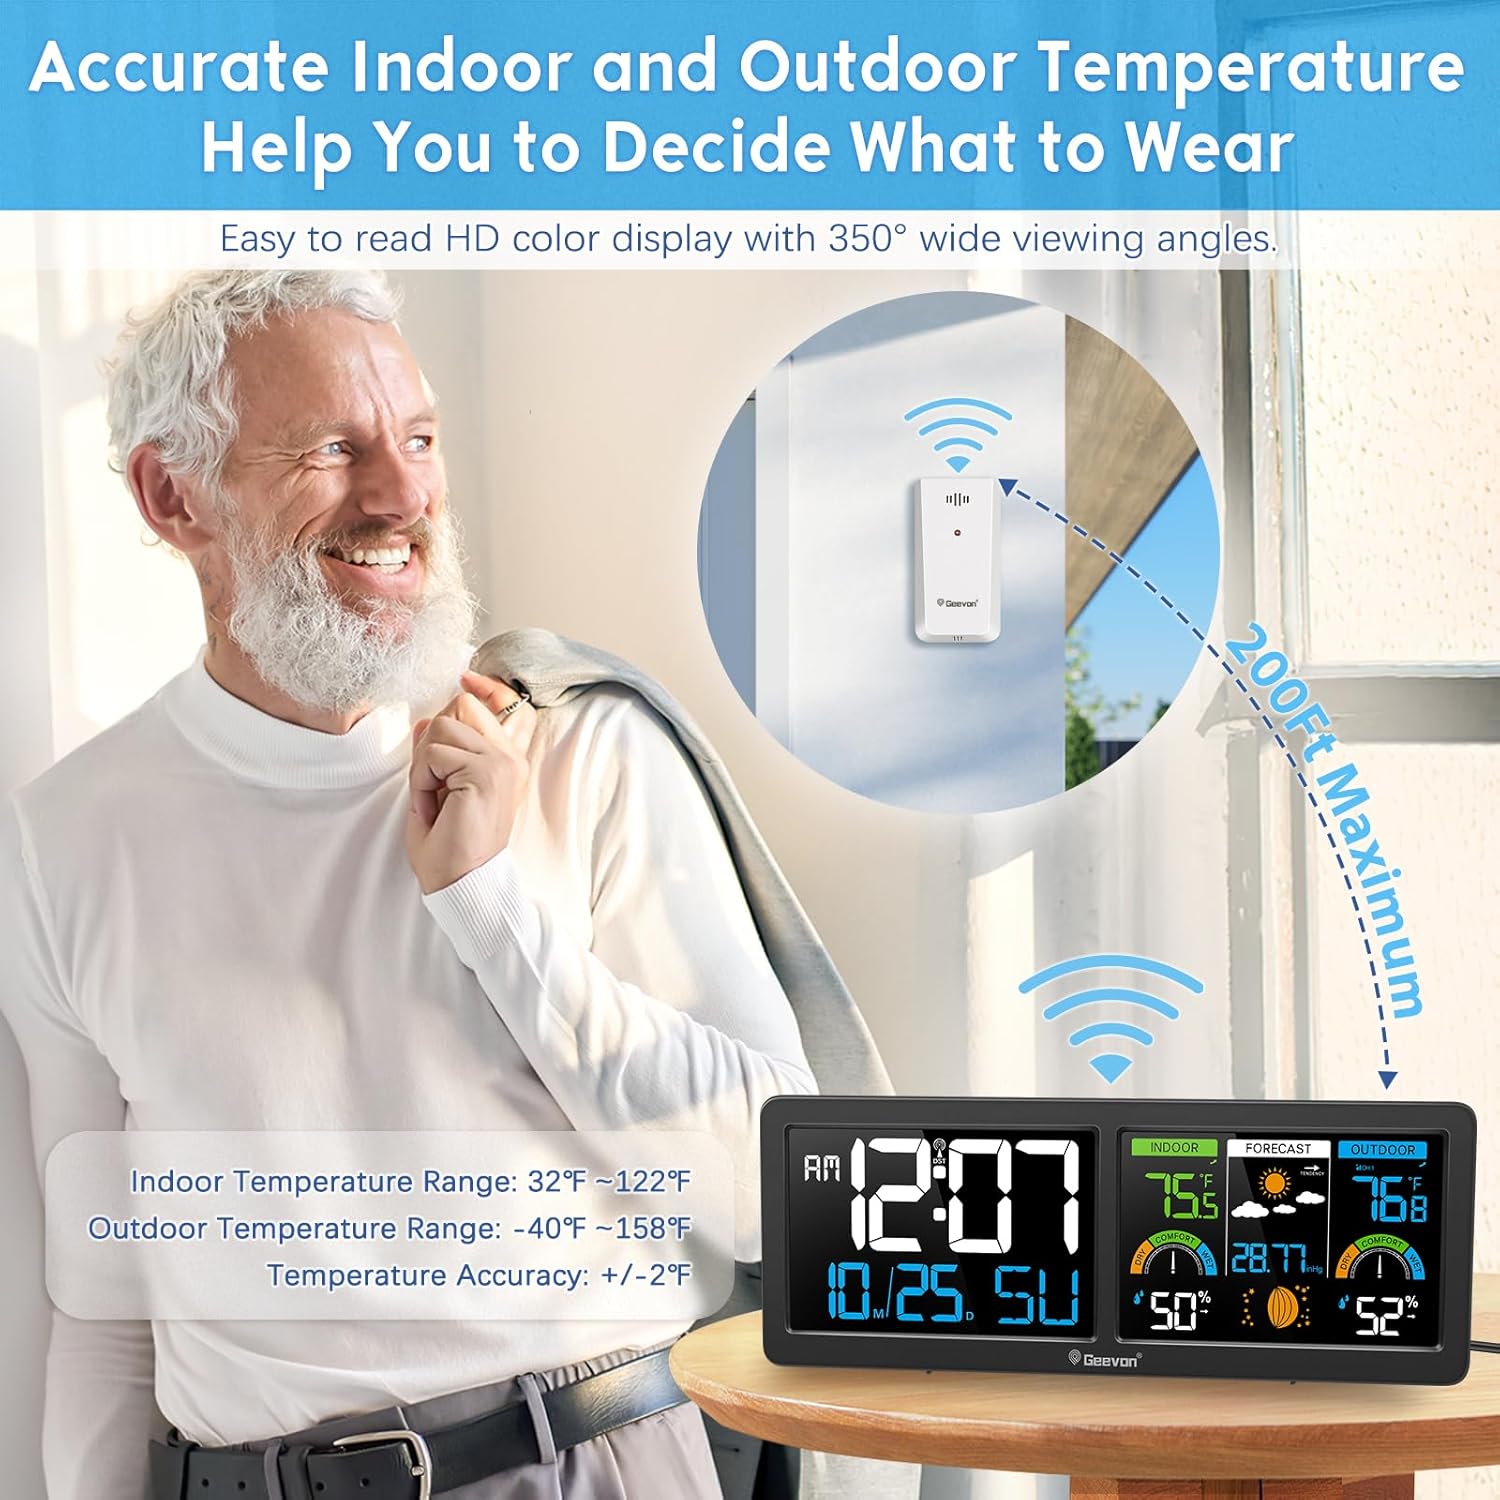
Image: The main unit and remote sensor demonstrating the 200ft maximum wireless transmission range for outdoor temperature and humidity monitoring.
4.3 Atomic Clock (WWVB) Synchronization
The weather station is designed to receive the WWVB atomic clock signal for automatic time synchronization. This process typically occurs overnight.
- Ensure the main unit is placed in a location with good reception, away from electronic interference.
- Set the correct time zone using the "MODE" button and "UP/DOWN" buttons. The available time zones are AST(-4), EST(-5), CST(-6), MST(-7), PST(-8), AKST(-9), HST(-10).
- Enable or disable Daylight Saving Time (DST) as required for your region.
- Leave the clock plugged in overnight. It will automatically attempt to sync with the WWVB signal.
Эскертүү: The backlight may temporarily turn off during WWVB signal reception. If the atomic clock signal is not received, the time can be set manually.

Image: A visual representation of the WWVB signal coverage across the United States and the selectable time zones.
5. Иштөө нускамалары
5.1 Дисплейview
The HD color display is divided into several sections, providing comprehensive information at a glance:
- Сол панель: Time, AM/PM indicator, DST indicator, Date, Day of Week.
- Middle Panel (Indoor): Indoor temperature, indoor humidity, indoor comfort level.
- Middle Panel (Forecast): Weather forecast icons, barometric pressure, moon phase.
- Right Panel (Outdoor): Outdoor temperature, outdoor humidity, outdoor comfort level, remote sensor channel.
Image: The multi-functional digital atomic weather clock display, showing labels for time, calendar, indoor/outdoor temperature and humidity, weather forecast icons, barometric pressure, and comfort indicators.
5.2 Арткы жарыкты жөндөө
When the main unit is powered by the AC adapter, the backlight brightness can be adjusted to three levels (100%, 50%, 0%).
- басыңыз LIGHT / SNOOZE button (usually located on top or back) to cycle through the brightness levels.
- If operating on batteries, the backlight will only illuminate for 15 seconds after a button press.

Image: Comparison of the weather station display with backlight off, at low brightness, and at high brightness, illustrating the adjustable feature.
5.3 Ойготкуч саат функциясы
The weather station includes an alarm clock with a snooze feature.
- басыңыз АЛАРМ сигнал орнотуу режимине кирүү үчүн баскыч.
- колдонуу UP жана ылдый ойготкучтун убактысын тууралоо үчүн баскычтарды басыңыз.
- Басыңыз АЛАРМ again to confirm and activate the alarm.
- Ойготкуч басылганда, басыңыз LIGHT / SNOOZE button to activate the 5-minute snooze function.
- To turn off the alarm, press any other button during the alarm sound or snooze period.

Image: The weather station functioning as a digital alarm clock with a 5-minute snooze feature, placed on a bedside table.
5.4 Temperature and Humidity Alerts
You can set customizable high and low temperature alerts for both indoor and outdoor readings.
- басыңыз ALERT button to cycle through alert settings (Indoor High Temp, Indoor Low Temp, Outdoor High Temp, Outdoor Low Temp).
- колдонуу UP жана ылдый buttons to adjust the desired alert threshold.
- Басыңыз ALERT ар бир жөндөөнү ырастоо үчүн кайрадан басыңыз.
- An audible alarm will sound and the corresponding temperature reading will flash when the set threshold is reached.

Image: The weather station indicating an indoor or outdoor temperature alert with a 'LO HI' icon, suggesting a user might need to adjust their environment.
5.5 Аба ырайынын божомолун чечмелөө
The weather station predicts the weather for the next 12-24 hours based on changes in atmospheric pressure. The forecast is represented by various icons.
- Күн ачык: Ачык асман.
- Partly Sunny: Mix of sun and clouds.
- Булуттуу: Overcast conditions.
- Жамгырлуу: Жаан-чачын күтүлүүдө.
Маанилүү: Weather forecasts are based on atmospheric pressure trends and are for reference only. Local weather conditions may vary.

Image: The weather station's display showing icons for the next 12-hour weather forecast, including sunny, partly sunny, cloudy, and rainy conditions.
5.6 Ыңгайлуулук деңгээлинин көрсөткүчү
The comfort level indicator provides a visual representation of the indoor and outdoor humidity levels, helping you assess the environmental comfort.
- КУРГАК: Нымдуулук төмөн.
- КОМФОРТ: Humidity is within an optimal range.
- СУУ: Нымдуулук жогору.
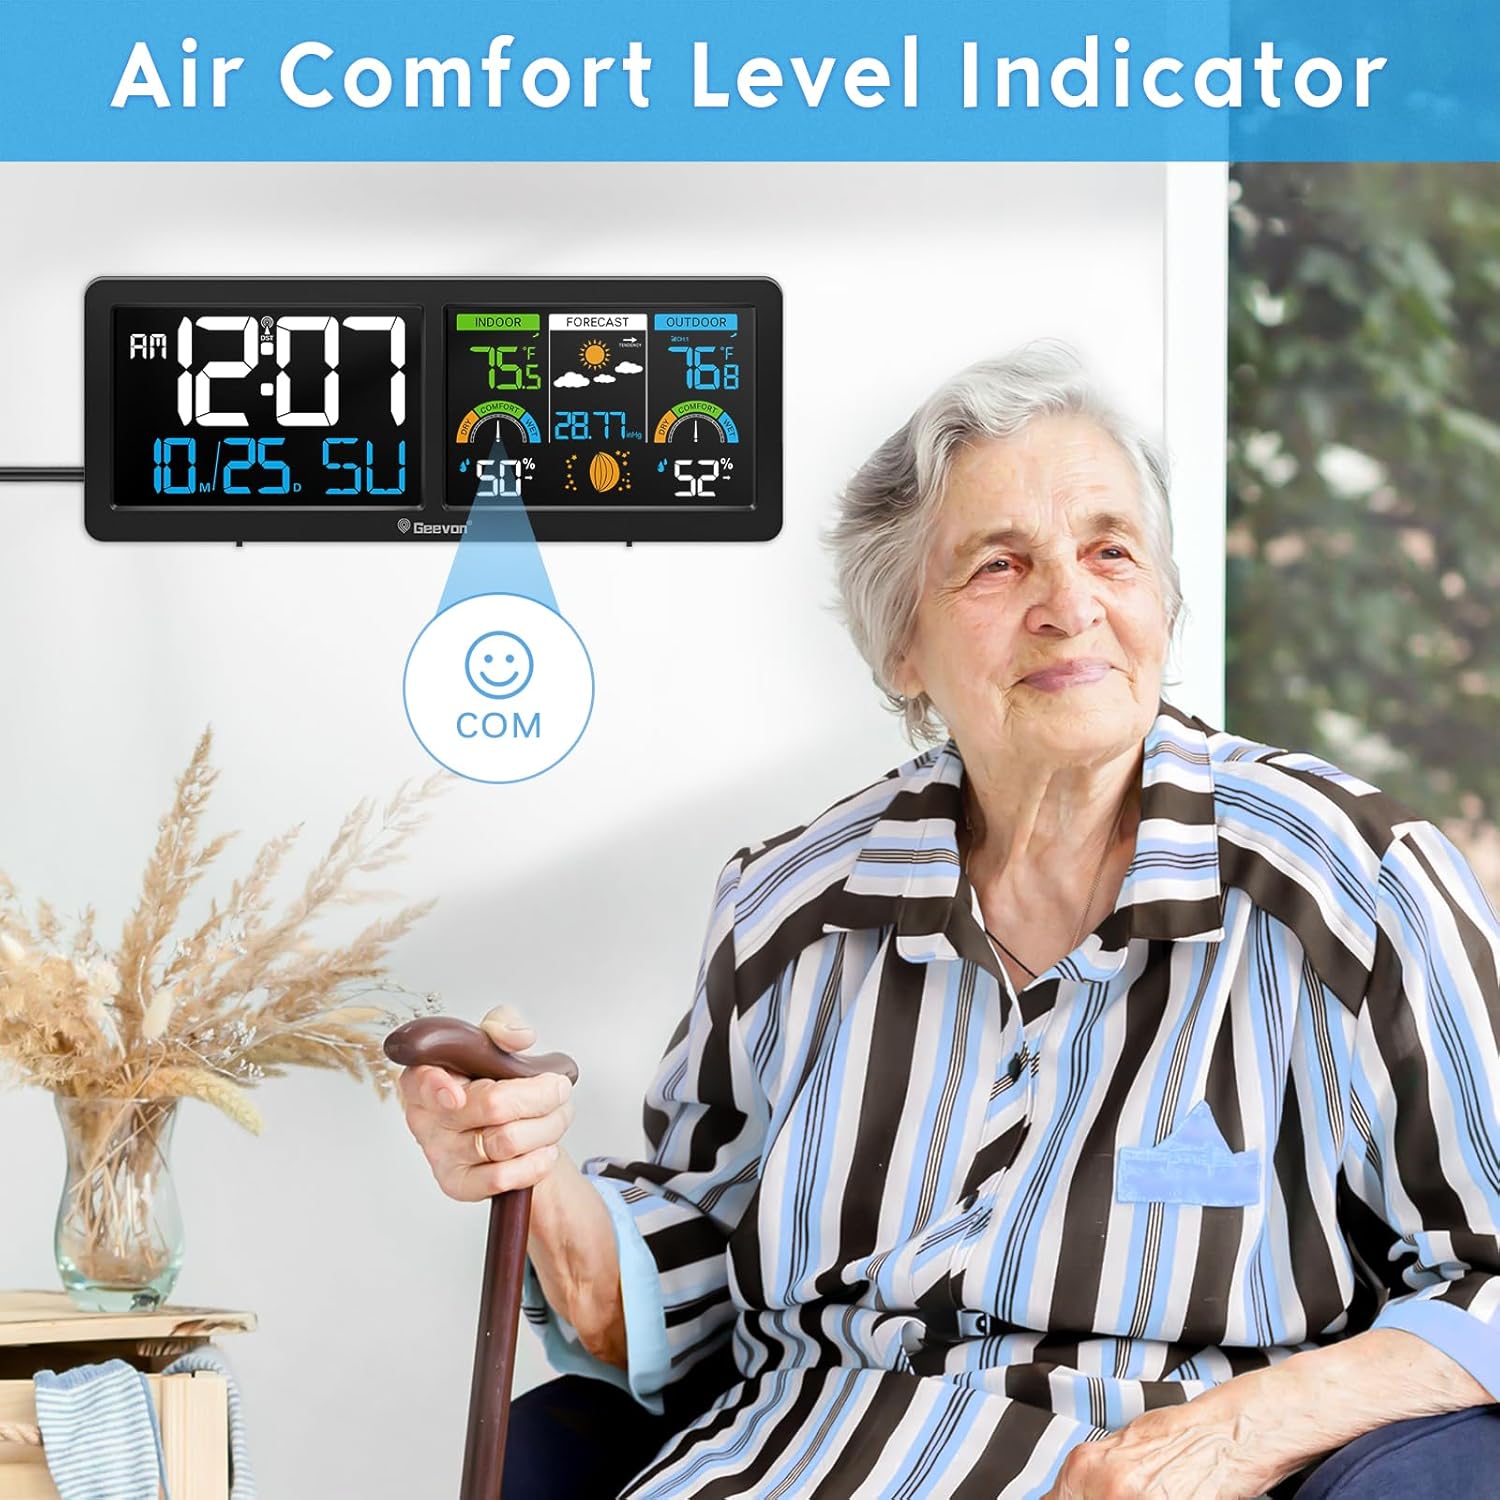
Image: The weather station display showing the comfort level indicator, which helps users understand the current indoor and outdoor humidity conditions.
6. Техникалык тейлөө
6.1 Батареяны алмаштыруу
- When the low battery indicator appears on the display, replace the batteries in the main unit (3x AAA) or the remote sensor (2x AA) as needed.
- Always replace all batteries in a set with new ones. Do not mix old and new batteries, or different types of batteries.
- Эски батареяларды жергиликтүү эрежелерге ылайык таштаңыз.
6.2 Тазалоо
- Дисплейди жана c блогун сүртүңүзasing жумшак менен, гamp кездеме.
- Do not use abrasive cleaners or solvents, as these may damage the display or finish.
- Ensure the remote sensor remains free of dirt, dust, and debris for accurate readings.
7. Кыйынчылыктарды
| Көйгөй | Мүмкүн себеп | Чечим |
|---|---|---|
| Негизги блокто дисплей жок. | Кубат жок же өлүп калган батарейкалар. | Ensure AC adapter is plugged in or replace AAA batteries. |
| Сырткы температура/нымдуулук көрсөтүлгөн эмес. | Remote sensor not connected or out of range. | Replace remote sensor batteries. Move sensor closer to main unit. Press and hold "CH" button on main unit to re-establish connection. |
| Atomic clock not synchronizing. | Poor WWVB signal reception or incorrect time zone. | Ensure correct time zone is set. Move unit to a location with better signal reception (e.g., near a window, away from electronics). Allow overnight for synchronization. Manual time setting is an alternative. |
| Температура/нымдуулуктун көрсөткүчтөрү так эмес. | Sensor placement or interference. | Ensure remote sensor is in a shaded, dry area. Avoid placing sensors near heat sources, vents, or direct sunlight. Allow time for readings to stabilize after placement. |
| Backlight not staying on. | Unit is running on battery power only. | Connect the AC power adapter for continuous backlight. |
8. Техникалык шарттар
| Өзгөчөлүк | Деталь |
|---|---|
| Модель номери | 256258 |
| Продукциянын өлчөмдөрү (Негизги бирдик) | 11.2" W x 4.2" H x 1" D |
| Жабык температура диапазону | 32 ° F ~ 122 ° F (0 ° C ~ 50 ° C) |
| Тышкы температура диапазону | -40 ° F ~ 158 ° F (-40 ° C ~ 70 ° C) |
| Температуранын тактыгы | +/- 2°F (+/- 1.1°C) |
| нымдуулук колому | 10% ~ 99% RH |
| Зымсыз берүү диапазону | Up to 200ft (60m) in open air |
| Кубат булагы (Негизги блок) | AC Power Adapter (included), 3x AAA Batteries (not included) |
| Кубат булагы (Алыскы сенсор) | 2x AA батарейкалар (киргизилген эмес) |
| Дисплей түрү | HD Color VA Display |
| Өзгөчөлүктөр | Atomic Clock, DST, Alarm, Snooze, Adjustable Backlight, Temperature Alerts, Weather Forecast, Comfort Indicator, Moon Phase |
| Материал | ABS, Glass, Metal, Plastic |

Image: Diagram illustrating the dimensions of the Geevon Weather Station main unit.
9. Кепилдик жана колдоо
For warranty information or technical support, please refer to the contact details provided with your purchase or visit the official Geevon webсайт. Сатып алганыңыздын далили катары сатып алуу дүмүрчөгүңүздү сактаңыз.


