1. Киришүү
This manual provides detailed instructions for the safe installation, operation, and maintenance of your Parrot Uncle 84-inch industrial ceiling fan. Please read all instructions carefully before beginning installation and retain this manual for future reference.
The Parrot Uncle 84-inch industrial ceiling fan is designed for large indoor and covered outdoor spaces such as living rooms, bedrooms, shops, and garages. It features a powerful yet quiet DC motor, remote control operation, and a reversible function for year-round air circulation.
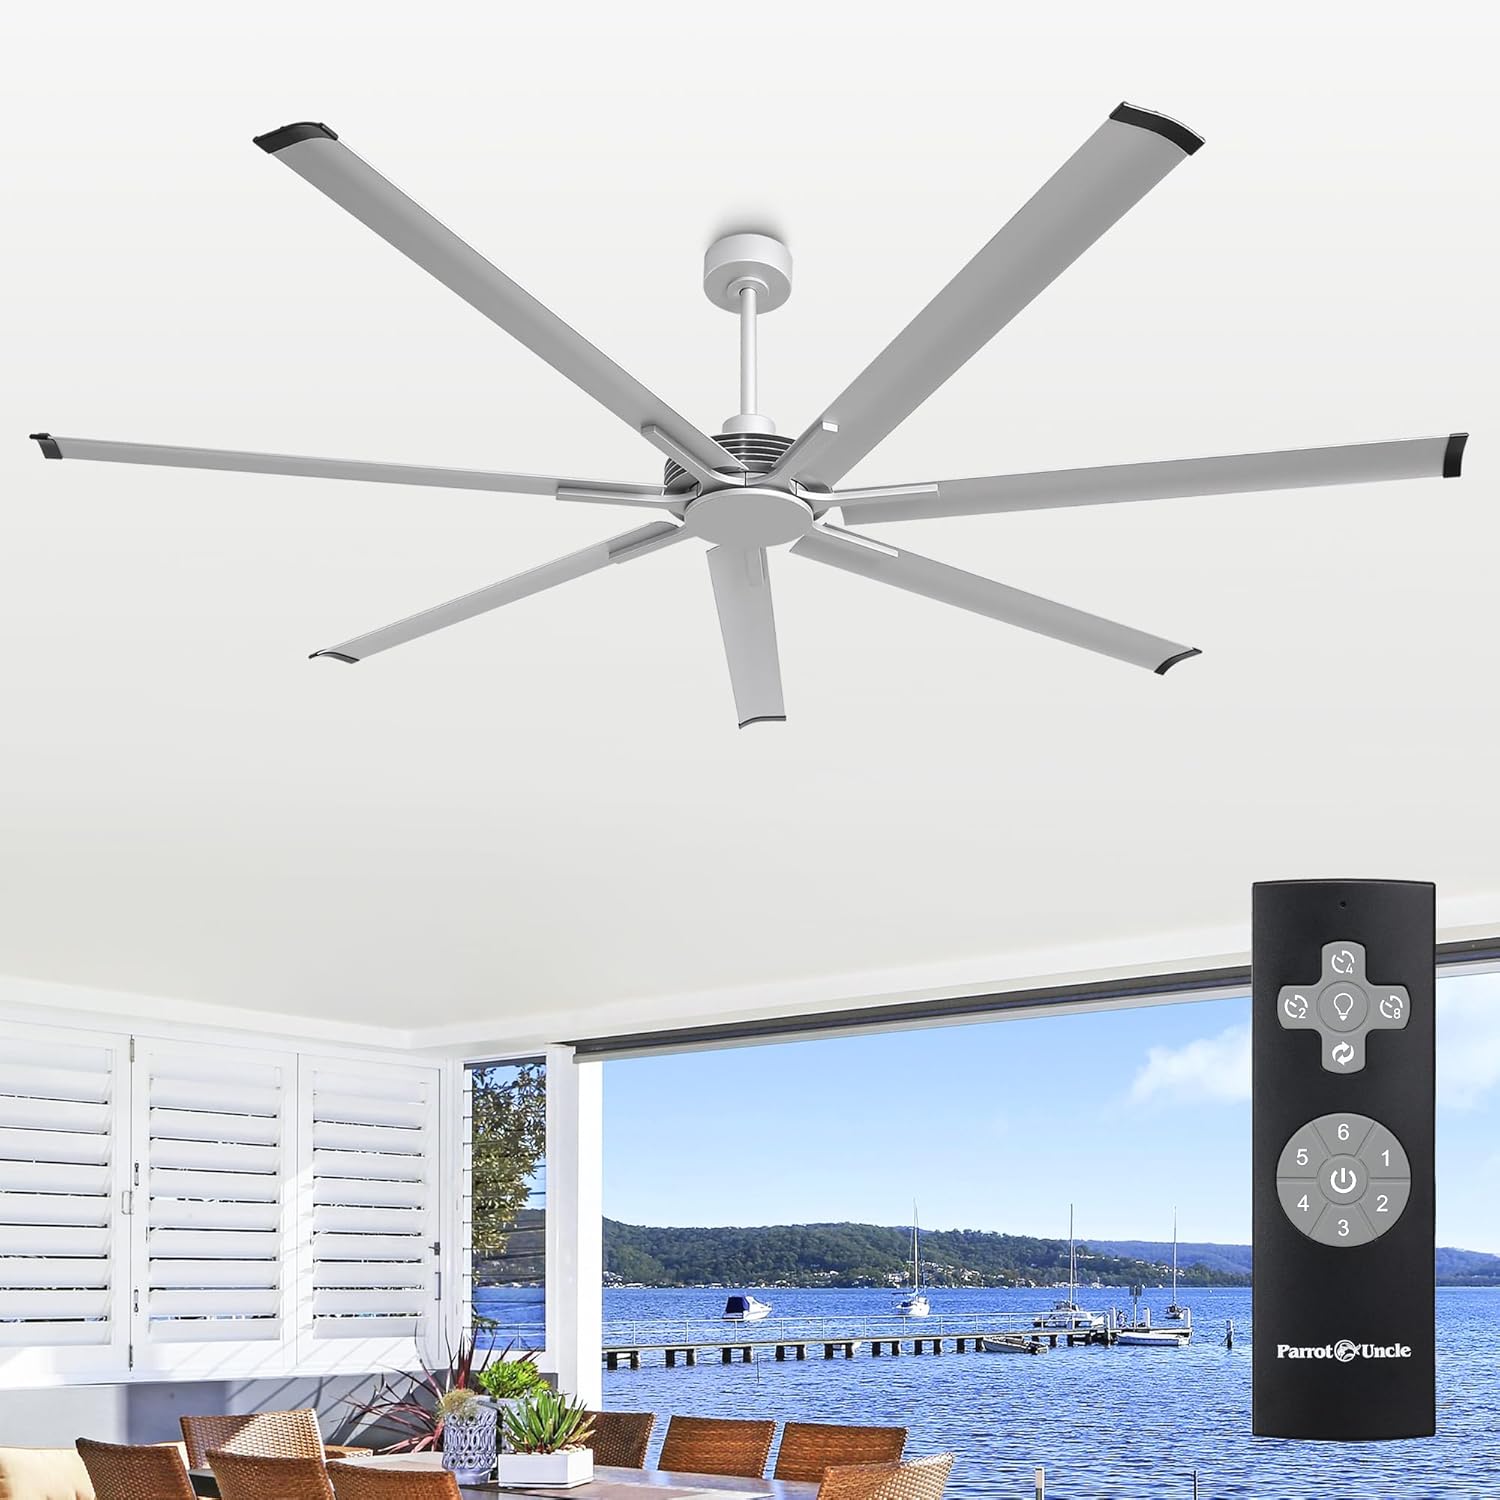
Image 1.1: Parrot Uncle 84-inch industrial ceiling fan in a residential setting.
2. Коопсуздук маалыматы
Электр тогуна урунуу, өрт чыгуу же жеке жаракат алуу коркунучун азайтуу үчүн ар дайым төмөнкү негизги коопсуздук чараларын сактаңыз:
- Орнотуудан же тейлөөдөн мурун автоматтык өчүргүчтө электр энергиясы өчүрүлгөнүн текшериңиз.
- All electrical connections must be made in accordance with local codes, ordinances, or national electrical codes. If you are unfamiliar with wiring, consult a qualified electrician.
- Монтаждоочу конструкция желдеткичтин салмагын (болжол менен 25 фунт) көтөрө алышы керек.
- Вентилятор иштеп жатканда колдоруңузду, кийимиңизди жана башка буюмдарыңызды желдеткичтин бычактарынан алыс кармаңыз.
- Желдеткичти электр шнурунун же сайгычтын бузулушу менен иштетпеңиз.
- This fan is designed for indoor and covered outdoor use. Do not expose to direct water spray.
3. Пакеттин мазмуну
Орнотууну баштоодон мурун бардык компоненттер бар экендигин текшериңиз. Эгерде кандайдыр бир бөлүктөрү жок же бузулуп калса, кардарларды колдоо менен байланышыңыз.
- Вентилятордун мотору
- 7 Aluminum Fan Blades
- Чатыр
- Төмөнкү таякчалар (8 дюймдук жана 12 дюймдук варианттар)
- Кронштейн орнотуу
- Алыстан башкаруу
- Алыстан башкаруу тутуму
- 23A 12V Battery (for remote)
- Аппараттык пакет (буроолор, шайбалар, зым гайкалар)
- Instruction Manual

Image 3.1: Included components: remote control, downrods, and fan blade.
4. Орнотуу жана орнотуу
Installation typically takes approximately 30 minutes. Ensure you have the necessary tools and follow these steps carefully.
4.1 Монтаждалуучу жер
Choose a location where the fan blades will have at least 7 feet of clearance from the floor and 24 inches from any walls or obstructions. The fan can be installed on flat or sloped ceilings (up to 15 degrees).
4.2 Чогултуу кадамдары
- Кубатты өчүрүү: Before starting, ensure the power supply to the installation location is turned off at the circuit breaker.
- Монтаждык кронштейнди орнотуу: Secure the mounting bracket to the ceiling junction box using the provided hardware. Ensure the bracket is firmly attached and can support the fan's weight.
- Төмөнкү таякчаны чогултуңуз: Select either the 8-inch or 12-inch downrod based on your ceiling height. Feed the electrical wires from the fan motor through the downrod.
- Attach Fan to Downrod: Secure the fan motor assembly to the chosen downrod.
- Асма желдеткич: Вентилятор топтомун этияттык менен көтөрүп, орнотуу кронштейнине илип коюңуз.
- Электр байланыштарын жасоо: Connect the fan's electrical wires to the household wiring according to the wiring diagram in the detailed user manual (not provided here, refer to product packaging for full manual). Ensure all connections are secure with wire nuts.
- Canopy орнотуу: Slide the canopy up to cover the mounting bracket and wiring, then secure it in place.
- Желдетүүчү бычактарды тиркөө: Secure each of the 7 aluminum fan blades to the motor housing using the provided screws.

Image 4.1: Fan dimensions and compatibility with flat and sloped ceilings.

Image 4.2: Visual representation of the installation process.
5. Иштөө нускамалары
Your Parrot Uncle ceiling fan is operated using the included remote control.
5.1 Алыстан башкаруу функциялары
- Желдеткич КҮЙГҮЗҮҮ/ӨЧҮРҮҮ: Желдеткичти күйгүзүү же өчүрүү үчүн кубат баскычын басыңыз.
- Fan Speed Control (1-6): Buttons 1 through 6 adjust the fan speed from low (1) to high (6).
- Кайтарымдуу айлануу: Press the reverse button to change the direction of the fan blades.
- Таймерди орнотуу: Use the timer buttons (2H, 4H, 8H) to set the fan to automatically shut off after 2, 4, or 8 hours.

Image 5.1: Reversible motor function and quiet operation.

Image 5.2: Fan speed levels and corresponding airflow.

Image 5.3: Multi-functional remote control overview.
5.2 Кайтарылуучу мотордун функциясы
The fan features a reversible DC motor for year-round comfort:
- Summer Mode (Counterclockwise Rotation): Муздатуу эффектин жаратып, ылдый карай аба агымын жаратат.
- Winter Mode (Clockwise Rotation): Creates an upward airflow, circulating warm air trapped near the ceiling throughout the room.

Image 5.4: Seasonal reversible air circulation.
6. Техникалык тейлөө
Үзгүлтүксүз техникалык тейлөө оптималдуу иштөөнү камсыз кылат жана желдеткичиңиздин иштөө мөөнөтүн узартат.
- Тазалоо: Вентиляторду тазалоо үчүн, жумшак, d менен сүртүңүзamp кездеме. Абразивдүү тазалагычтарды же эриткичтерди колдонбоңуз. Тазалоодон мурун электр кубаты өчүрүлгөнүн текшериңиз.
- Бычак текшерүү: Periodically check the fan blades for any signs of damage or looseness. Tighten screws if necessary.
- Моторду майлоо: Туруктуу токтун кыймылдаткычы туруктуу майланган жана кошумча майлоону талап кылбайт.
7. Кыйынчылыктарды
Эгер күйөрманыңыз менен көйгөйлөргө туш болсоңуз, төмөнкү жалпы көйгөйлөрдү жана чечимдерди караңыз:
| Көйгөй | Мүмкүн себеп | Чечим |
|---|---|---|
| Күйөрман иштебейт | желдеткичке кубат жок; Бошоң зым байланыштары; Алыстан башкаруунун батареясы аз. | өчүргүчтү текшерүү; Бардык зым байланыштары коопсуз экендигин текшериңиз; Алыстан башкаруунун батареясын алмаштырыңыз. |
| Күйөрман солкулдайт | Loose fan blades; Uneven blade installation; Loose mounting bracket. | Ensure all blade screws are tight; Re-install blades evenly; Tighten mounting bracket screws. |
| Пульт иштебей жатат | Battery low or incorrectly installed; Remote not paired. | Replace battery, ensuring correct polarity; Refer to the full manual for remote pairing instructions. |
| Желдетүүчү ызы-чуу | Бошоң бурамалары; Ички компоненттин көйгөйү. | Бардык бурамаларды текшерип, бекемдөө; Эгер ызы-чуу кетпесе, кардарларды колдоо бөлүмүнө кайрылыңыз. |
If the problem persists after attempting these solutions, please contact Parrot Uncle customer support.
8. Техникалык шарттар
| Өзгөчөлүк | Деталь |
|---|---|
| Бренд | Тоту куш байке |
| Модель аты | F8311110V |
| Түс | Silver |
| Продукциянын өлчөмдөрү | 84"D x 84"W x 14.5"H |
| Элемент Салмагы | 25 фунт |
| Power Source | AC/DC |
| Тtage | 120 вольт |
| Ватtage | 40 ватт |
| Мотор түрү | DC Motor |
| Blades саны | 7 |
| Бычактын материалы | Алюминий |
| Аба агымынын кубаттуулугу | Мүнөтүнө 11200 куб фут |
| Ызы-чуу деңгээли | 40 дБ |
| Башкаруу ыкмасы | Алыстан |
| Кубат деңгээли саны | 7 (speeds 1-6, plus off) |
| Төмөнкү таякчанын узундугу | 8 дюйм, 12 дюйм |
| Ички/тышкы колдонуу | Имараттын ичинде, жабык сыртта |
| Specification Met | ETL |

Image 8.1: Key product specifications and dimensions.
9. Кепилдик жана колдоо
Parrot Uncle stands behind the quality of its products.
- Whole Fan Coverage: 3 жылдык кепилдик.
- Мотордун камтуусу: Өмүр бою кепилдик.
- Сатуудан кийинки тейлөө: Lifetime support is provided.
For technical assistance, warranty claims, or general inquiries, please contact Parrot Uncle customer support through the retailer where the product was purchased or visit the official Parrot Uncle webсайт.

Image 9.1: Warranty and service details.


