Introduction
Thank you for choosing the Electactic Commercial Ice Maker. This manual provides essential information for the safe and efficient operation, maintenance, and troubleshooting of your new ice machine. Please read these instructions thoroughly before installation and use, and retain them for future reference.
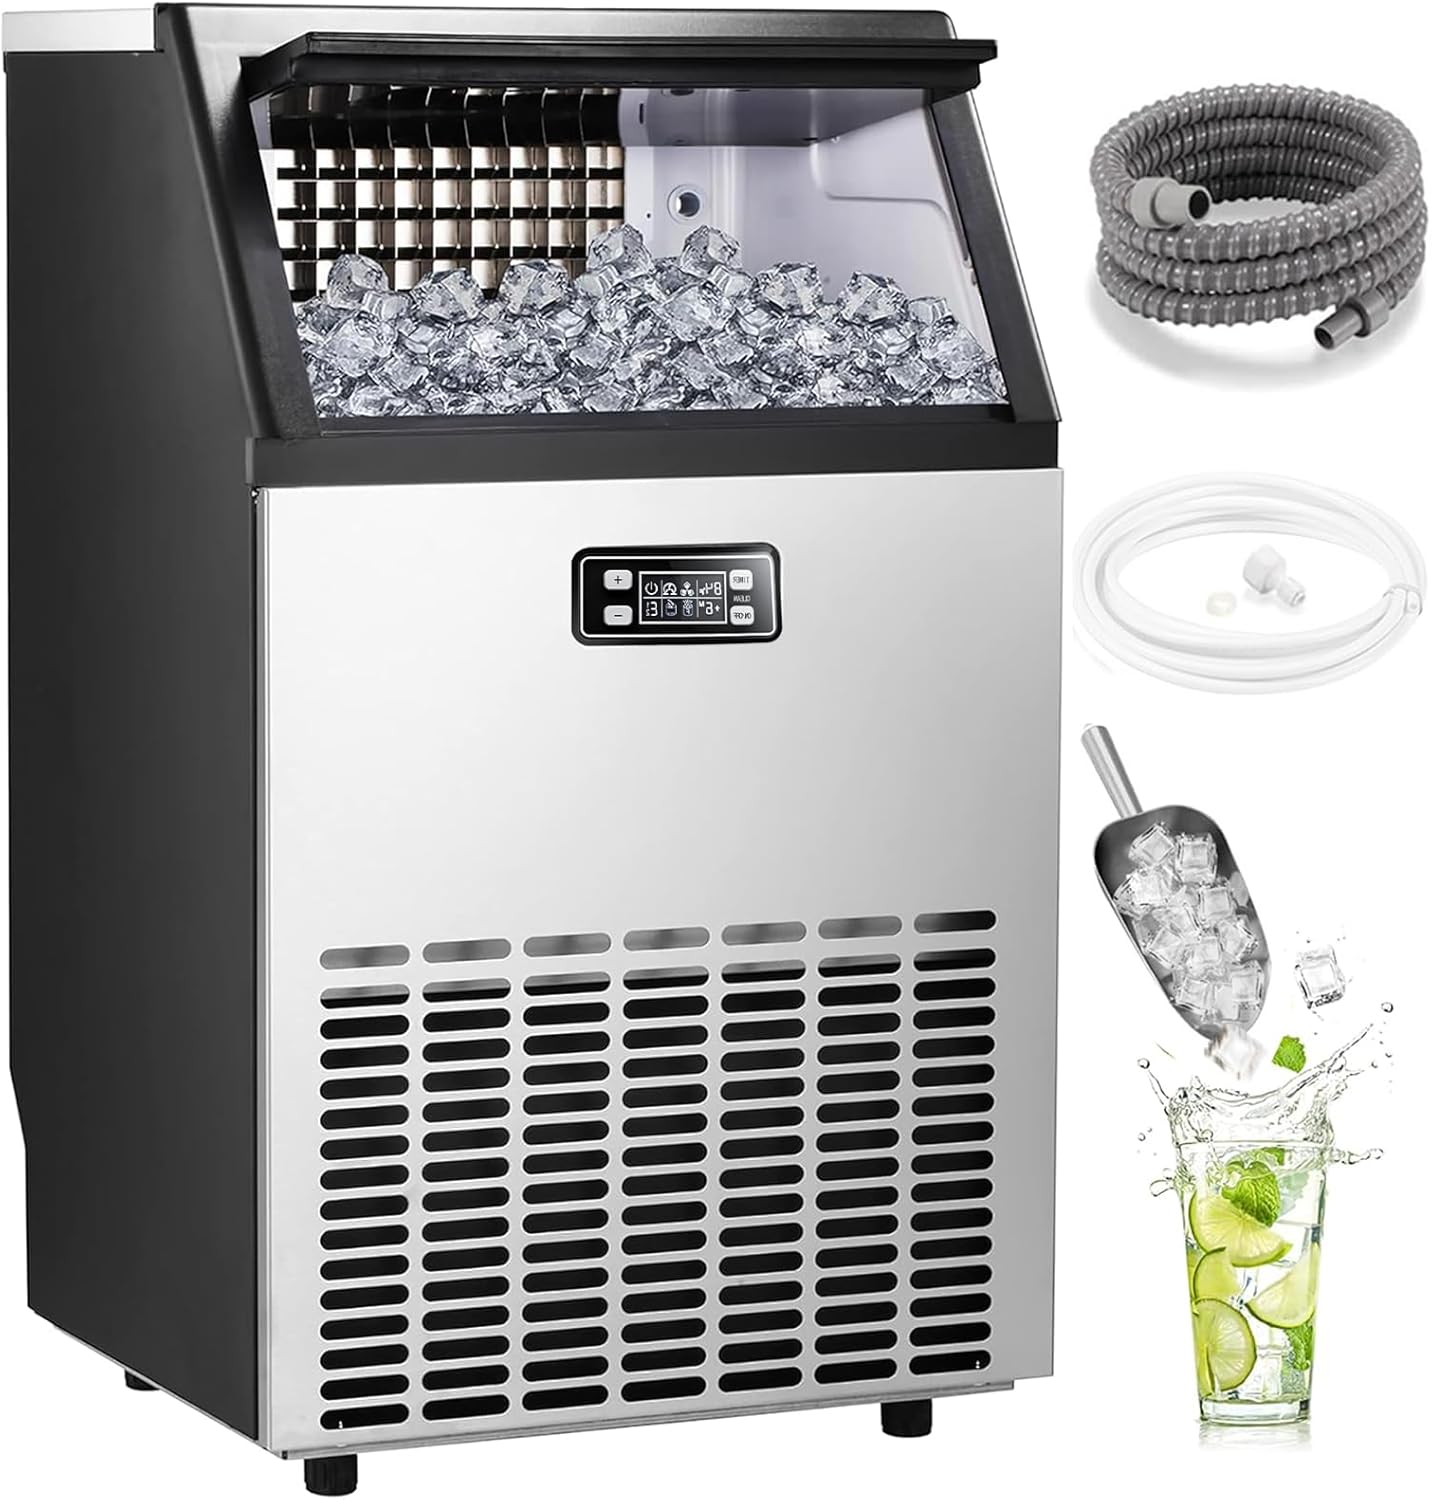
Figure 1: Electactic Commercial Ice Maker and included accessories.
Коопсуздук нускамалары
- Шайман туура жерге туташтырылганын текшериңиз.
- Do not operate the ice maker with a damaged power cord or plug.
- Муз жасагычты жылуулук булактарынан жана түз күн нурунан алыс кармаңыз.
- Allow the unit to stand upright for at least 24 hours before initial use to allow refrigerant to settle.
- Муз өндүрүү үчүн ичүүчү сууну гана колдонуңуз.
- Бул шаймандын ичинде күйүүчү от жагылуучу аэрозолдук кутулар сыяктуу жарылуучу заттарды сактабаңыз.
- Бул шайман физикалык, сезүү же акыл-эс жөндөмү начар же тажрыйбасы жана билими жок адамдар (анын ичинде балдар) үчүн, эгерде алардын коопсуздугуна жооптуу адам тарабынан көзөмөлсүз же шайманды колдонуу боюнча көрсөтмө болбосо, колдонууга арналбайт.
- Балдар шайман менен ойнобошу үчүн аларды көзөмөлгө алуу керек.
Продукт бүттүview
The Electactic Commercial Ice Maker is designed for high-efficiency ice production, featuring a durable stainless steel construction and an intuitive LED digital display. It produces up to 101 lbs of ice per 24 hours with a storage capacity of 33 lbs.
Негизги компоненттер:
- Ice Maker Unit (Stainless Steel Casing)
- LED Digital Control Panel
- Ice Storage Bin (33 lbs capacity)
- Муз кашык
- Суу кирүүчү шланг
- Дренаждык шланг
- Жөнгө салынуучу буттар
Жайгашуу
1. Таңгактан чыгаруу жана жайгаштыруу:
- Бардык таңгактоочу материалдарды кылдаттык менен алып салыңыз.
- Place the ice maker on a firm, level surface. Ensure there is adequate ventilation around the unit (at least 5 inches of space on all sides).
- Allow the unit to stand upright for a minimum of 24 hours before plugging it in. This allows the refrigerant to stabilize.
2. Суу туташуу:
Муз жасоочу суу менен камсыздоонун эки ыкмасын колдойт:
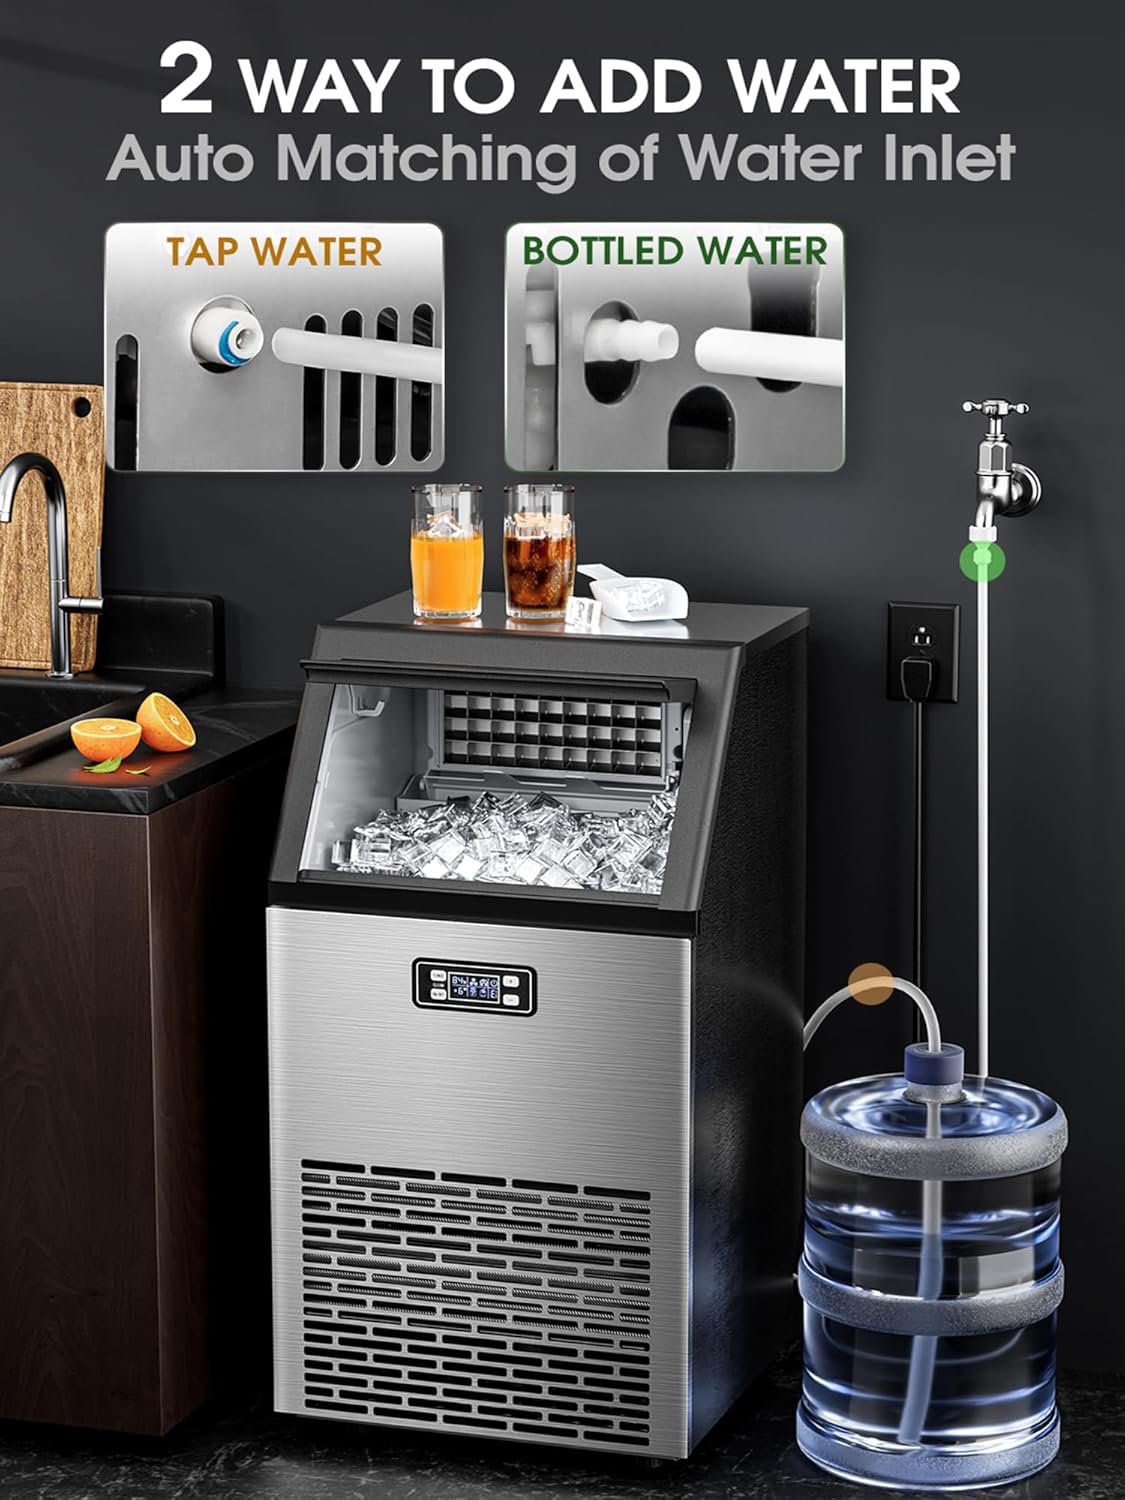
Figure 2: Water inlet options for the ice maker.
- Direct Tap Water Connection: Connect the provided water inlet hose to a potable water supply and the designated inlet on the ice maker. Ensure all connections are secure to prevent leaks.
- Бөтөлкөдөгү сууга туташуу: For bottled water, connect the appropriate adapter and hose to a water bottle (e.g., 5-gallon) and the ice maker's water inlet.
3. Drainage Connection:
Connect the drainage hose to the unit's drain outlet and route it to a suitable drain or container. Ensure the drainage hose is positioned lower than the ice maker's drain outlet for proper water flow.
4. Алгачкы тазалоо:
Before first use, it is recommended to clean the interior of the ice maker. Refer to the "Maintenance" section for detailed cleaning instructions. After cleaning, perform a self-cleaning cycle.
Иштөө нускамалары
1. Control Panel Overview:
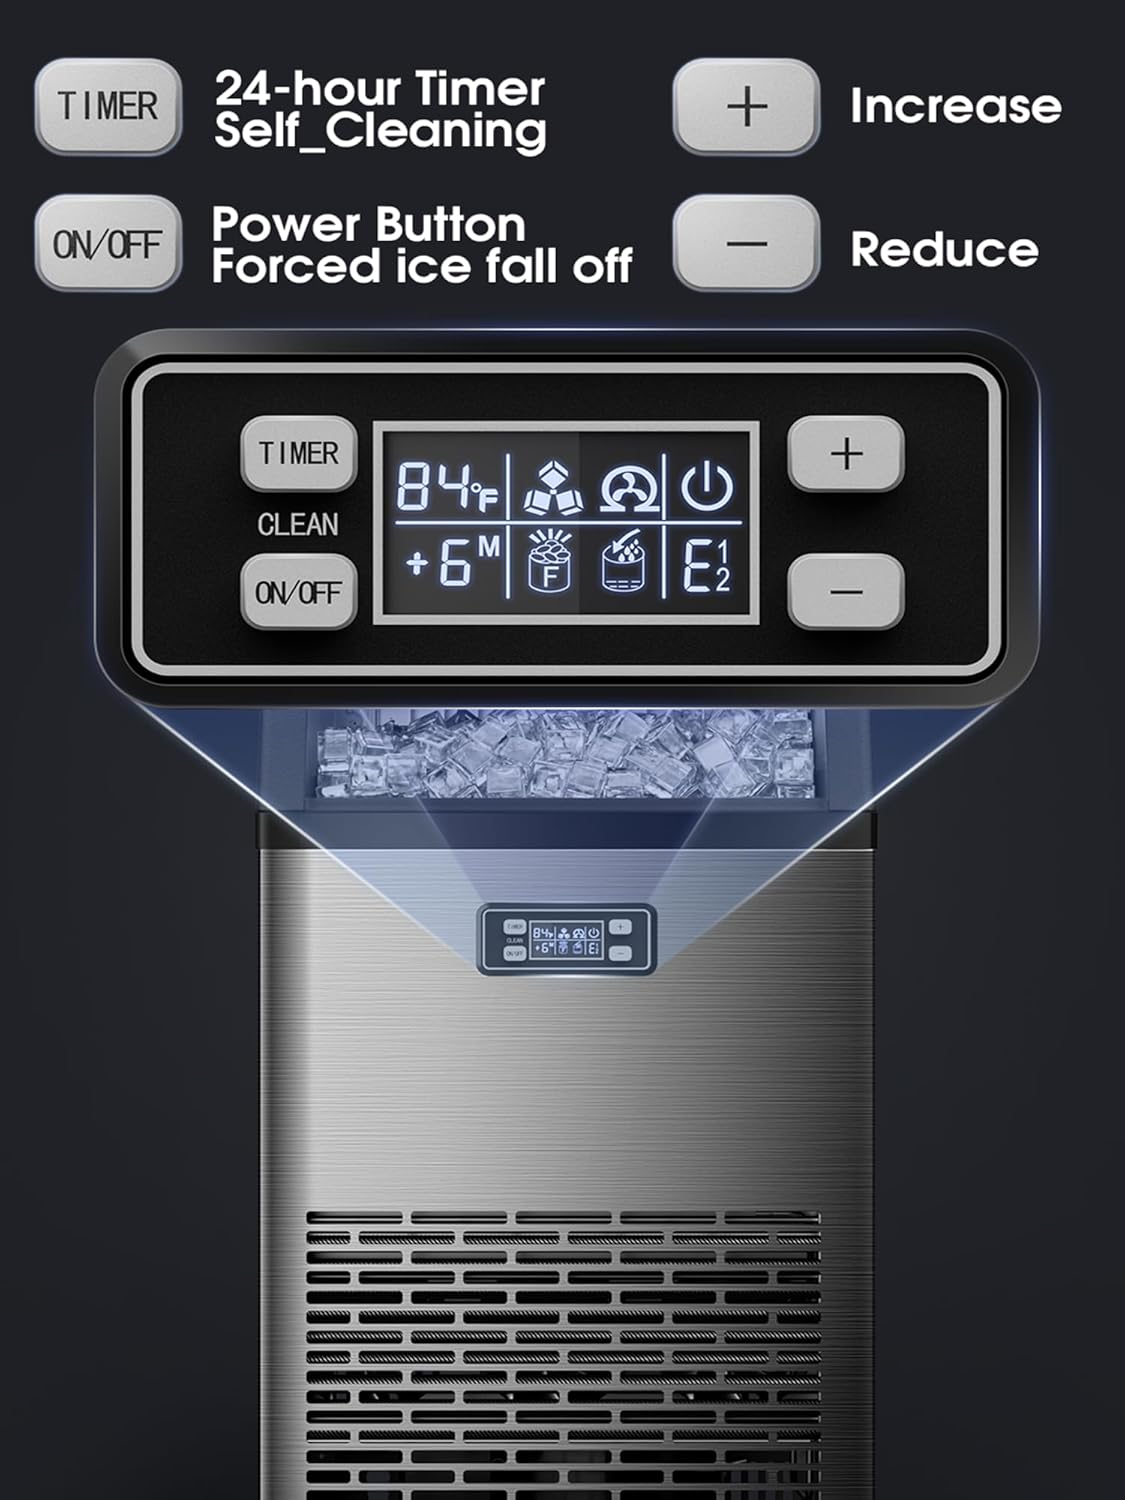
Figure 3: LED Digital Control Panel.
- ON/OFF баскычы: Powers the unit on or off. Press and hold to force ice to fall off.
- TIMER/CLEAN баскычы: Activates the timer function or initiates the self-cleaning cycle (press and hold for 5 seconds).
- '+' баскычы: Increases settings (e.g., ice thickness, timer duration).
- '-' баскычы: Decreases settings (e.g., ice thickness, timer duration).
- LED дисплей: Shows current status, temperature, error codes, and timer settings.
2. Starting Ice Production:
- Суу түтүгү туташтырылганын жана дренаж түтүгү туура жайгашканын текшериңиз.
- Муз жасагычты жерге туташтырылган электр розеткасына сайыңыз.
- басыңыз КҮЙГҮЗҮҮ/ӨЧҮРҮҮ button to start the unit. The machine will automatically begin the ice-making cycle.
- The first batch of ice may take slightly longer. The unit can produce approximately 45 ice cubes in 12-18 minutes.
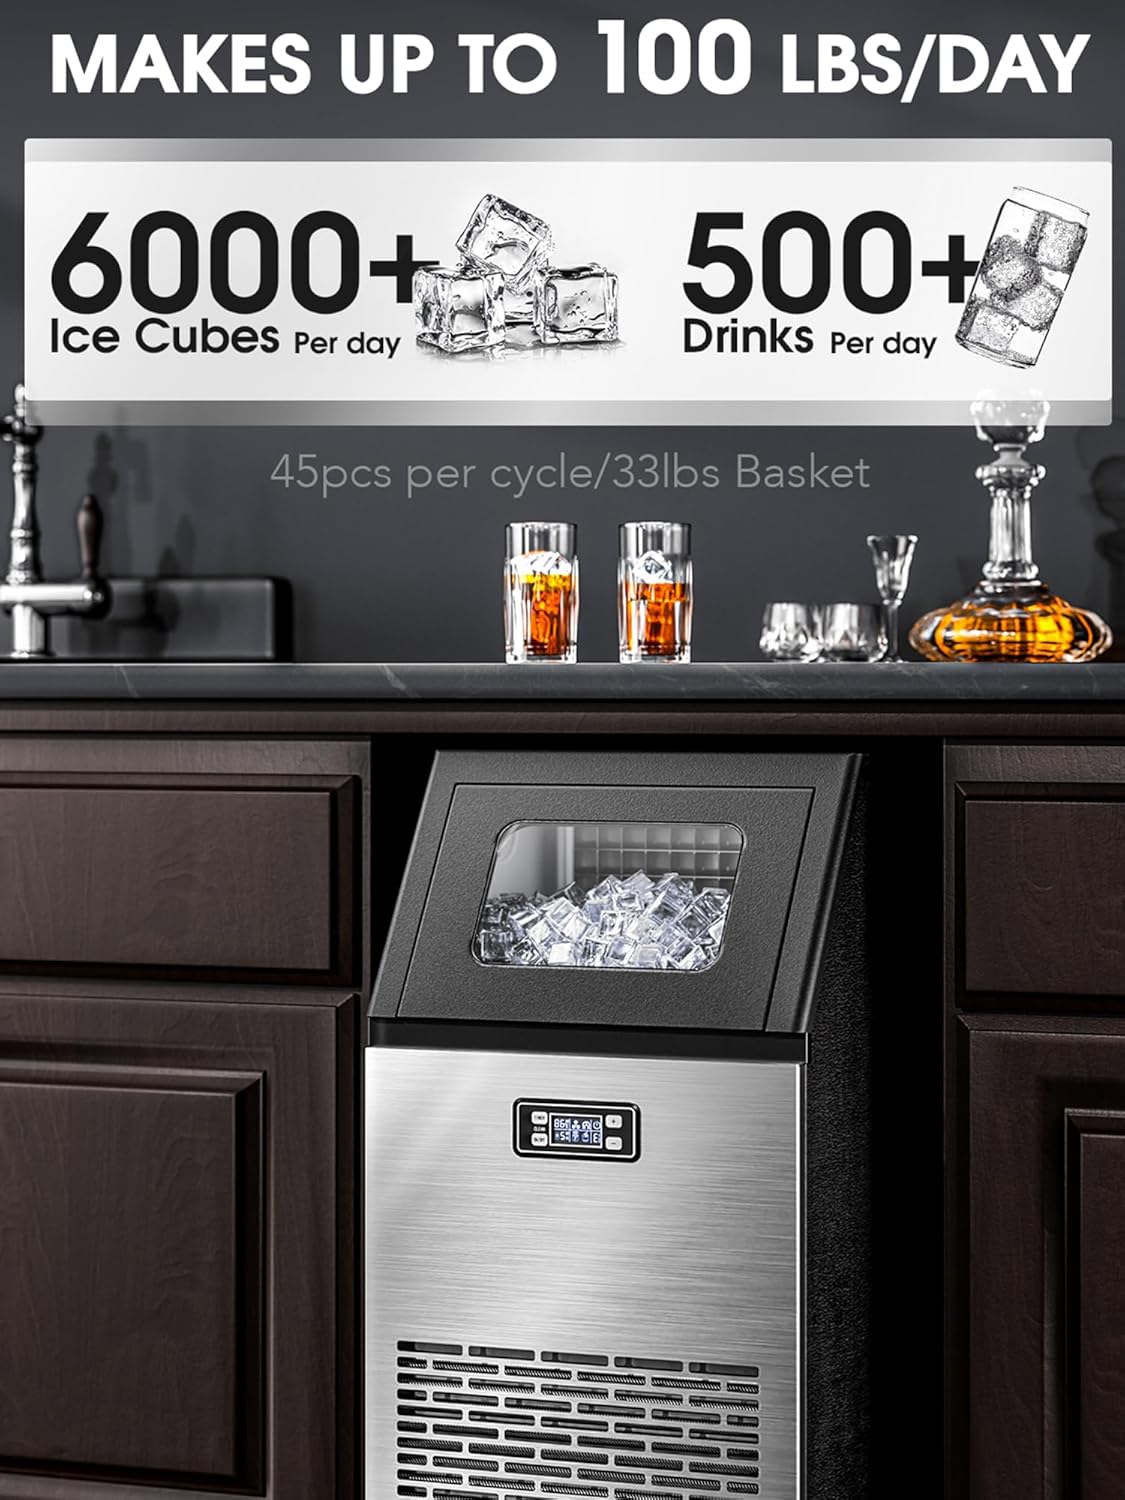
Figure 4: Ice production capacity.
3. Adjusting Ice Thickness:
You can adjust the ice cube thickness to suit your preference:

Figure 5: Ice thickness adjustment options.
- While the machine is operating, use the '+' жана '-' buttons to cycle through thickness settings.
- A shorter freezing time results in thinner ice, ideal for smoothies.
- A longer freezing time results in thicker ice, suitable for cooling drinks or retaining freshness.
4. Using the Timer Function:
The 24-hour timer allows you to schedule when the ice maker starts or stops operation.
- басыңыз TIMER/CLEAN button once to activate the timer setting.
- колдонуу '+' жана '-' buttons to set the desired delay time (in hours) for the unit to turn on or off.
- баскычын басып орнотууну ырастаңыз TIMER/CLEAN button again or waiting a few seconds for it to auto-confirm.
5. Ice Storage:
The ice storage bin is insulated to help preserve ice for a short period. For extended storage, transfer ice to a freezer, as this machine is not a refrigerator and cannot maintain ice in a frozen state indefinitely.
Техникалык тейлөө
1. Auto Self-Cleaning Function:
Муз жасагыч техникалык тейлөөнү жөнөкөйлөтүү үчүн автоматтык түрдө өзүн-өзү тазалоо функциясына ээ.
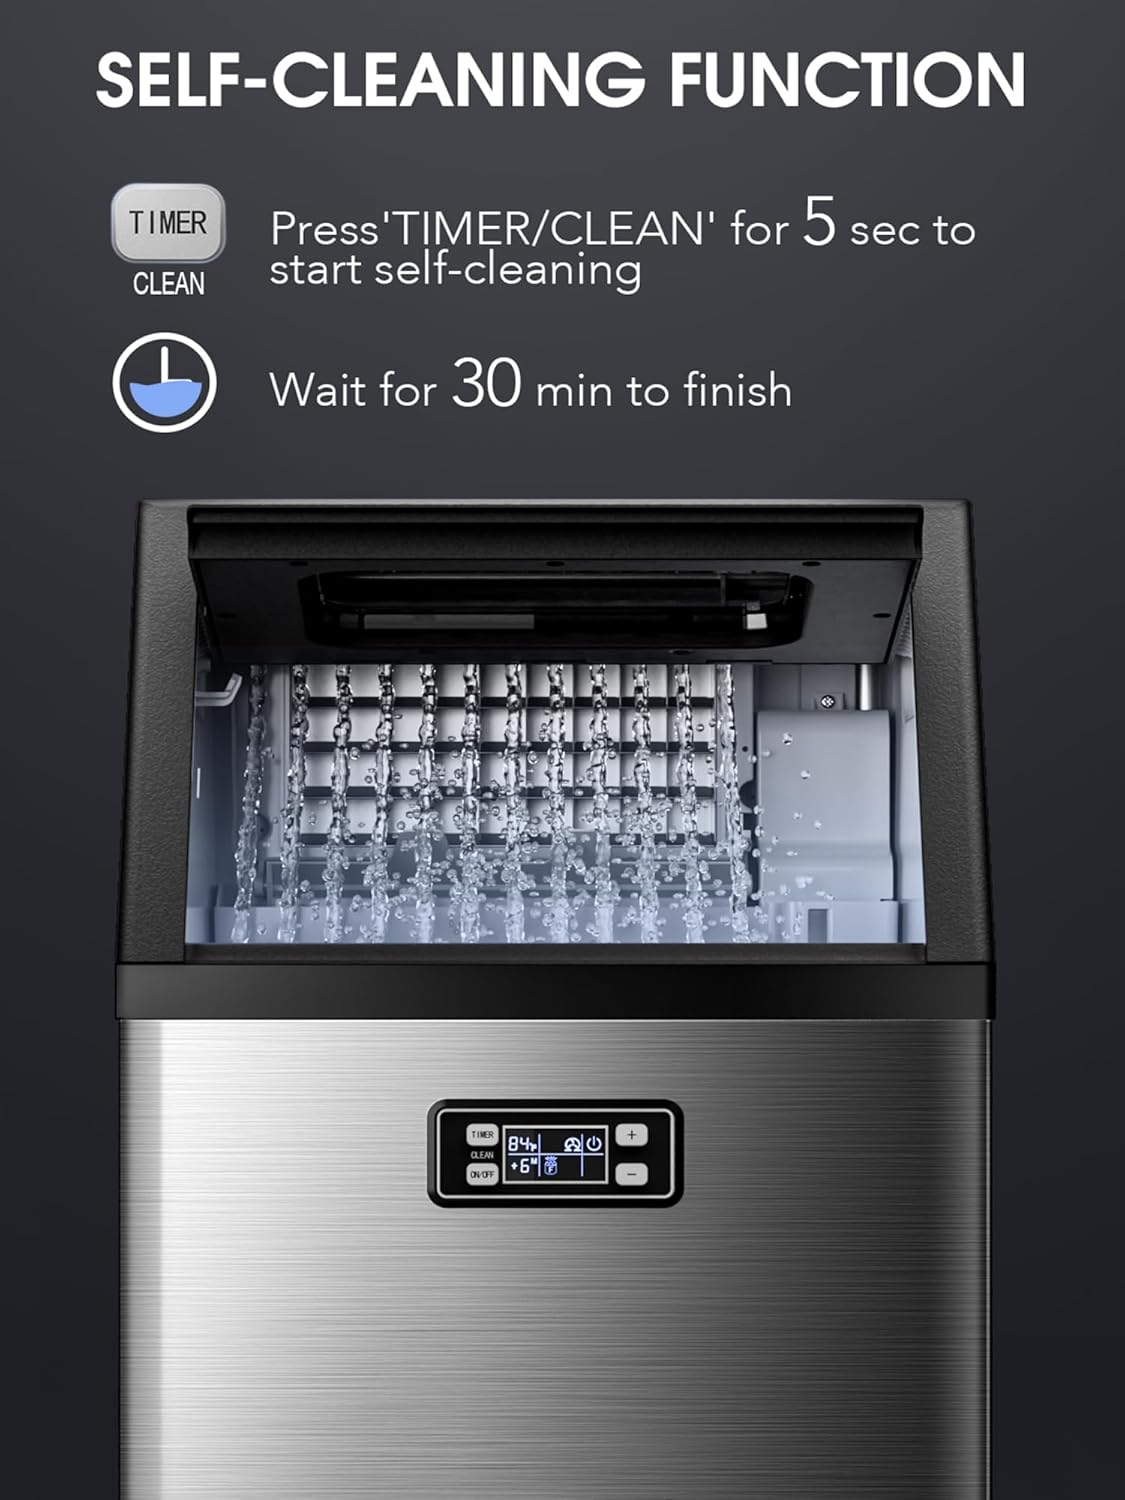
Figure 6: Self-cleaning cycle in progress.
- Ensure the unit is connected to a water supply and the drain hose is properly set up.
- басып, кармап туруңуз TIMER/CLEAN button for 5 seconds. The display will indicate the cleaning cycle has started.
- The self-cleaning process takes approximately 30 minutes. Do not interrupt the cycle.
- Once complete, the unit will automatically switch off or return to standby mode.
2. Үзгүлтүксүз тазалоо:
- Сырткы: Дат баспас болоттон жасалган корпустун сыртын жумшак чүпүрөк жана жумшак жуугуч каражат менен сүртүңүз. Абразивдүү тазалоочу каражаттардан алыс болуңуз.
- Ички иштер: Periodically clean the ice storage bin and other accessible interior surfaces with a solution of warm water and mild soap. Rinse thoroughly and ensure all soap residue is removed.
- Суу системасы: For optimal performance and hygiene, consider using a descaling solution specifically designed for ice makers every few months, especially in areas with hard water. Follow the descaling product's instructions carefully.
3. Draining the Unit:
To drain the water from the unit, locate the drain plug at the bottom of the machine. Place a container beneath it, remove the plug, and allow all water to drain. Reinsert the plug securely after draining.
Проблемаларды чечүү
| Көйгөй | Мүмкүн себеп | Чечим |
|---|---|---|
| Муз жасоочу муз чыгарбайт. | No water supply; water inlet blocked; ambient temperature too high; refrigerant issue. | Check water connection and supply. Ensure water pressure is adequate. Clean water inlet filter. Move unit to a cooler environment. Contact customer support if refrigerant is suspected. |
| Муз кубиктери өтө кичинекей же жумшак. | Insufficient freezing time; water temperature too high; ambient temperature too high. | Adjust ice thickness setting to a longer freezing time. Use colder water. Ensure proper ventilation and lower ambient temperature. |
| "Суу кошуу" көрсөткүчү күйүп турат. | Water tank is empty or water supply is interrupted. | Refill water tank or check water supply connection. |
| Агрегат ызы-чуу. | Unit not level; fan obstruction; normal operation sounds. | Ensure unit is on a level surface. Check for any obstructions around the fan. Some operational noise is normal. |
| Error codes displayed (e.g., E1, E2). | Ички белгилүү бир бузулуу. | Refer to the specific error code in the full product manual (if available) or contact customer support with the error code. |
Техникалык шарттар

7-сүрөт: Продукциянын өлчөмдөрү жана типтүү колдонулушу.
| Өзгөчөлүк | Деталь |
|---|---|
| Бренд | Электрик |
| Модель аты | HZB-45A |
| Элемент моделинин номери | Commercial Ice Maker-5845AS |
| Продукциянын өлчөмдөрү (D x W x Y) | 15.28"D x 14.57"W x 31.42"H |
| Муз өндүрүшүнүн кубаттуулугу | 101 фунт / 24 саат |
| Муз сактоо сыйымдуулугу | 33 фунт |
| Ice Cube Production Cycle | 12-18 мүнөттө 45 кубик |
| Материал | Дат баспаган болот |
| Тtage | 120 вольт |
| Ватtage | 200 ватт |
| Муздаткыч | R600a |
| Элемент Салмагы | 71 фунт |
Кепилдик жана колдоо
For warranty information and customer support, please refer to the warranty card included with your product or visit the official Electactic brand store. You can typically find support resources, FAQs, and contact information there.


