Introduction
This manual provides detailed instructions for the ATTACK SHARK G3 Tri-Mode Wireless Gaming Mouse. Please read this manual thoroughly before use to ensure proper operation and to maximize your experience with the product.
The ATTACK SHARK G3 is a high-performance gaming mouse designed for versatility and precision. It offers three connectivity modes: 2.4GHz wireless, Bluetooth 5.2, and wired USB-C, allowing seamless switching between various devices and setups. Featuring a lightweight design, a high-precision PAW3311 sensor, and programmable buttons, the G3 is engineered for both gaming and productivity.
Пакеттин мазмуну
- ATTACK SHARK G3 Wireless Gaming Mouse
- USB-C заряддоо/дата кабели
- 2.4GHz USB кабылдагычы
- User Manual
Продукт бүттүview
Familiarize yourself with the components of your ATTACK SHARK G3 mouse.

Сүрөт: жогорудан төмөнгө view of the ATTACK SHARK G3 Wireless Gaming Mouse in Berry Red, showing the left and right click buttons, scroll wheel, and two side buttons on the left.
- Сол чыкылдатуу баскычы: Standard primary mouse function.
- Оң баскычты чыкылдатуу: Standard secondary mouse function.
- Жылдыруу дөңгөлөгү: Жылдыруу жана ортоңку чыкылдатуу функциясы үчүн.
- Side Buttons (x2): Default to Forward/Backward, programmable via software.
- DPI Button (underside): Алдын ала коюлган DPI деңгээлдери аркылуу айлануу.
- Mode Switch (underside): Toggles between 2.4GHz, Bluetooth, and Wired modes.
- USB-C порту: Зымдуу туташуу жана кубаттоо үчүн.
- 2.4GHz USB Receiver Storage: Чычкандын астыңкы бетинде жайгашкан.

Сүрөт: Коллаж көрсөтүүasing key features of the G3 mouse, including its 59g ultra-light design, 500mAh battery, PixArt PAW3311 sensor, 25000 DPI capability, Huano Blue Shell Pink Dot Switches, and Tri-mode connectivity.
Жайгашуу
1. Зымдуу режимдеги туташуу
- Берилген кабелдин USB-C учун чычканга туташтырыңыз.
- Кабелдин USB-A учунун компьютериңиздеги жеткиликтүү USB портуна туташтырыңыз.
- Ensure the mode switch on the underside of the mouse is set to the "Wired" position.
- The mouse will be recognized by your computer and is ready for use.
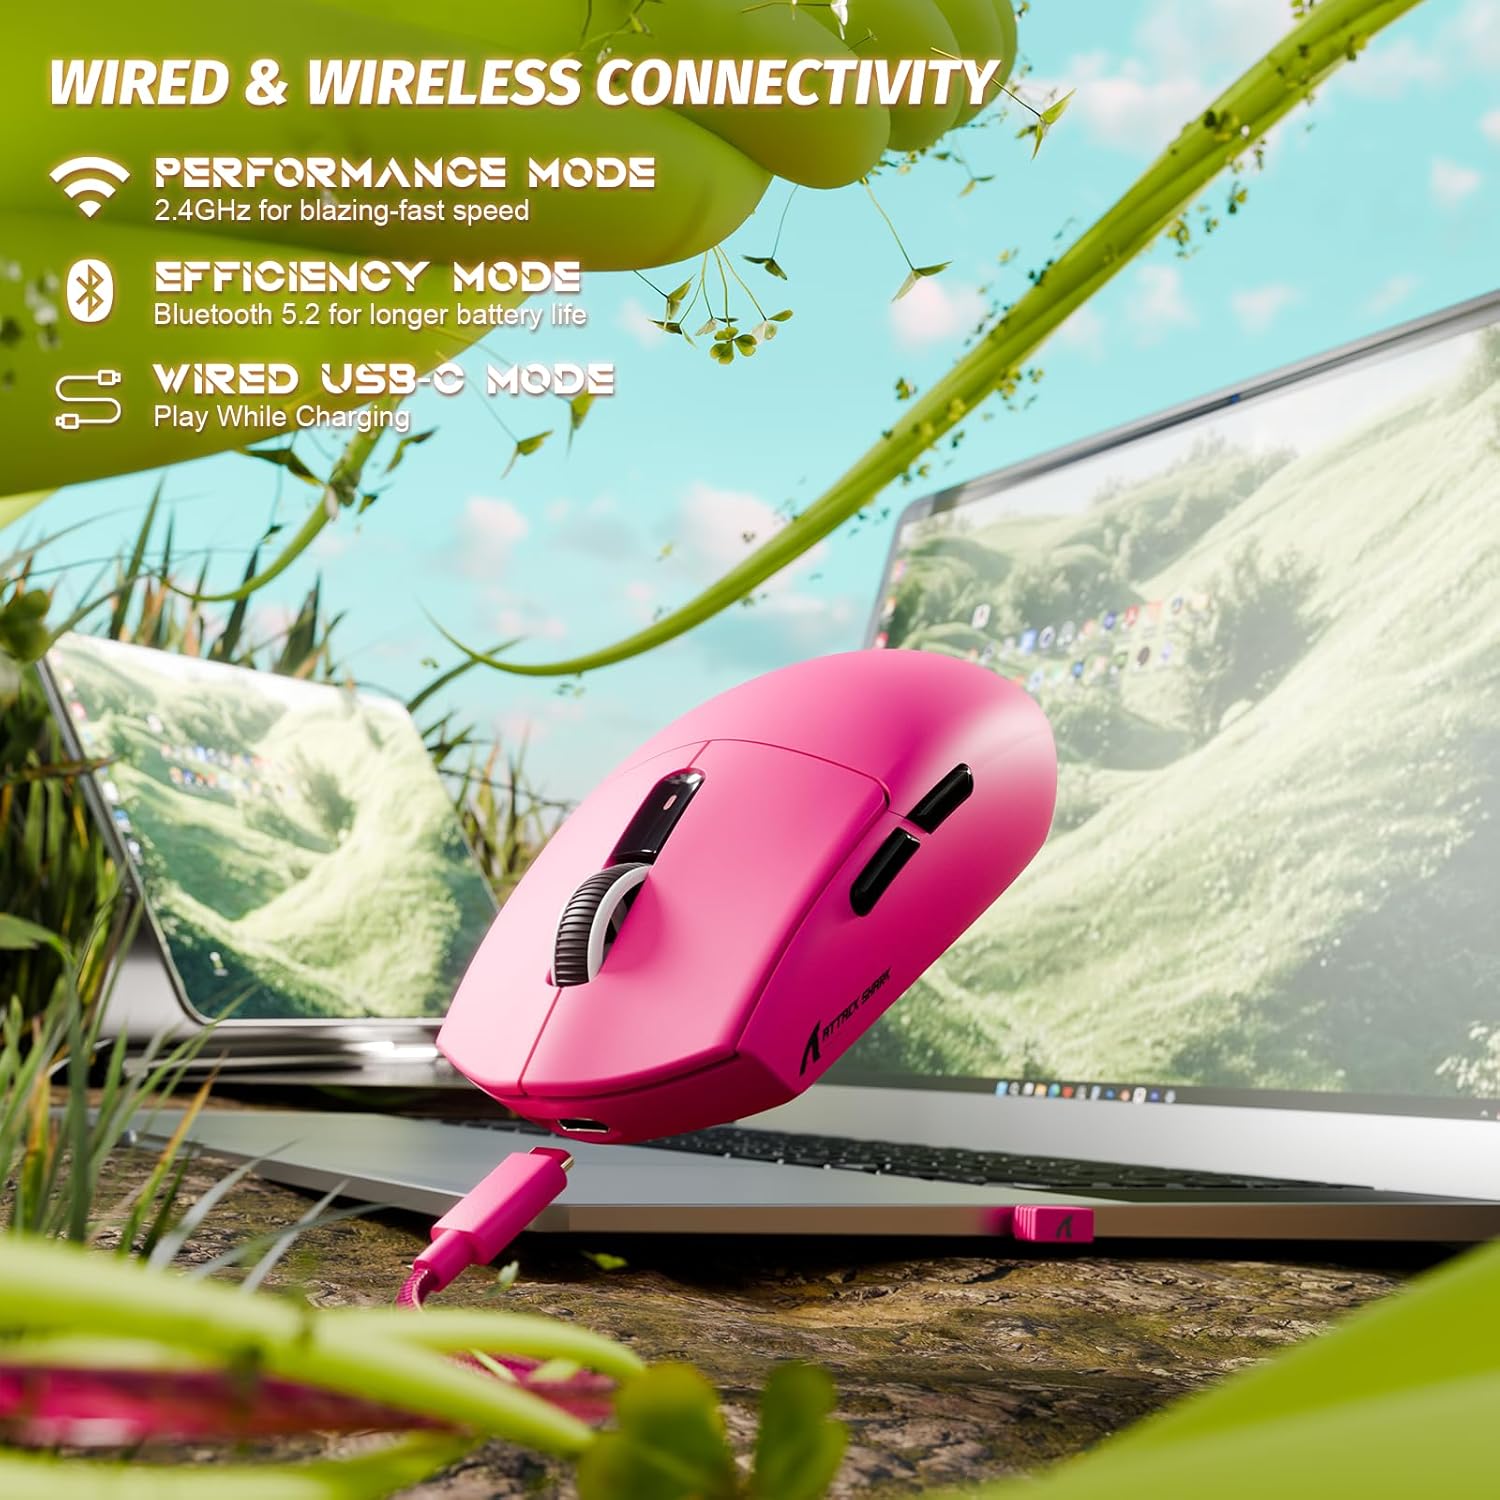
Image: The ATTACK SHARK G3 mouse connected to a laptop via its USB-C cable, illustrating the wired connectivity option.
2. 2.4GHz Wireless Mode Connection
- Locate the 2.4GHz USB receiver stored on the underside of the mouse.
- USB ресиверди компьютериңиздеги жеткиликтүү USB портуна сайыңыз.
- Чычкандын астыңкы жагындагы режим которгучун "2.4G" абалына коюңуз.
- The mouse should automatically connect to the receiver. If not, press and hold the DPI button and a side button simultaneously for 3 seconds to initiate pairing.
3. Bluetooth 5.2 Mode Connection
- Set the mode switch on the underside of the mouse to the "BT" (Bluetooth) position.
- The mouse will enter pairing mode, indicated by a blinking LED light.
- Компьютериңизде же түзмөгүңүздө Bluetooth жөндөөлөрүнө өтүңүз.
- Издөө new devices and select "ATTACK SHARK G3" from the list.
- Жупташтыруу процессин аяктоо үчүн экрандагы көрсөтмөлөрдү аткарыңыз.
Иштөө нускамалары
DPI тууралоо
The ATTACK SHARK G3 features a PAW3311 sensor with adjustable DPI settings. You can cycle through preset DPI levels by pressing the DPI button located on the underside of the mouse. For fine adjustments and custom DPI profiles, use the dedicated driver software.

Сүрөт: жакын план view of the PixArt PAW3311 sensor inside the mouse, highlighting its capabilities such as 1000Hz polling rate, 25000 DPI max, and 40G acceleration.
Программалануучу баскычтар жана программалык камсыздоо
The G3 mouse includes 5 programmable buttons. To customize button functions, create macros, and adjust settings like polling rate and Lift-Off Distance (LOD), download and install the official ATTACK SHARK driver software from the manufacturer's website. The software allows for personalized configurations to suit your specific needs.

Image: A screenshot of the ATTACK SHARK G3 customization software interface, showing options for mouse settings, DPI settings, parameter settings, macro editing, and personal center.
Чычканды заряддоо
The mouse is equipped with a built-in 500mAh rechargeable lithium-ion battery. When the battery is low, the LED indicator will signal. Connect the mouse to your computer using the provided USB-C cable to charge. The mouse can be used normally while charging in wired mode.

Image: The ATTACK SHARK G3 mouse in a natural setting, emphasizing its 500mAh battery capacity for extended use.
Техникалык тейлөө
- Тазалоо: Чычкандын бетин тазалоо үчүн жумшак, кургак чүпүрөктү колдонуңуз. өжөр кир үчүн, бир аз гamp кездемени колдонсо болот, бул нымдуулуктун ички компоненттерге кирбешин камсыздайт.
- Сенсорго кам көрүү: Так көз салууну камсыз кылуу үчүн чычкандын астыңкы жагындагы оптикалык сенсорду чаңдан же таштандыдан таза кармаңыз.
- Батареянын узактыгы: Батареянын иштөө мөөнөтүн узартуу үчүн, чычкандын зарядын тез-тез толук бошотпоңуз. Батареянын заряды аз калганын көрсөткөн индикатор пайда болгондо аны кубаттаңыз.
- Сактагыч: Узак мөөнөткө колдонулбаганда чычканды салкын, кургак жерде сактаңыз.

Image: An inverted view of the ATTACK SHARK G3 mouse, showcasing its double-layer mouse feet for smooth gliding and stability.
Проблемаларды чечүү
- Чычкан жооп бербей жатат:
- Чычкандын заряддалганын текшериңиз.
- Check the mode switch (2.4G, BT, Wired) is set correctly.
- For 2.4GHz, ensure the USB receiver is securely plugged in. Try a different USB port.
- For Bluetooth, ensure Bluetooth is enabled on your device and the mouse is paired.
- Try connecting in wired mode to confirm functionality.
- Туура эмес көзөмөлдөө:
- Чычкандын астындагы оптикалык сенсорду тазалаңыз.
- Чычканды ылайыктуу жерде (мисалы, чычкан аянтчасында) колдонуп жатканыңызды текшериңиз.
- Adjust DPI settings via the DPI button or software.
- Туташуу маселелери:
- Move the mouse closer to the receiver/device to reduce interference.
- Avoid using the 2.4GHz receiver near other wireless devices that may cause interference.
- Re-pair the mouse in 2.4GHz or Bluetooth mode if connection is lost.
- Программа чычканды аныктай албай жатат:
- Ensure the mouse is connected in wired or 2.4GHz mode (Bluetooth may not be supported by all software).
- Программаны жана/же компьютериңизди өчүрүп күйгүзүңүз.
- Reinstall the driver software.
Техникалык шарттар
| Өзгөчөлүк | Деталь |
|---|---|
| Модел | G3 |
| Байланыш | 2.4 ГГц зымсыз, Bluetooth 5.2, USB-C зымдуу |
| Сенсор | PixArt PAW3311 оптикалык сенсор |
| DPI диапазону | 800 - 25,000 DPI (adjustable) |
| Көз салуу ылдамдыгы | 400IPS |
| Ылдамдатуу | 40G |
| Добуш берүү көрсөткүчү | 1000Hz (Wired/2.4GHz) |
| Buttons | 5 Программалануучу баскычтар |
| Которгучтар | Huano Blue Shell Pink Dot Switches (80 million clicks) |
| Батарея | 500 мАч кайра заряддалуучу литий-иондук |
| Чычкандын салмагы | Болжол менен 59г (2.08 унция) |
| Шайкештик | PC, Mac (Windows/macOS) |
Кепилдик жана колдоо
ATTACK SHARK products are designed and manufactured to the highest quality standards. For warranty information and technical support, please refer to the official ATTACK SHARK webсайтка же түздөн-түз кардарларды тейлөөгө кайрылыңыз. Кепилдик дооматтар үчүн сатып алганыңыздын далилин сактаңыз.
For further assistance, visit the official ATTACK SHARK store: ATTACK SHARK Store


