1. Киришүү
Thank you for choosing the Gawfolk 32-inch 4K UHD Computer Monitor, Model GF320F. This manual provides essential information to help you set up, operate, and maintain your new monitor. Please read these instructions carefully before use and retain them for future reference.
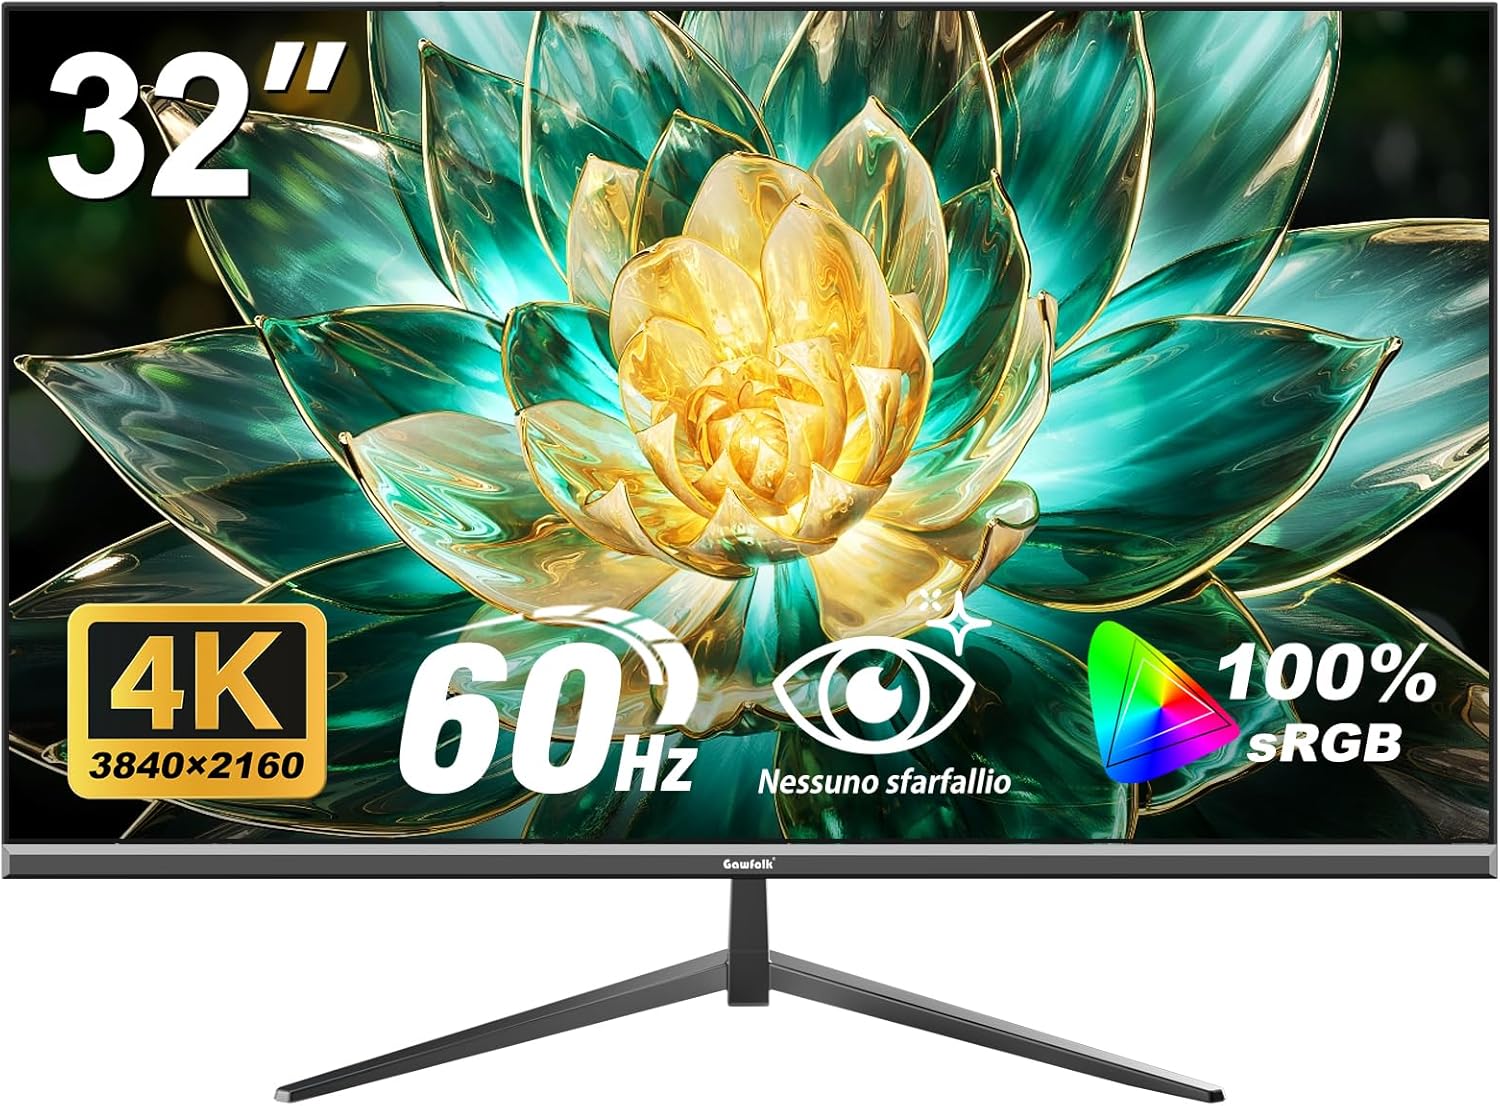
Сүрөт 1.1: Алдыңкы view of the Gawfolk 32-inch 4K UHD Monitor.
The Gawfolk GF320F monitor features a 32-inch 4K UHD (3840x2160) display with a VA panel, offering a 178° wide viewing angle. It supports 8-bit color depth for 16.7 million colors and 100% sRGB coverage, providing clear and accurate visuals.

Image 1.2: Visual representation of 4K UHD resolution and wide viewing angles provided by the VA panel.
2. Пакеттин мазмуну
Сураныч, таңгактын ичиндегисин кылдаттык менен текшериңиз. Эгерде кандайдыр бир буюмдар жок болсо же бузулуп калса, кардарларды колдоо кызматына кайрылыңыз.
- Gawfolk 32-inch 4K UHD Monitor (Model GF320F)
- Монитор стенд (негизги жана моюн)
- Кубаттуу адаптер жана кабель
- HDMI кабели
- DisplayPort (DP) кабели
- Колдонуучунун Колдонмосу (бул документ)
- Стендди чогултуу үчүн бурамалар

Сүрөт 2.1: Бүттүview of the 32-inch Ultra HD Monitor and its key specifications.
3. Орнотуу
3.1. Монитор Ассамблеясы
Follow these steps to assemble the monitor stand or prepare for wall mounting.
3.1.1. Стендди бекитүү
- Carefully place the monitor face down on a soft, clean surface to prevent screen damage.
- Attach the stand neck to the back of the monitor, aligning the mounting holes.
- Secure the neck with the provided screws.
- Attach the stand base to the bottom of the neck and tighten the thumb screw or secure with screws.
- Carefully lift the monitor and place it on a stable, flat surface.
3.1.2. VESA дубалга орнотуу (милдеттүү эмес)
The monitor supports VESA mounting standard 100mm x 100mm. Ensure your wall mount is compatible and can support the monitor's weight (approximately 13.27 pounds or 6.02 kg).
- Carefully place the monitor face down on a soft, clean surface.
- Эгерде стенд мурунтан эле бекитилген болсо, аны алып салыңыз.
- Attach your VESA-compatible wall mount bracket to the four screw holes on the back of the monitor.
- Secure the bracket using appropriate screws (typically M4 x 10mm, but refer to your wall mount's instructions).
- Mount the monitor to the wall according to your wall mount's instructions.

Сүрөт 3.1: Арткы view of the monitor, highlighting the VESA 100x100mm mounting points and input ports.
3.2. Компьютерге туташуу
Connect the monitor to your computer using one of the available video input ports.
- Кубат туташуу: Connect the power adapter to the monitor's power input port, then plug the power cable into a power outlet.
- Видео туташуу (HDMI): Connect one end of the HDMI cable to the HDMI port on your computer's graphics card and the other end to an HDMI port on the monitor.
- Видео туташуу (DisplayPort): Connect one end of the DisplayPort cable to the DP port on your computer's graphics card and the other end to the DisplayPort on the monitor.
- Бардык байланыштар коопсуз экенин текшериңиз.

Сүрөт 3.2: Детальдуу view of the monitor's input ports, including HDMI and DisplayPort.
4. Иштөө нускамалары
4.1. Күйгүзүү/өчүрүү
Locate the power button, typically on the back or bottom edge of the monitor. Press it to turn the monitor on or off. The power indicator light will illuminate when the monitor is on.
4.2. Экрандагы дисплей (OSD) менюсунун навигациясы
The OSD menu allows you to adjust various monitor settings. The control buttons are usually located on the back or bottom right side of the monitor.
- Press one of the OSD buttons to activate the menu.
- Use the navigation buttons (often a joystick or directional buttons) to move through menu options.
- Суб-менюга кирүү же орнотууну ырастоо үчүн тандоо баскычын басыңыз.
- Артка кайтуу же OSD менюсун жабуу үчүн чыгуу баскычын колдонуңуз.
4.3. Сүрөт орнотуулары
Adjust the display quality to your preference using the OSD menu:
- Жарыктык: Экрандын жалпы жарыктыгын тууралайт.
- Контраст: Жарык жана караңгы аймактардын айырмасын тууралайт.
- Түс температурасы: Selects preset color modes (e.g., Warm, Cool, User).
- Аспект катышы: Changes the display ratio (e.g., 16:9, 4:3).
- Айкындыгы: Adjusts the clarity of image details.
4.4. Киргизүүнү тандоо
To switch between connected devices (e.g., a computer connected via HDMI and another via DisplayPort):
- OSD менюсуна кирүү.
- Navigate to the "Input Source" or "Input Select" option.
- Select the desired input (HDMI 1, HDMI 2, DisplayPort).
4.5. Low Blue Light and Flicker-Free Technology
This monitor incorporates DC global dimming technology to achieve flicker-free operation and a low blue light mode to reduce eye strain during prolonged use.
- Жаркылдоосуз: The monitor is designed to minimize screen flickering, providing a more comfortable viewтажрыйбасы.
- Төмөн көк жарык режими: Activate this mode via the OSD menu to filter out harmful short-wave blue light, which can help reduce eye fatigue.

Image 4.1: Illustration of the benefits of DC Dimming and Low Blue Light technology.
5. Техникалык тейлөө
Туура тейлөө мониторуңуздун узак мөөнөттүү жана оптималдуу иштешин камсыз кылат.
- Экранды тазалоо:
- Мониторду өчүрүп, кубат кабелин сууруп алыңыз.
- Экранды жумшак, түксүз чүпүрөк менен акырын сүртүңүз.
- өжөр белгилери үчүн, жеңил гampчүпүрөккө суу же атайын экран тазалагыч (экранга түздөн-түз чачпаңыз).
- Avoid using alcohol, ammonia, or abrasive cleaners.
- Тазалоо Casing: Мониторду сүртүңүз casing жумшак, кургак чүпүрөк менен.
- Вентиляция: Ашыкча ысып кетүүнүн алдын алуу үчүн монитордун желдетүү тешиктери жабылбагандыгын текшериңиз.
6. Кыйынчылыктарды
Мониторуңузда көйгөйлөргө туш болсоңуз, төмөнкү жалпы көйгөйлөрдү жана чечимдерди караңыз.
| Көйгөй | Мүмкүн себеп | Чечим |
|---|---|---|
| Экранда сүрөт жок |
|
|
| Сүрөт бүдөмүк же бурмаланган |
|
|
| Экрандын бүлбүлдөөсү |
|
|
| Monitor randomly sets resolution to 1080p |
|
|
7. Техникалык шарттар
Key technical specifications for the Gawfolk 32-inch 4K UHD Monitor (Model GF320F).
| Өзгөчөлүк | Спецификация |
|---|---|
| Модель номери | GF320F |
| Screen Size | 32 дюйм |
| Резолюция | 3840 x 2160 (4K UHD) |
| Жаңыртуу ылдамдыгы | 60Hz |
| Панел түрү | VA панели |
| Viewбурч | 178° |
| Түс тереңдиги | 8-Bit (16.7 Million Colors) |
| sRGB камтуусу | 100% |
| Контраст катышы | 3500:1 |
| Жарыктык | 200 кд/м² |
| Киргизүү порттору | DisplayPort, HDMI |
| Дубалга орнотуу шайкештиги | VESA 100мм x 100мм |
| Продукциянын өлчөмдөрү (стенд менен) | 7.48 x 28.15 x 19.96 дюйм |
| Элемент Салмагы | 13.27 фунт (6.02 кг) |
8. Кепилдик жана колдоо
Gawfolk provides a 12 айлык сатуудан кийинки тейлөө for this monitor. If you encounter any issues or require assistance, please contact Gawfolk customer support. Details for contacting support are typically found on the product packaging or the official Gawfolk webсайт.

Image 8.1: Gawfolk's commitment to customer support, including 365 days easy replacement and 24-hour solution response.


