Introduction
Thank you for choosing the Geek AiroCook Torix 25 Litre Smart Air Fryer Oven. This appliance combines the functions of an air fryer and an OTG (Oven Toaster Griller), allowing you to air fry, grill, bake, roast, and toast with ease. This manual provides essential information for safe operation, proper use, and maintenance of your new appliance. Please read it thoroughly before first use and keep it for future reference.
Маанилүү коопсуздук нускамалары
Электр шаймандарын колдонууда өрт, электр тогуна урунуу жана адамдардын жаракат алуу коркунучун азайтуу үчүн негизги коопсуздук чараларын дайыма сактоо керек.
- Шайманды колдонуудан мурун бардык нускамаларды окуп чыгыңыз.
- Ысык беттерге тийбеңиз. Туткаларды же туткаларды колдонуңуз. Ысык материалдарды кармаганда ар дайым духовкага арналган кол каптарды же кол каптарды колдонуңуз.
- To protect against electric shock, do not immerse the cord, plugs, or the appliance body in water or other liquid.
- Кандайдыр бир шайманды балдар же алардын жанында колдонуп жатканда, катуу көзөмөл керек.
- Колдонбогондо жана тазалоодон мурун розеткадан ажыратыңыз. Бөлүктөрүн кийүүдөн же чечүүдөн мурун муздатыңыз.
- Эч кандай шайманды зымы же сайы бузулган, же шайман иштебей калгандан кийин же кандайдыр бир түрдө бузулгандан кийин иштетпеңиз. Жардам алуу үчүн кардарларды колдоо бөлүмүнө кайрылыңыз.
- Шаймандын өндүрүүчүсү сунуш кылбаган кошумча тиркемелерди колдонуу жаракатка алып келиши мүмкүн.
- Сыртта колдонбоңуз.
- Шнурды столдун же столдун четине илинип салбаңыз же ысык беттерге тийбеңиз.
- Ыстык газ же электр мешине же ысытылган мештин жанына коюуга болбойт.
- Курамында ысык май же башка ысык суюктуктар бар шайманды жылдырууда өтө этияттык керек.
- Ар дайым алгач сайгычка сайыңыз, андан кийин шнурду розеткага сайыңыз. Өчүрүү үчүн каалаган башкарууну "өчүрүү" абалына буруңуз, андан кийин розеткадан сайгычты чыгарыңыз.
- Шайманды максаттуу колдонуудан башка максатта колдонбоңуз.
- Чоң өлчөмдөгү тамак-аштарды же металл идиштерди тостер мешине салууга болбойт, анткени алар өрт чыгып же электр тогуна урунуп калуу коркунучун жаратышы мүмкүн.
- Меш жабылып калса же күйүүчү материалга тийсе, анын ичинде пардалар, перделер, дубалдар жана ушул сыяктуулар, иштеп жатканда өрт чыгышы мүмкүн.
- Духовкага өндүрүүчү сунуштаган аксессуарлардан башка эч кандай материалдарды салбаңыз.
- Картон, пластмасса, кагаз же ушуга окшош материалдарды мешке салбаңыз.
- Колдонулбаган учурда бул мешке өндүрүүчү сунуштаган аксессуарлардан башка эч кандай материалдарды сактабаңыз.
- Металл жуугучтар менен тазалабаңыз. Бөлүктөр жаздыкчаны үзүп, электр бөлүктөрүнө тийип, электр тогуна урунуу коркунучун жаратышы мүмкүн.
- Шайман электр розеткасына сайылып турганда тамак-ашты чыгарууга аракет кылбаңыз.
- Always ensure the appliance is placed on a stable, heat-resistant surface with adequate ventilation around it.
Пакеттин мазмуну
Carefully unpack your Geek AiroCook Torix and check that all items are present and in good condition.
- 1x Geek AiroCook Torix 25 Litre Smart Air Fryer Oven
- Crumb науасы
- Айлануучу себет
- Духовканын текчеси
- Ысыкка туруктуу мээлей
- Рецепт китеби
- Rotisserie Rod
- Fetch Tool (for rotisserie and hot trays)
- Бышыруучу табак
- Airfryer себети

1-сүрөт: Камтылган аксессуарлар. This image displays the nine smart accessories that come with the Geek AiroCook Torix oven: a crumb tray, rotating basket, oven rack, heat-resistant glove, recipe book, rotisserie rod, fetch tool, baking tray, and airfryer basket.
Продукт бүттүview
Familiarize yourself with the components and control panel of your Geek AiroCook Torix oven.
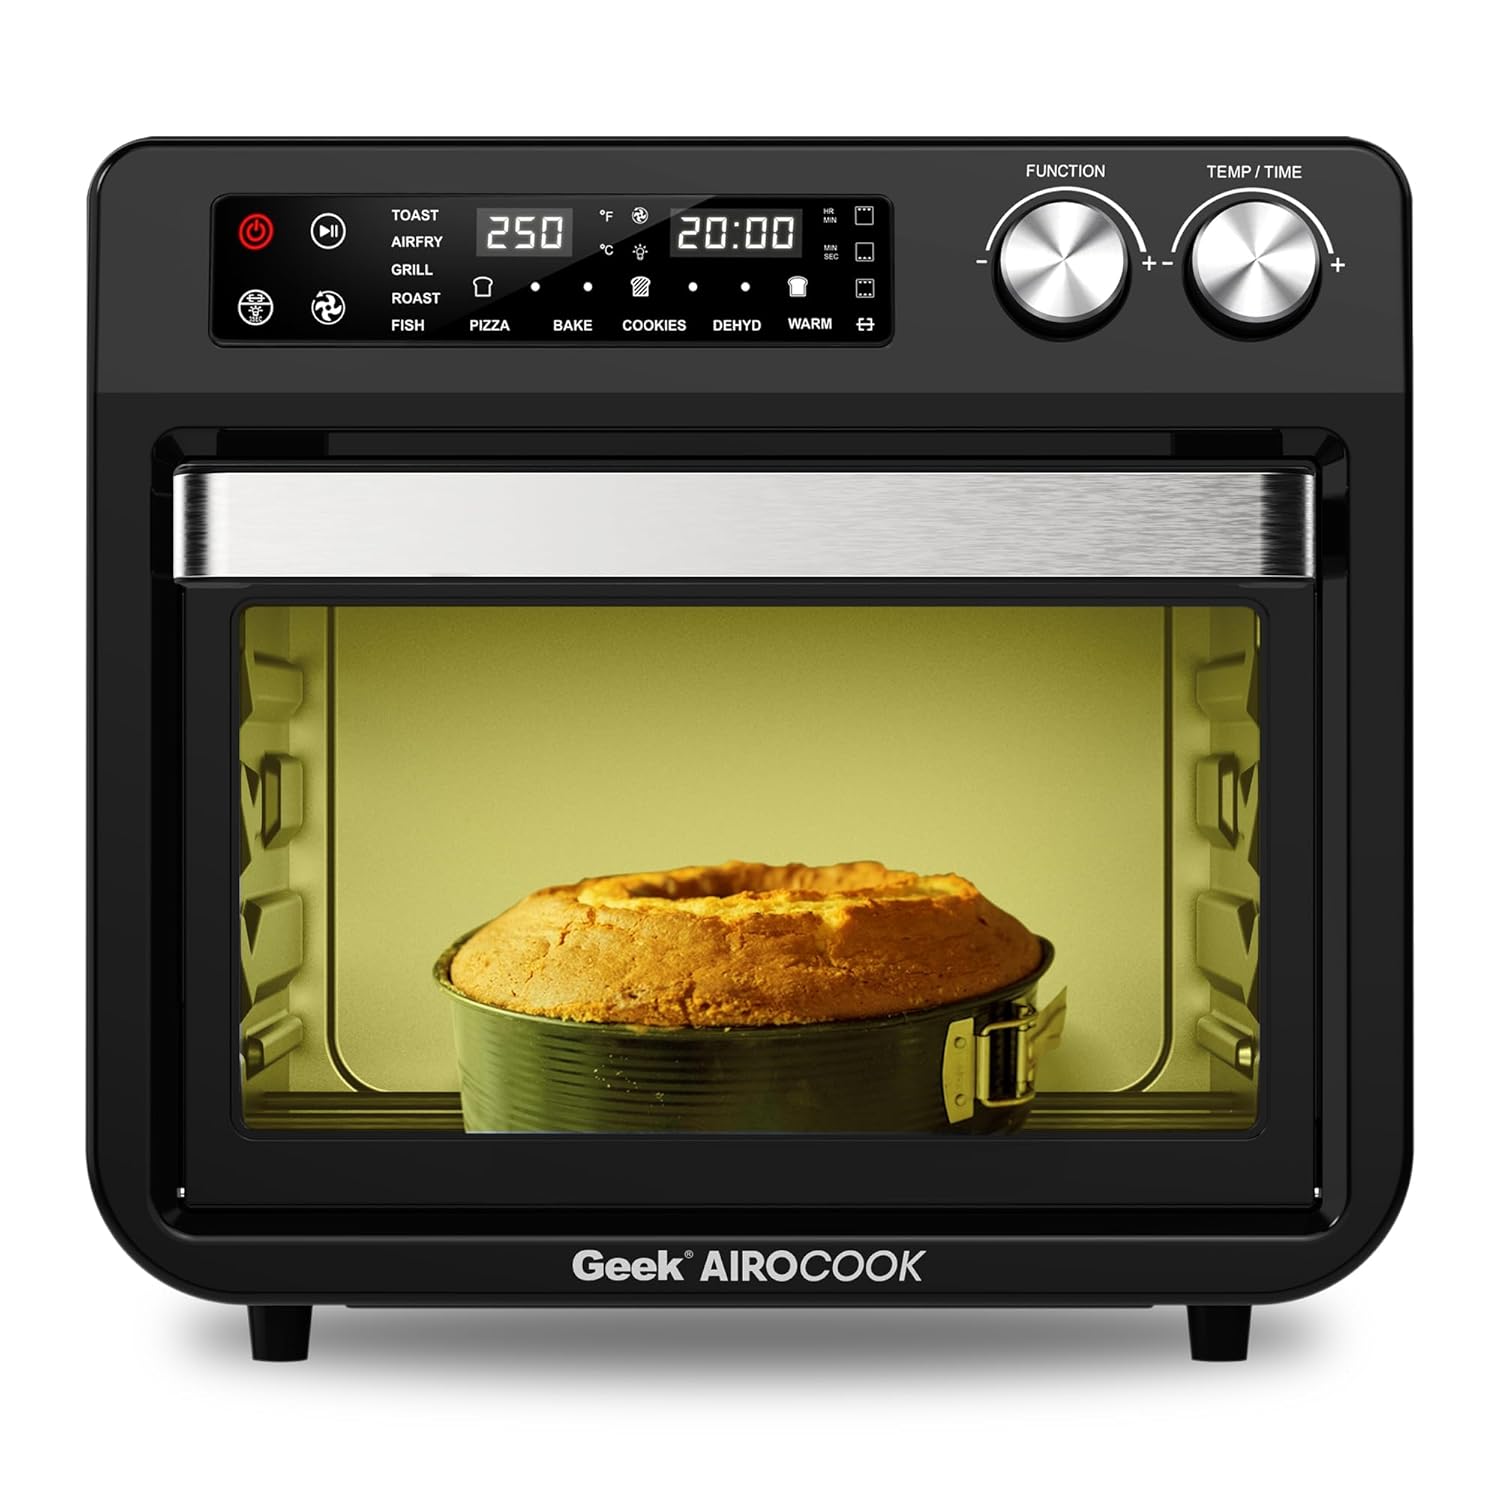
Сүрөт 2: Алдыңкы View of the Geek AiroCook Torix. This image shows the overall design of the air fryer oven, featuring the digital display, control knobs, and the transparent glass door with an internal light.
Башкаруу панели

3-сүрөт: Санариптик башкаруу панели. This image highlights the "Smart Touch" control panel with its various buttons and digital display.
- Кубат баскычы: Шайманды күйгүзөт/өчүрөт.
- Баштоо/тындыруу баскычы: Бышыруу циклин баштайт же тындырат.
- Жарык баскычы: Controls the internal oven light.
- Rotisserie баскычы: Activates/deactivates the rotisserie function.
- Күйөрман баскычы: Controls the convection fan.
- Меню баскычы: Алдын ала коюлган бышыруу функциялары аркылуу циклдерди өткөрөт.
- Time/Temperature Knobs: Бышыруу убактысын жана температурасын тууралайт.
- Digital LCD дисплей: Shows current settings, time, and temperature.
Жайгашуу
- Пакеттен чыгаруу: Remove all packaging materials, stickers, and labels from the appliance and accessories.
- Алгачкы тазалоо: Мештин сыртын d менен сүртүңүзamp cloth. Wash all removable accessories (baking tray, airfryer basket, rotating basket, rotisserie kit, oven rack, crumb tray) with warm soapy water, rinse thoroughly, and dry completely.
- Жайгашкан жери: Place the oven on a stable, level, heat-resistant surface. Ensure there is at least 10-15 cm (4-6 inches) of clear space on all sides and above the oven for proper ventilation. Do not place it near flammable materials.
- Биринчи колдонуу (күйгүзүү): Before cooking food, it is recommended to run the oven empty for about 15-20 minutes at 200°C (390°F) to burn off any manufacturing residues. A slight odor or smoke may be present during this process; this is normal. Ensure the area is well-ventilated.
Иштөө нускамалары
Негизги операция
- Күйгүзүү: Plug the appliance into a grounded electrical outlet. Press the Power Button to turn on the oven. The digital display will illuminate.
- Функцияны тандоо: Use the Menu Button to cycle through the available cooking functions (e.g., Toast, Air Fry, Grill, Roast, Fish, Pizza, Bake, Cookies, Dehydrate, Warm).
- Убакытты жана температураны тууралоо: Once a function is selected, use the Time/Temperature knobs to adjust the desired cooking time and temperature. The display will show the current settings.
- Даярдоону баштоо: Press the Start/Pause Button to begin the cooking process. The oven light may turn on, and the fan will activate depending on the selected function.
- Тыныгуу/Токтоо: Press the Start/Pause Button again to pause cooking. Press the Power Button to stop the cooking cycle and turn off the oven.
Using Preset Menus
The Geek AiroCook Torix features 10 precise preset menus for common dishes.

Figure 4: 10 Preset Menu Options. This image illustrates the various preset cooking functions available, including Toast, Air Fry, Roast, Pizza, Cookies, Fish, Grill, Cake, Dehydrate, and Warm, along with their default temperature and time settings.
- тост: 250°C / 5 мүн
- Air Fry: 204°C / 25 мүн
- Куурулган: 204°C / 1 hr
- Пицца: 232°C / 15 мүн
- Cookies: 170°C / 12 мүн
- Балык: 210°C / 16 мүн
- Гриль: 230°C / 18 мүн
- Торт: 177°C / 30 мүн
- Суусуздандыруу: 66°C / 5 мүн
- Жылуу: 82°C / 1 hr
To use a preset, simply select it using the Menu Button. The oven will automatically set the recommended time and temperature. You can then adjust these settings manually if desired before pressing Start/Pause.
Rotisserie функциясы
The rotisserie function is ideal for roasting whole chickens or other large cuts of meat.
- Prepare your food and secure it onto the rotisserie rod using the forks. Ensure the food is centered and balanced.
- Insert the rotisserie rod into the designated slots inside the oven.
- Select a cooking function (e.g., Roast, Grill) and set the desired time and temperature.
- Айлантууну иштетүү үчүн айланма бышыруучу баскычты басыңыз.
- Даярдоону баштоо үчүн Start/Pause баскычын басыңыз.
- Once cooking is complete, use the Fetch Tool to safely remove the hot rotisserie rod and food from the oven.
Тейлөө жана тазалоо
Үзгүлтүксүз тазалоо оптималдуу иштешин камсыз кылат жана шайманыңыздын иштөө мөөнөтүн узартат.
- Ар дайым розеткадан ажыратыңыз: Тазалоодон мурун, духовканы ар дайым розеткадан сууруп, толугу менен муздаганча күтүңүз.
- Сырткы: Жарнама менен сыртын сүртүңүзamp кездеме жана жумшак жуугуч каражат. Абразивдүү тазалоочу каражаттарды же металл кыргычтарды колдонбоңуз.
- Ички иштер: Жарнама менен ички дубалдарды сүртүңүзamp cloth. For stubborn food residue, use a non-abrasive sponge with mild soap. Ensure the interior is dry before next use.
- Аксессуарлар: Wash the baking tray, airfryer basket, rotating basket, rotisserie kit, oven rack, and crumb tray with warm soapy water. Rinse thoroughly and dry completely. Эскертүү: These accessories are not dishwasher safe.
- Чакан табак: Regularly remove and empty the crumb tray located at the bottom of the oven to prevent grease buildup and potential fire hazards.
- Чөмүлбө: Эч качан негизги блокту, шнурду же розеткага сууга же башка суюктукка салбаңыз.
Проблемаларды чечүү
| Көйгөй | Мүмкүн себеп | Чечим |
|---|---|---|
| Шайман күйбөйт. | розеткага кошулбаган; электр розеткасынын маселеси; кубат баскычы басылган жок. | Кубат шнуру иштеп жаткан розеткага бекем сайылганын текшериңиз. Кубат баскычын басыңыз. |
| Тамак бир калыпта бышпайт. | толуп кетүү; туура эмес температура/убакыт; тамак айланбайт. | Do not overcrowd the basket/tray. Adjust temperature/time. For best results, flip or shake food halfway through cooking. |
| Мештен ак түтүн чыгып жатат. | Grease/oil residue; fatty food cooking. | Clean the oven and accessories thoroughly. For fatty foods, ensure the crumb tray is clean and consider using less oil. |
| Rotisserie функциясы иштебейт. | Rotisserie rod not properly installed; Rotisserie button not pressed. | Ensure the rotisserie rod is correctly seated in its slots. Press the Rotisserie Button to activate. |
Техникалык шарттар
| Модель аты | AiroCook Torix |
| Кубаттуулугу | 25 литр |
| Power Output | 1800 Ватт |
| Тtage | 220 вольт |
| Продукциянын өлчөмдөрү (D x W x Y) | 39.5D x 37.5W x 43.5H Сантиметр |
| Элемент Салмагы | 10 килограмм |
| Материал | Дат баспаган болот |
| Өзгөчө өзгөчөлүк | Аба кууруучу духовка + OTG |
Кепилдик жана колдоо
Your Geek AiroCook Torix 25 Litre Smart Air Fryer Oven comes with a 1 жылдык кепилдик from the date of purchase. This warranty covers manufacturing defects under normal use. Please retain your purchase receipt as proof of purchase.
For warranty claims, technical support, or any other inquiries, please contact Geek Customer Care:
- Кардарларды тейлөө номери: 1800 121 922922
You can also refer to the included recipe book and access the Geek Recipe App for additional cooking inspiration and tips.


