1. Киришүү
Thank you for choosing the TOOQ DB1733TNR-B Desk Mount. This manual provides comprehensive instructions for the safe installation, operation, and maintenance of your new monitor arm. Please read this guide thoroughly before beginning installation.
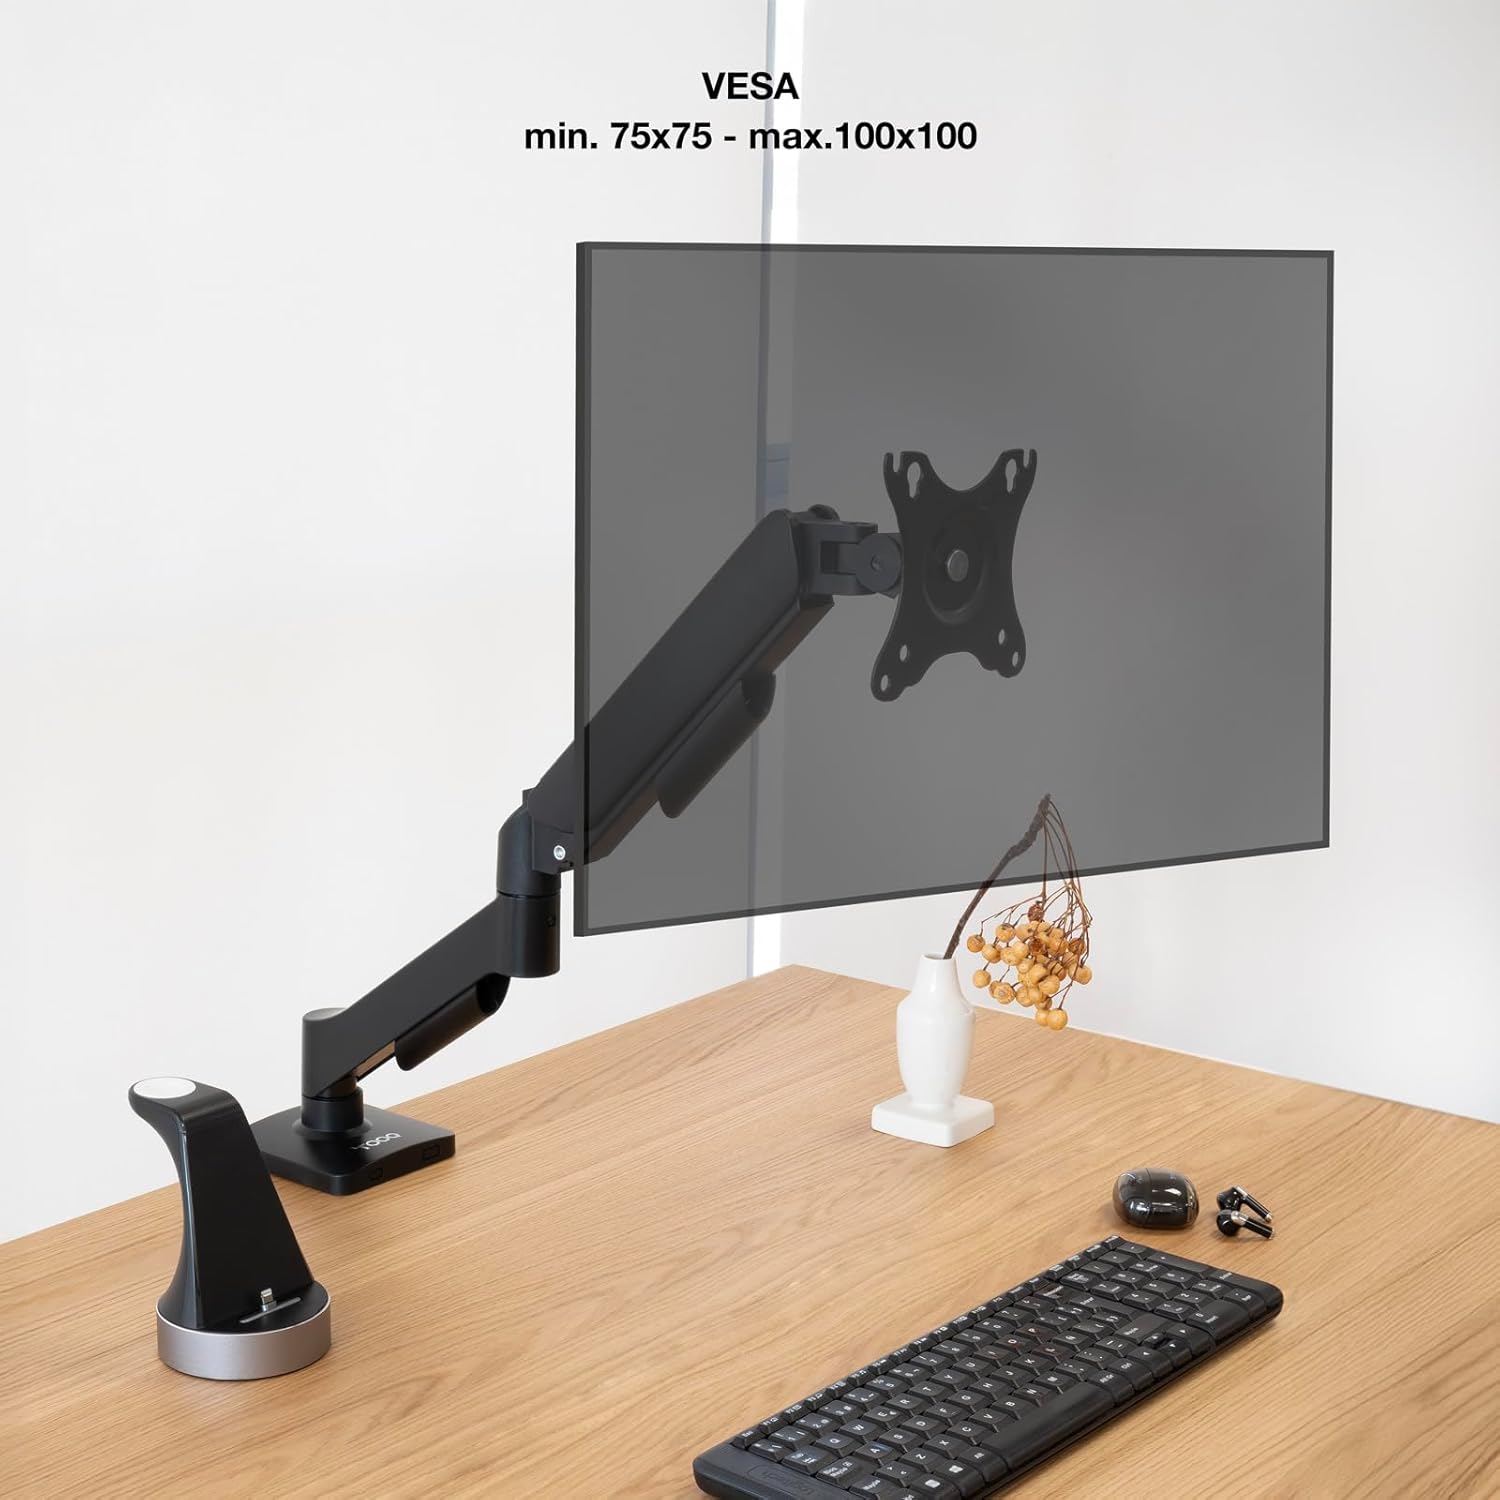
The DB1733TNR-B is engineered to support screens from 17 to 32 inches, including curved displays, with VESA compatibility of 75x75mm and 100x100mm. It features an adjustable gas piston arm for smooth and precise positioning, accommodating monitors weighing between 2kg and 9kg.
кутучанын мазмуну:
- 1 x TOOQ DB1733TNR-B Desk Mount
- 1 x Mounting Kit (includes necessary tools and hardware)
- 1 x Орнотуу боюнча колдонмо (бул документ)

2. Коопсуздук маалыматы
- Read all instructions carefully before installation and use to prevent injury or damage.
- Ensure the mounting surface (desk) can safely support the combined weight of the mount and your monitor.
- Do not exceed the maximum weight capacity of 9kg (19.8 lbs) for the monitor.
- Орнотуу учурунда балдарды жана үй жаныбарларын жумуш аймагынан алыс кармаңыз.
- Use only the provided hardware. Do not substitute parts, as this may compromise safety and performance.
- If you have any doubts or encounter difficulties during installation, consult a qualified professional.
- Avoid pinching fingers or cables in moving parts during adjustment.
3. Орнотуу жана орнотуу
The DB1733TNR-B offers two primary installation methods: desk clamp or through-hole (grommet) mounting. Choose the method best suited for your desk.
3.1. Орнотуу ыкмасын тандаңыз:
- Desk Clamp: Ideal for desks with accessible edges. Ensure your desk thickness is between 10mm and 80mm.
- Through-Hole (Grommet): Requires an existing hole in the desk or drilling a new one. Ensure the desk thickness is between 10mm and 48mm.
3.2. Attach VESA Plate to Monitor:
- Carefully place your monitor face down on a soft, clean, and stable surface to prevent scratches.
- Identify the VESA mounting holes on the back of your monitor. The DB1733TNR-B supports 75x75mm and 100x100mm patterns.
- Attach the VESA plate from the mount to your monitor using the appropriate screws and washers from the mounting kit. Ensure the screws are tightened securely but do not overtighten to avoid damaging the monitor.
3.3. Mount the Arm to the Desk:
Follow the specific instructions provided in the mounting kit for your chosen installation method (clamp or through-hole). Ensure the base is firmly and securely attached to the desk before proceeding.
3.4. Attach Monitor to Arm:
- With assistance if needed, carefully slide the monitor (with the VESA plate attached) onto the arm's mounting head.
- Ensure the monitor clicks securely into place. Tighten any safety screws or locking mechanisms if provided in your mounting kit.
4. Иштөө нускамалары
The gas piston arm allows for effortless and precise adjustment of your monitor's position to achieve optimal ergonomics.
4.1. Бийиктигин тууралоо:
Gently push or pull the monitor up or down to your desired viewing height. The integrated gas piston will assist in holding the monitor securely in its new position.

4.2. Tilt, Horizontal Rotation, and Swivel Adjustment:
- Эңкейүүнү тууралоо: Tilt the monitor screen up or down (up to ±90°) to eliminate glare and achieve the most comfortable viewбурч.
- Горизонталдык айлануу: Rotate the monitor horizontally around the arm's pivot points (up to ±90°) to adjust its position relative to your desk.
- Айланууну жөндөө: Swivel the monitor screen left or right (up to ±180°) to easily share your screen with others or change your viewбагыттоо.

4.3. Screen Orientation (Portrait/Landscape):
The VESA plate allows for full 360° rotation, enabling you to effortlessly switch your monitor between landscape (horizontal) and portrait (vertical) modes as needed for different tasks.

4.4. Кабелди башкаруу:
Utilize the integrated cable management clips or channels located along the arm to route and conceal your monitor and power cables. This helps maintain a tidy and organized workspace.
5. Техникалык тейлөө
- Тазалоо: Wipe the mount with a soft, slightly damp кездеме. Абразивдүү тазалоочу каражаттарды, эриткичтерди же катуу химиялык заттарды колдонуудан алыс болуңуз, анткени алар капталга зыян келтириши мүмкүн.
- Мезгилдүү текшерүүлөр: Periodically check all screws and connections, especially those securing the mount to the desk and the monitor to the VESA plate, to ensure they remain tight and secure. Do not overtighten.
- Gas Piston Adjustment: If the arm does not hold its position correctly (e.g., sags or is too stiff to move), refer to the mounting kit instructions for adjusting the gas piston tension. This typically involves turning a screw with an Allen key. Turn clockwise to increase tension for heavier monitors, and counter-clockwise to decrease tension for lighter monitors.
6. Кыйынчылыктарды
- Arm does not hold monitor position:
- Verify that the monitor's weight is within the supported range (2kg-9kg).
- Adjust the gas piston tension screw. Turn clockwise to increase tension for heavier monitors, and counter-clockwise to decrease tension for lighter monitors.
- Монитордогу термелүүлөрдү байкаңыз:
- Ensure all mounting screws, especially those connecting the VESA plate to the monitor and the arm to the desk, are securely tightened.
- Verify that the desk itself is stable and not flexing.
- Difficulty rotating or tilting the monitor:
- Кыймылга тоскоол болгон физикалык тоскоолдуктарды текшериңиз.
- Ensure no cables are caught in the joints.
- Some joints may have tension screws that can be adjusted if they are too stiff or too loose. Refer to the mounting kit for details.
7. Техникалык шарттар
| Өзгөчөлүк | Спецификация |
|---|---|
| Supported Screen Sizes | 17" - 32" (including curved screens) |
| VESA шайкештиги | 75x75мм, 100x100мм |
| Weight Capacity per Screen | 2kg (4.4 lbs) minimum, 9kg (19.8 lbs) maximum |
| Тит бурч | +90° / -90° |
| Horizontal Rotation Angle | +90° / -90° |
| Swivel Angle | +180° / -180° |
| Бийиктигин тууралоо | 415 мм (16.3 дюйм) чейин |
| Колдун максималдуу узартылышы | 450мм (17.7 дюйм) |
| Орнотуу ыкмалары | Desk Clamp, Through-Hole (Grommet) |
| Кабель башкаруу | Интеграцияланган система |
| Материал | Жогорку сапаттагы болот |
| Түс | Кара |
| Таза Салмак | 2.2 кг (4.84 фунт) |
| Пакеттин өлчөмдөрү | 375x155x66 мм (14.72 x 6.3 x 2.76 дюйм) |

8. Кепилдик жана колдоо
For detailed warranty information, technical support, or to inquire about replacement parts, please refer to the documentation included with your original purchase or visit the official TooQ website. Customer service contact information can typically be found on the manufacturer's webсайт.