1. Киришүү
This manual provides detailed instructions for the installation, operation, and maintenance of your ZSUS X99-8D4 Motherboard Set Kit. This kit includes the ZSUS X99-8D4 motherboard, an Intel Xeon E5 2650 V4 CPU, and 16GB (1x16GB) of DDR4 2133MHz memory. Please read this manual thoroughly before proceeding with installation to ensure proper setup and optimal performance.
2. Продукт бүтүп калдыview
The ZSUS X99-8D4 motherboard is designed for high-performance computing, supporting Intel LGA2011-3 processors and DDR4 memory. It features an NVMe M.2 slot for high-speed storage and Gigabit Ethernet for reliable network connectivity.
2.1-сүрөт: ZSUS X99-8D4 Motherboard Set Kit. This image displays the complete motherboard kit, including the motherboard, CPU, and RAM, ready for installation.
Негизги өзгөчөлүктөрү:
- CPU колдоо: LGA2011-3 socket for Intel Xeon E5 V3/V4 series processors.
- Эстутум: 4x DDR4 memory slots, supporting up to 128GB of RAM.
- Сактагыч: NVMe M.2 slot (2280 form factor) for high-speed SSDs, and multiple SATA 2.0 ports.
- Кеңейтүү: 1x PCIe x16 slot (PCI-E 3.0) for graphics cards, 1x PCIe x1 slot.
- Networking: Integrated Gigabit Ethernet (1000Mbps).
- USB: Multiple USB 2.0 ports.
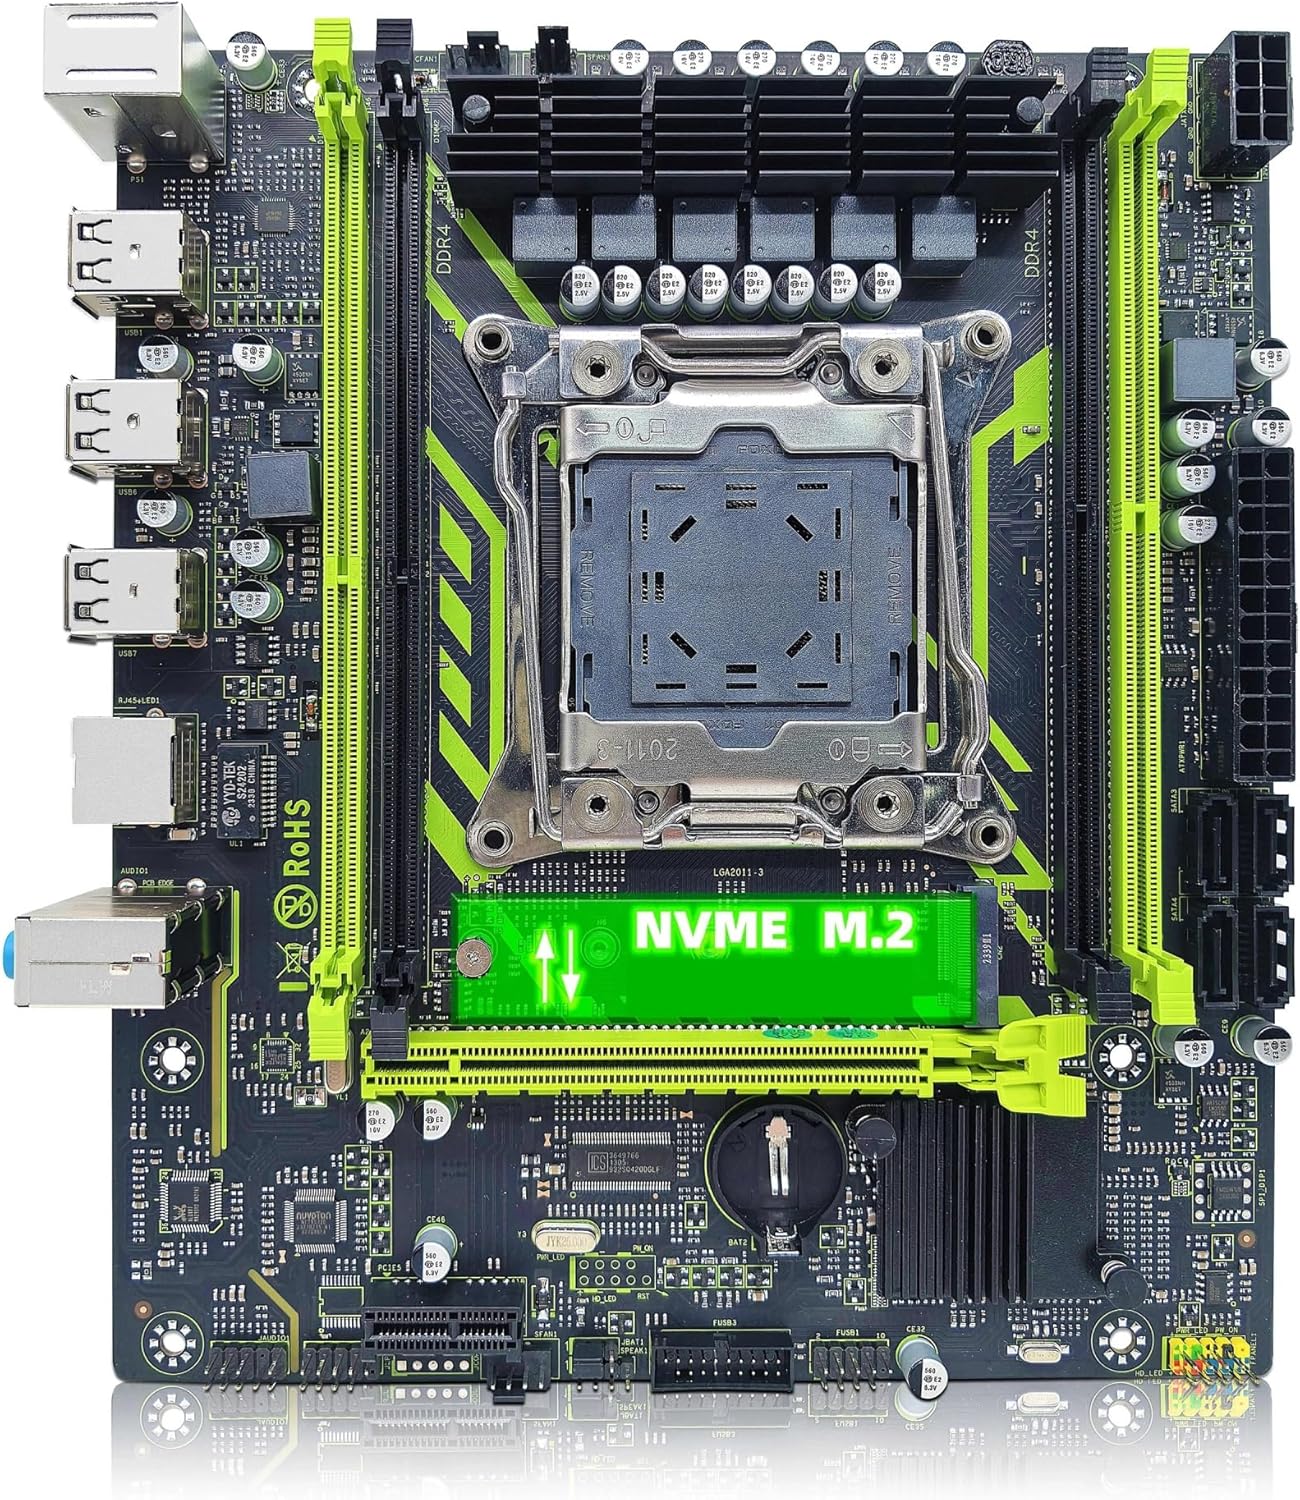
2.2-сүрөт: ZSUS X99-8D4 Motherboard highlighting the NVMe M.2 slot. This image shows the motherboard with the NVMe M.2 slot clearly visible, indicating its location for SSD installation.
3. Орнотуу жана орнотуу
Before beginning installation, ensure your system is powered off and unplugged. Wear an anti-static wrist strap to prevent electrostatic discharge (ESD) damage to components.
3.1 Таңгактан чыгаруу жана текшерүү
Carefully remove all components from their packaging. Verify that all items listed in your kit are present and undamaged. The kit typically includes the motherboard, CPU, RAM, I/O shield, and SATA cable.
3.2 Motherboard орнотуу
- Компьютериңиздин корпусунун арткы тешигине I/O калкан орнотуңуз.
- Align the motherboard with the standoffs inside your computer case.
- Secure the motherboard with screws, ensuring it is firmly seated and not touching any metal parts of the case directly.

3.1-сүрөт: ZSUS X99-8D4 Motherboard with dimensions. This image illustrates the physical dimensions of the motherboard, showing a width of 215mm and a length of 190mm, which is useful for case compatibility.
3.3 CPU Installation (Intel Xeon E5 2650 V4)
- LGA2011-3 CPU розеткасын энелик платадан табыңыз.
- Open the CPU socket retention mechanism by pushing down and out on the lever(s).
- Carefully place the Intel Xeon E5 2650 V4 CPU into the socket, aligning the gold triangle on the CPU with the corresponding mark on the socket. Do not force the CPU into place.
- CPU камсыз кылуу үчүн кармап туруу механизмин жабуу.
- Процессордун үстү жагына жука, тегиз термикалык пастаны сүйкөңүз.
- CPU муздаткычыңызды өндүрүүчүнүн көрсөтмөлөрүнө ылайык орнотуңуз.
3.4 RAM орнотуу (DDR4)
- Locate the four DDR4 memory slots on the motherboard.
- Эстутум уясынын эки учундагы клиптерди ачыңыз.
- Align the notch on the 16GB DDR4 memory module with the key in the memory slot.
- Эстутум модулунун эки учуна кысылганчалар орнотулганга чейин катуу басыңыз.
3.5 NVMe M.2 SSD Installation
- Locate the NVMe M.2 slot on the motherboard.
- M.2 туруучу буроону алып салыңыз.
- M.2 SSDди уячага 30 градустук бурч менен салыңыз.
- SSDди ылдый түртүп, аны бурма менен бекитиңиз.
3.6 Graphics Card and Other PCIe Devices
- Locate the PCIe x16 slot for your graphics card.
- Уячанын аягындагы бекитүүчү клипти ачыңыз.
- Графикалык картаңызды уячага тегиздеп, ордуна чыкылдаганча бекем басыңыз.
- Графикалык картаны бурама менен корпуска бекитиңиз.
- Install any other PCIe x1 expansion cards as needed.
3.7 Электр кубаты менен камсыздоонун туташуусу
- 24 пин ATX кубат туташтыргычын кубат булагыңыздан энелик платага туташтырыңыз.
- Connect the 8-pin CPU power connector (and 4-pin if available/needed) to the corresponding sockets near the CPU.
- Connect SATA power cables to your storage devices.
3.8 Алдыңкы панель жана перифериялык байланыштар
- Connect the front panel headers (Power SW, Reset SW, HDD LED, Power LED) to the designated pins on the motherboard. Refer to the motherboard diagram for correct pin assignments.
- Connect USB 2.0 headers from your case to the motherboard.
- Connect the front panel audio header.
- Connect SATA data cables from your storage devices to the SATA 2.0 ports on the motherboard.

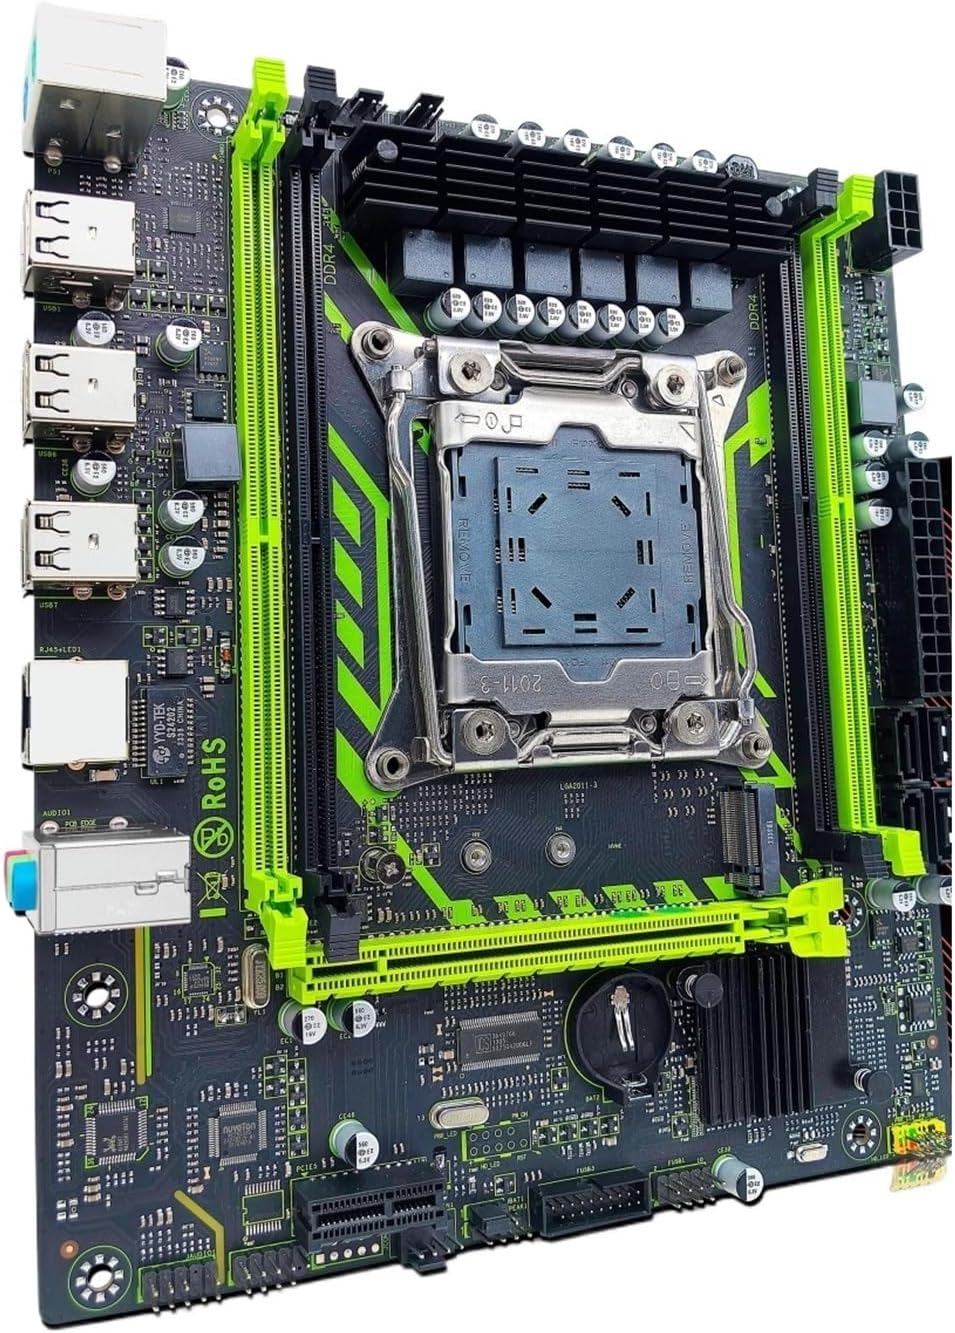
3.2-сүрөт: ZSUS X99-8D4 Motherboard with labeled ports and connectors. This image provides a detailed layout of the motherboard, indicating the locations of the CPU socket, DDR4 slots, PCIe slots, SATA ports, USB headers, and power connectors.

3.3-сүрөт: ZSUS X99-8D4 Motherboard I/O Shield and SATA Cable. This image shows the included I/O shield for the rear panel and a SATA data cable, essential accessories for system assembly.
4. Иштөө нускамалары
4.1 Биринчи жүктөө
- After all connections are made, connect your monitor, keyboard, and mouse.
- Plug in the power cord and turn on your power supply.
- Компьютериңиздин корпусундагы кубат баскычын басыңыз.
- The system should power on and display the BIOS/UEFI splash screen.
4.2 BIOS/UEFI орнотуу
During the initial boot, press the designated key (usually DEL or F2) to enter the BIOS/UEFI setup utility. Here you can configure boot order, system time, and other hardware settings. Ensure your storage device with the operating system is set as the primary boot device.
4.3 Драйверди орнотуу
After installing your operating system, install the necessary drivers for the motherboard chipset, LAN, and audio. These drivers are typically provided on a CD/DVD or can be downloaded from the manufacturer's website. Installing the correct drivers ensures optimal performance and stability.
5. Техникалык тейлөө
5.1 Тазалоо
Regularly clean your computer's interior to prevent dust buildup, which can lead to overheating. Use compressed air to remove dust from fans, heatsinks, and motherboard components. Ensure the system is powered off and unplugged before cleaning.
5.2 BIOS жаңыртуулары
Мезгил-мезгили менен өндүрүүчүнүн текшерүү website for BIOS/UEFI updates. Updates can improve system stability, add support for new hardware, or fix bugs. Follow the update instructions carefully to avoid damaging the motherboard.
6. Кыйынчылыктарды
Бул бөлүм сиз кабылышы мүмкүн болгон жалпы көйгөйлөрдү карайт.
6.1 Кубат жок / Жүктөө жок
- Check all power connections: 24-pin ATX, 8-pin CPU, and power button header.
- Кубат менен камсыздоонун которгучу 'ON' абалында экенин текшериңиз.
- Мүмкүн болсо, кубат булагын башка система же кубат булагын текшергич менен текшериңиз.
6.2 Дисплей жок
- Ensure your monitor is connected to the graphics card (not the motherboard's I/O if no integrated graphics are present).
- Графикалык картаны жана эстутум модулдарын кайра орнотуңуз.
- Башка дисплей кабелин же мониторду колдонуп көрүңүз.
6.3 Memory Errors
- Эстутум модулдары өз уячаларына толугу менен орнотулганын текшериңиз.
- Try booting with one memory module at a time to identify a faulty stick or slot.
- Verify memory compatibility with the motherboard.
6.4 Системанын туруксуздугу / кыйроолор
- Процессордун жана GPU температурасынын коопсуз иштөө чегинде экенин текшериңиз.
- Бардык айдоочулар жаңыртылганын текшериңиз.
- RAM каталарын текшерүү үчүн эстутум диагностикалык куралдарын иштетиңиз.
7. Техникалык шарттар
| Өзгөчөлүк | Спецификация |
|---|---|
| Модел | ZSUS X99-8D4 |
| CPU розетка | LGA 2011-3 |
| Supported CPU | Intel Xeon E5 V3/V4 series (e.g., E5 2650 V4 included) |
| Memory Type | DDR4 |
| Memory Slots | 4 |
| Эс тутумдун максималдуу сыйымдуулугу | 128 ГБ |
| Сактагыч интерфейси | M.2 (NVMe 2280), SATA 2.0 |
| PCIe x16 Slots | 1 (PCI-E 3.0) |
| PCIe x1 Slots | 1 |
| LAN ылдамдыгы | 1000Mbps (Gigabit Ethernet) |
| USB порттору | 6 x USB 2.0 (rear I/O) |
| Аудио порттор | 3 x Jacks |
| Форма фактору | ATX (approx. 215mm x 190mm) |
| Сертификация | RoHS, CE |
8. Кепилдик жана колдоо
Кепилдик маалыматы жана техникалык колдоо үчүн, сатып алууда берилген документтерди караңыз же сатуучу менен түз байланышыңыз. Кепилдик дооматтар үчүн сатып алганыңыздын далилин сактаңыз.


