Introduction
This user manual provides comprehensive instructions for the installation, operation, and maintenance of your eRapta AWTCM501 Magnetic Solar Wireless Backup Camera System. Please read this manual thoroughly before using the product to ensure proper function and safety. Keep this manual for future reference.
Пакеттин мазмуну
Пакетиңизде бардык буюмдар бар экенин текшериңиз:
- eRapta AWTCM501 Wireless Backup Camera (with integrated solar panel and magnetic base)
- 5-inch HD1080P Touchscreen Monitor
- Car Charger for Monitor
- USB Type-C Charging Cable for Camera
- 32GB SD Card (pre-installed in monitor)
- Колдонуучунун Колдонмосу (бул документ)
Продукт өзгөчөлүктөрү
- Magnetic, Wireless, and Solar-Powered Camera: Offers quick, drill-free installation on any metal surface with a strong magnetic base. Integrated solar panel provides continuous charging.
- HD1080P 5-inch Touchscreen Monitor: Так жана жогорку сапаттагы сүрөттөлүштү камсыз кылат view with intuitive touch controls for settings and functions.
- Digital Video Recorder (DVR) Functionality: Automatically records video footage to the included 32GB SD card, supporting loop recording for continuous coverage.
- Сокур Тактарды Аныктоо (BSD): An AI system that provides visual and audio warnings for obstacles or people near parking lines, enhancing driving safety.
- Инфракызыл (ИК) түнкү көрүү: Жарыгы аз шарттарда ачык көрүнүүнү камсыздайт.
- Кош кубаттоо ыкмалары: Camera features a built-in Li-ion battery rechargeable via solar power or Type-C USB.
- IP69K суу өткөрбөйт камера: Катаал аба ырайынын шарттарына туруштук берүү үчүн иштелип чыккан.
- Stable 2.4GHz Wireless Signal: Provides reliable video transmission.
Орнотуу колдонмосу
1. Камераны орнотуу
The eRapta AWTCM501 camera features a magnetic base for easy, tool-free attachment to any metal surface on your vehicle. Ensure the camera is securely attached and has a clear line of sight for optimal performance.

Image: Step 1 shows attaching the magnetic camera to a metal surface. Step 2 shows plugging the monitor into the car charger.
- Identify a suitable metal surface at the rear of your vehicle (e.g., bumper, trailer hitch area) where the camera can be securely mounted and provide the desired viewбурч.
- Attach the camera firmly to the chosen metal surface using its strong magnetic base.
- Adjust the camera angle as needed to capture the desired view.
2. Monitor Power Connection
The 5-inch touchscreen monitor is powered via your vehicle's 12V accessory outlet (cigarette lighter socket).
- Plug the provided car charger into your vehicle's 12V accessory outlet.
- Connect the other end of the car charger cable to the monitor's power input.
- Mount the monitor on your dashboard or windshield using the included suction cup mount, ensuring it does not obstruct your view.
3. Баштапкы күйгүзүү жана жупташтыруу
Once both the camera and monitor are powered, the system should automatically establish a wireless connection.

Image: Illustration of the stable 2.4GHz wireless signal transmission between the camera and monitor, showing effective range.
- Turn on your vehicle's ignition to provide power to the 12V accessory outlet.
- The monitor will power on automatically and display the camera's view.
- If no image appears, ensure both the camera and monitor are powered and within range. Refer to the Troubleshooting section if issues persist.
4. Камераны заряддоо
The camera's built-in battery is charged via its integrated solar panel or a Type-C USB cable.
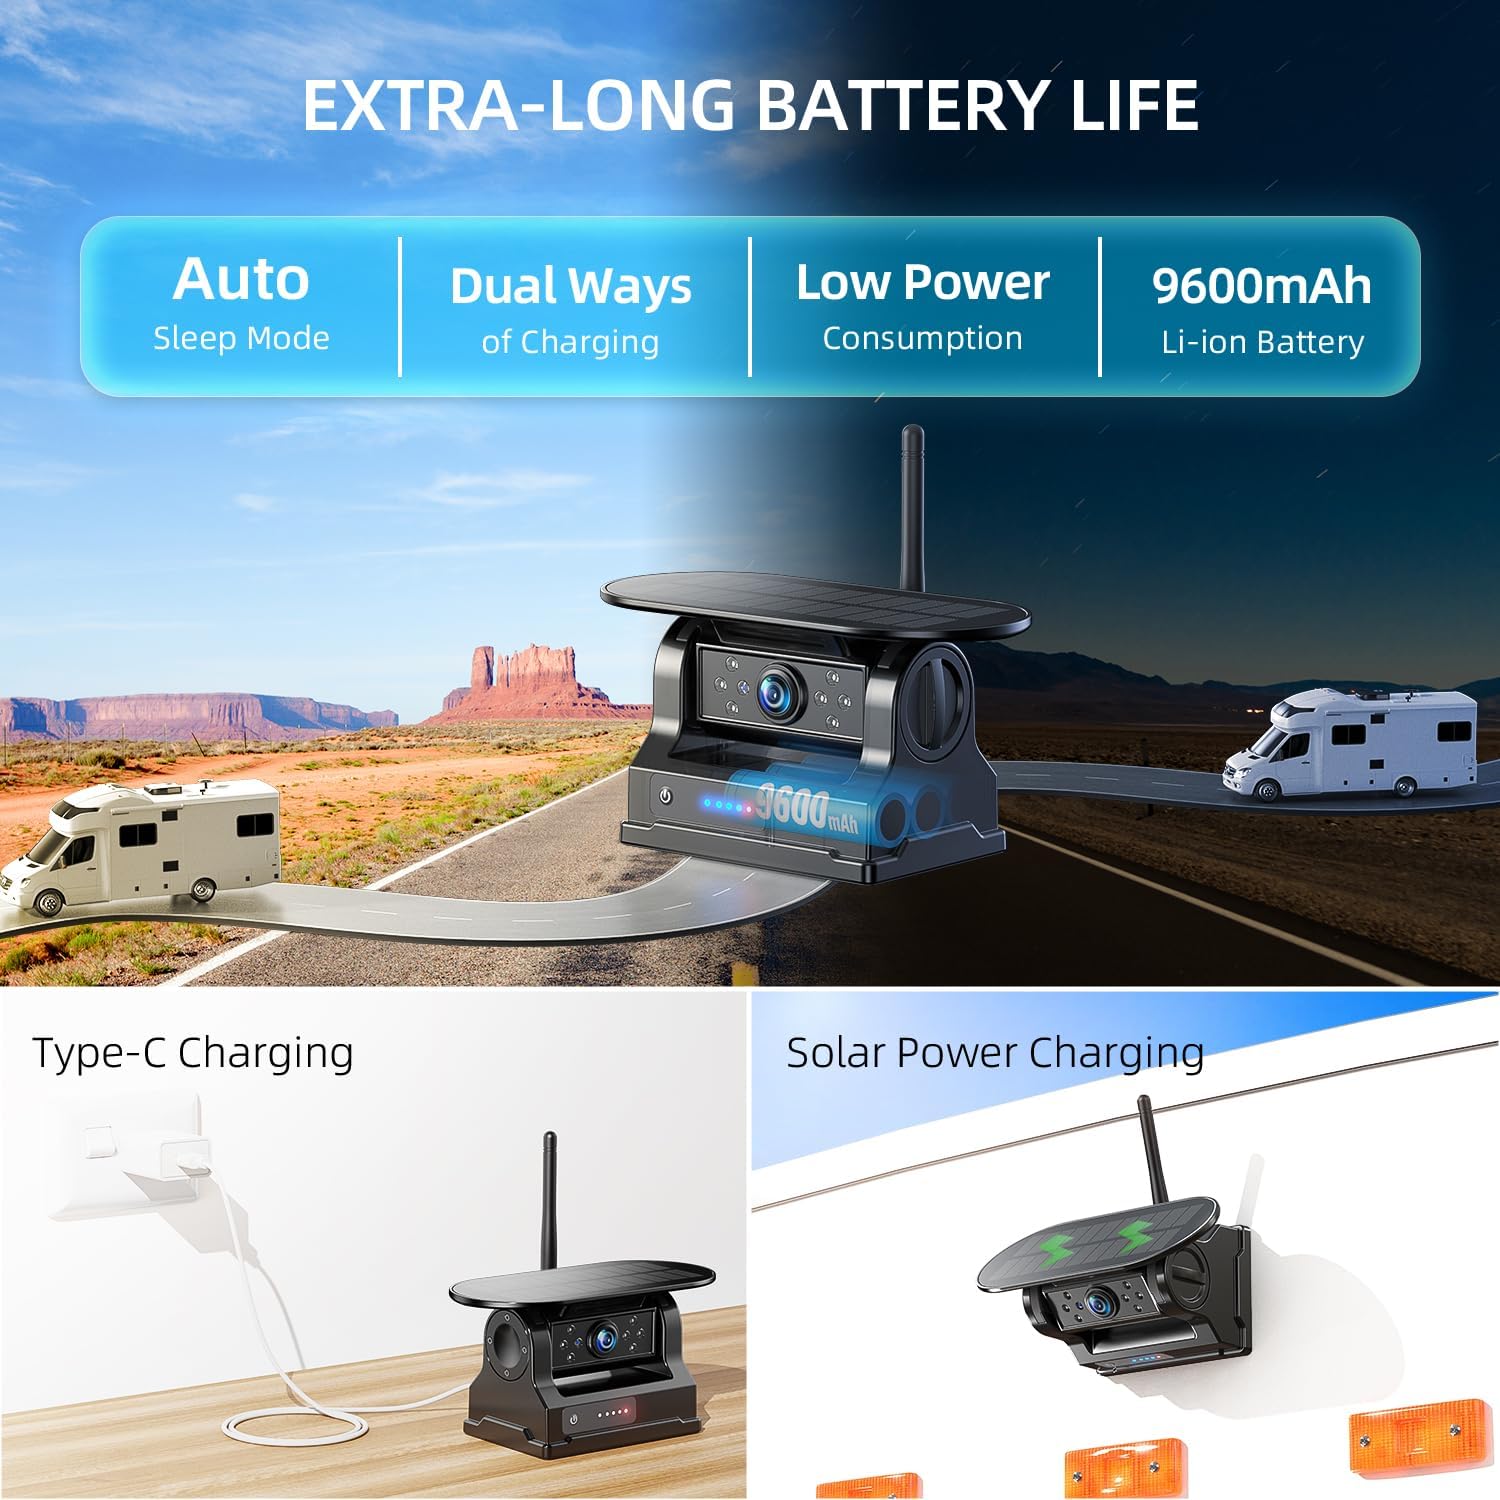
Image: Depicts the camera's dual charging methods: solar power and Type-C USB, highlighting its long battery life and auto-sleep mode.
- Күн кубаты: Position the camera where its solar panel receives direct sunlight for optimal charging.
- Type-C USB заряддоо: For faster charging or when solar power is insufficient, connect the camera to a 5V/2A USB power source using the provided Type-C cable.
- The camera enters an auto-sleep mode when the monitor is off to conserve battery. The battery level is visible on the monitor.
Иштөө нускамалары
1. Сенсордук экрандын иштеши
The 5-inch monitor features a full touchscreen interface for easy control and settings adjustment.

Image: A user interacting with the touchscreen monitor, demonstrating its intuitive touch-based controls.
- Tap on the screen to access menus and settings.
- Swipe to navigate through options or adjust parameters.
- Common functions like parking line adjustments, video playback, and DVR controls are accessible directly via the touchscreen.
2. Digital Video Recorder (DVR) Function
The system includes a DVR function that automatically records video footage to the pre-installed 32GB SD card.

Image: Visual representation of the loop recording feature, indicating automatic video retention and storage on the included 32GB SD card.
- Recording starts automatically when the monitor is powered on.
- The system supports loop recording, meaning older files are overwritten when the SD card is full.
- You can access recorded videos, play them back, or delete them directly from the monitor's touchscreen interface.
3. Blind Spot Detection (BSD)
The BSD feature enhances safety by detecting obstacles in your blind spots and providing warnings.
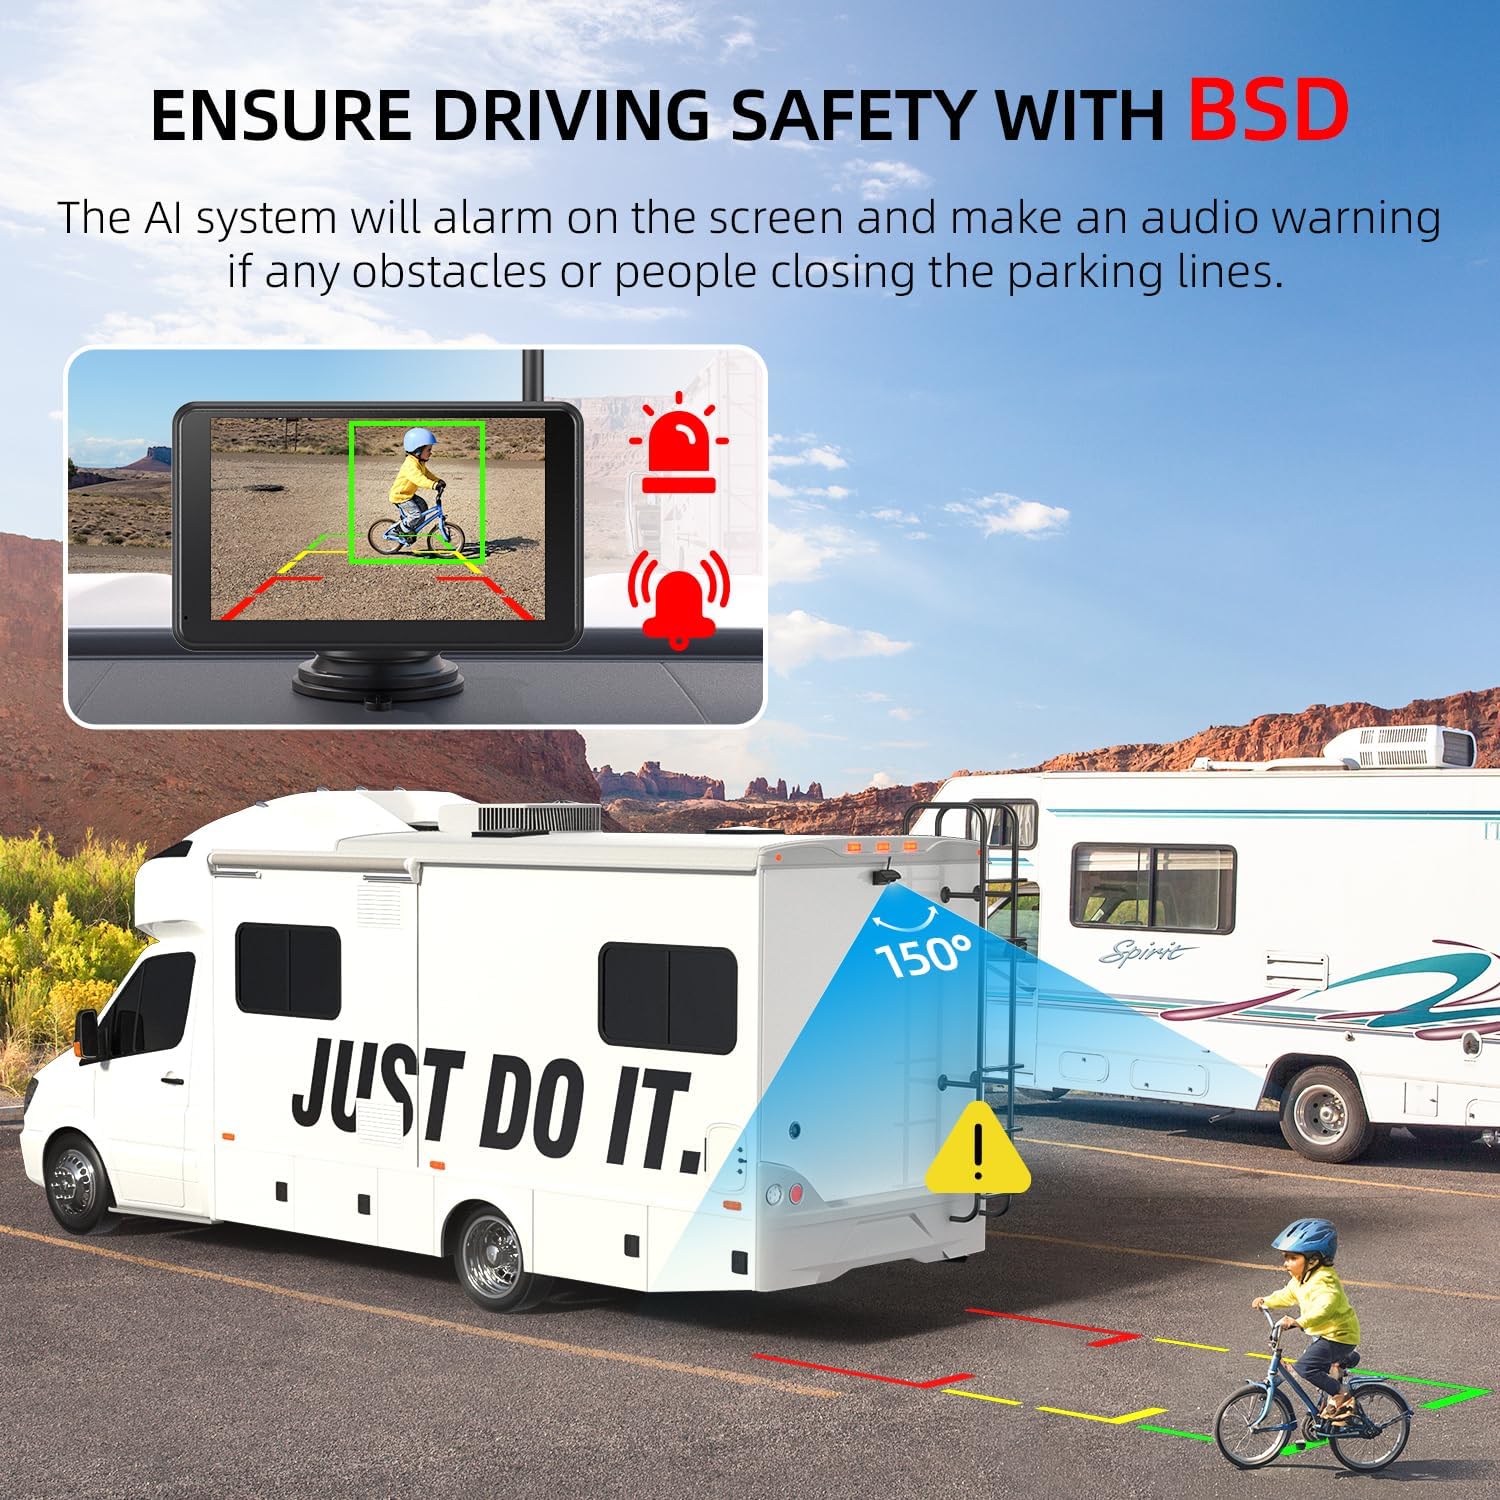
Image: The monitor displaying a Blind Spot Detection (BSD) warning, indicating an obstacle (child on bike) near the vehicle's parking lines.
- Customize BSD settings via the touchscreen menu.
- When an obstacle or person is detected near the configured parking lines, the AI system will trigger an alarm on the screen and emit an audio warning.
4. Түнкү көрүнүш
The camera is equipped with Infrared (IR) night vision capabilities to provide clear images in low-light or dark conditions.
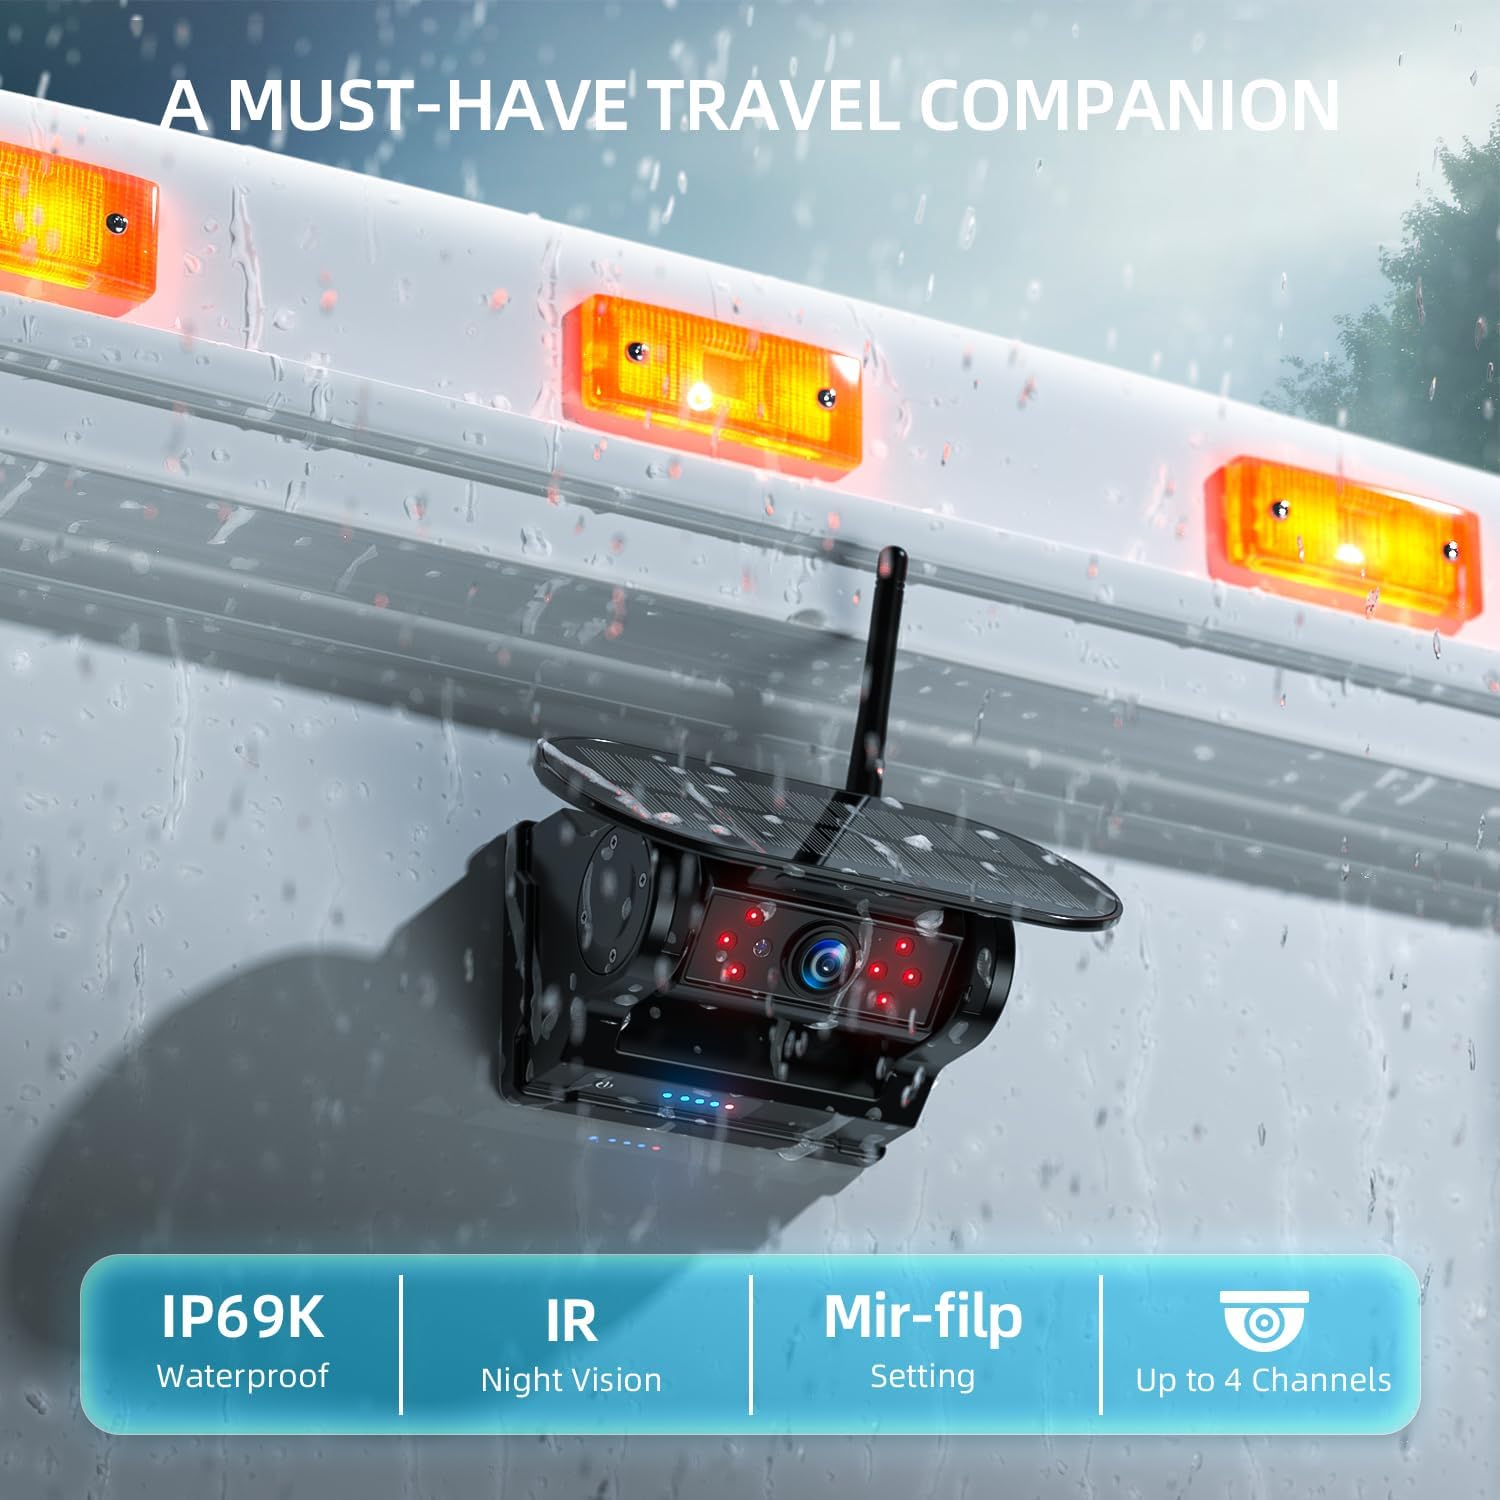
Image: The camera unit, emphasizing its IP69K waterproof rating and integrated IR night vision for enhanced visibility.
- IR night vision activates automatically in low-light environments.
- This feature ensures visibility when backing up or monitoring in the dark.
Техникалык тейлөө
- Тазалоо: жумшак колдонуу, damp cloth to clean the camera lens and monitor screen. Avoid abrasive cleaners or solvents.
- Камераны жайгаштыруу: Periodically check the camera's magnetic attachment to ensure it remains secure, especially after driving on rough terrain.
- Күн панели: Keep the solar panel clean and free of dirt or obstructions to maximize charging efficiency.
- SD Card башкаруу: Маанилүү видеонун камдык көчүрмөсүн дайыма сактаңыз files from the SD card. Format the SD card periodically (e.g., monthly) via the monitor's settings to maintain optimal recording performance and prevent data corruption.
- Батареяга кам көрүү: For prolonged storage, ensure the camera's battery is partially charged (around 50-70%) to extend its lifespan.
Проблемаларды чечүү
| Көйгөй | Мүмкүн себеп | Чечим |
|---|---|---|
| Монитордо сүрөт жок | Monitor not powered; Camera not powered; Wireless signal interference; Camera out of range. |
|
| Сүрөт бүлбүлдөгөн же туруксуз | Weak wireless signal; Interference from other devices. |
|
| DVR жаздырбай жатат | SD card full; SD card error; SD card not inserted correctly. |
|
| BSD not working | BSD feature disabled; Incorrect sensitivity settings; Obstruction of camera view. |
|
Техникалык шарттар
| Өзгөчөлүк | Деталь |
|---|---|
| Модел | AWTCM501 |
| Дисплей өлчөмү | 5 дюймдук |
| Video Resolution | HD1080P |
| Байланыш | Зымсыз (2.4 ГГц) |
| Камеранын кубат булагы | Built-in Li-ion Battery (9600mAh), Solar Panel, Type-C USB |
| Кубат булагына мониторинг жүргүзүү | 12V унаа кубаттагыч |
| Сактагыч | 32GB SD Card (included), Loop Recording |
| Өзгөчөлүктөр | Touchscreen, DVR, BSD (Blind Spot Detection), IR Night Vision, Magnetic Mount, IP69K Waterproof Camera |
| Дата биринчи жеткиликтүү | 26-август, 2025-жыл |
Кепилдик жана колдоо
eRapta products are designed for reliability and performance. For warranty information, technical support, or assistance with your AWTCM501 system, please contact eRapta customer service directly. Refer to the product packaging or the official eRapta webакыркы байланыш маалыматы үчүн сайт.
Кепилдик дооматтары үчүн сатып алганыңыздын далилин сактап коюңуз.


