Introduction
This manual provides detailed instructions for the proper setup, operation, and maintenance of your Singer 8500Q sewing machine. Please read this manual thoroughly before using the machine to ensure safe and efficient operation.
Image: Front cover of the Singer 8500Q Instruction Manual, displaying the Singer logo, a line drawing of the sewing machine, "8500Q", and "INSTRUCTION MANUAL".
Маанилүү коопсуздук нускамалары
When using an electrical appliance, basic safety precautions should always be followed to reduce the risk of fire, electric shock, or injury to persons. Read all instructions before using this sewing machine.
- Always unplug the machine from the electrical outlet immediately after using and before cleaning, removing covers, lubricating, or when making any other user servicing adjustments mentioned in the instruction manual.
- Do not operate the machine if it has a damaged cord or plug, if it is not working properly, or if it has been dropped or damaged. Return the appliance to the nearest authorized dealer for examination, repair, electrical or mechanical adjustment.
- Машинаны эч качан аба тешиктери жабык турган абалда иштетпеңиз. Тигүүчү машинанын жана бут контроллеринин желдетүүчү тешиктерин түктөрдүн, чаңдын жана бош кездемелердин топтолушунан алыс кармаңыз.
- Эч качан эч кандай тешикке эч кандай нерсени түшүрбөңүз же салбаңыз.
- Сыртта колдонбоңуз.
- Өчүрүү үчүн бардык башкаруу элементтерин өчүк абалына буруңуз, андан соң сайгычты розеткадан чыгарыңыз.
- Бул шайман физикалык, сезүү же акыл-эс жөндөмү начар же тажрыйбасы жана билими жок адамдар (анын ичинде балдар) үчүн, эгерде алардын коопсуздугуна жооптуу адам тарабынан көзөмөлсүз же шайманды колдонуу боюнча көрсөтмө болбосо, колдонууга арналбайт.
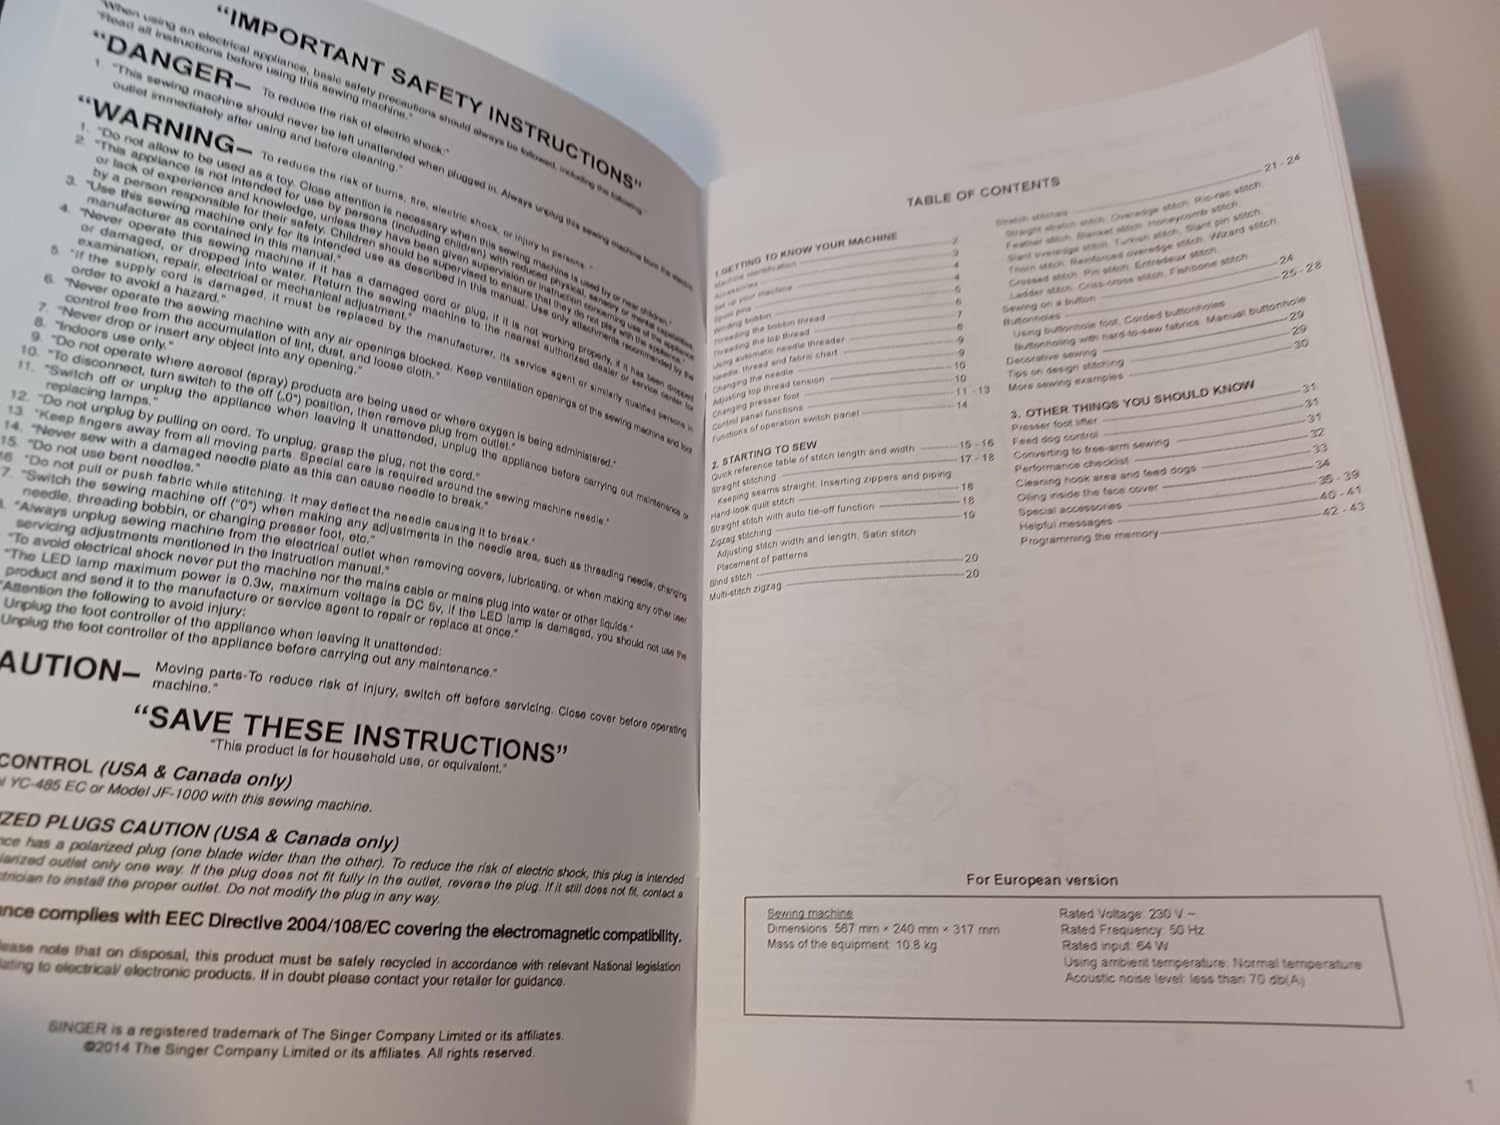
Image: An open page from the manual displaying "IMPORTANT SAFETY INSTRUCTIONS" on the left and a "TABLE OF CONTENTS" on the right, listing various sections of the manual.
Орнотуу жана баштоо
Getting to Know Your Machine
Familiarize yourself with the various parts of your Singer 8500Q sewing machine before beginning operation. This includes understanding the needle, bobbin, thread paths, and control panel.
Converting to Free-Arm Sewing
Your machine can be used either as a flat-bed or as a free-arm model. The extension table provides a large working surface. To convert to free-arm, hold the extension table with both hands and pull it off to the left. To replace, slide the extension table back into place until it clicks.

Image: An open page from the manual illustrating how to convert the sewing machine to free-arm sewing and detailing the presser foot lifter and feed dog control.
Чоң кеңейтүү үстөлү
The large extension table provides additional workspace. To attach, align the table with the machine and push it firmly until it locks into place. Ensure the table is flush with the machine bed to prevent fabric snags.

Image: An open page from the manual showing instructions for the large extension table, even feed/walking foot, open toe foot, and quarter inch foot with guide.
Операция
Негизги тигүү
The Singer 8500Q offers a variety of stitches for different sewing needs. Refer to the machine's display for stitch selection and adjustment.
Adjusting Stitch Width and Length
For most stitches, the machine automatically sets the optimal stitch width and length. However, you can manually adjust these settings for specific projects. Use the control panel to modify stitch width and length as needed.
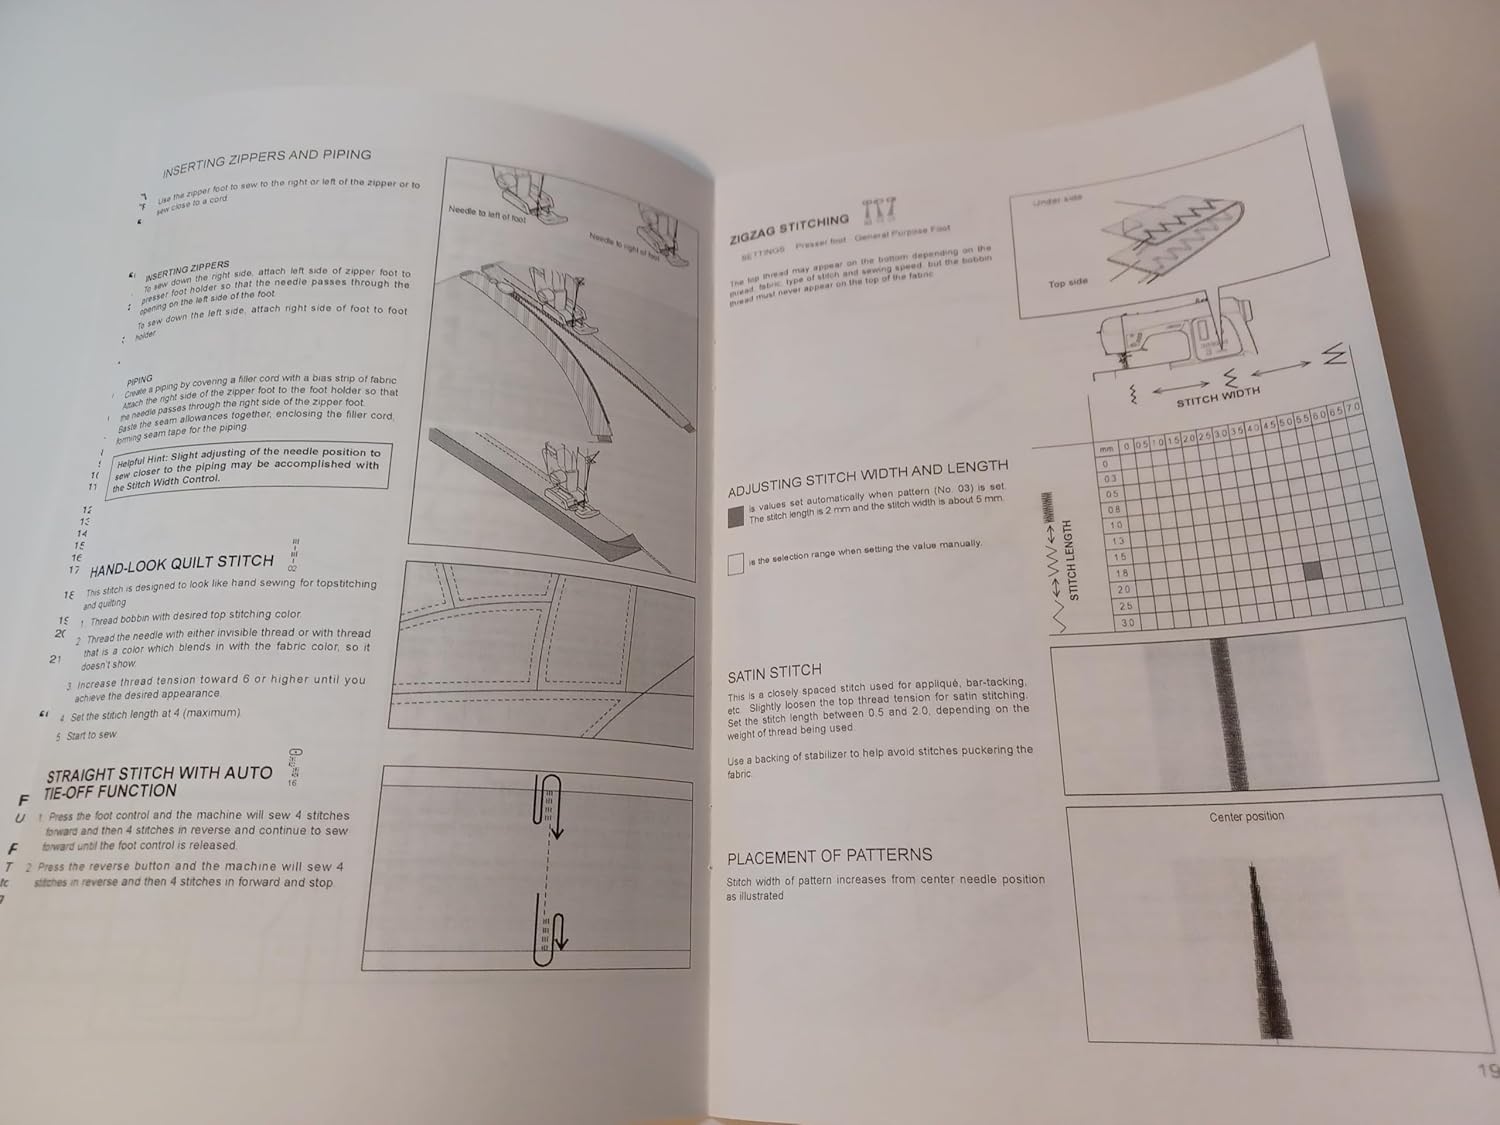
Image: An open page from the manual detailing instructions for inserting zippers and piping, zigzag stitching, adjusting stitch width and length, satin stitch, placement of patterns, hand-look quilt stitch, and straight stitch with auto tie-off function.
Specialized Stitches
- Zigzag Stitching: Used for finishing seams, appliqué, and decorative purposes.
- Satin Stitch: A dense zigzag stitch used for decorative embellishments and appliqué.
- Honeycomb Stitch: Creates a textured, decorative pattern.
- Slant Overedge Stitch: Ideal for finishing raw edges of fabric to prevent fraying.
- Turkish Stitch: Combines overcasting and decorative elements.
- Slant Pin Stitch: Excellent for hemstitching and decorative borders.
- Thorn Stitch: A decorative stitch for embellishing fabric pieces.
- Reinforced Overedge Stitch: Provides extra durability for seam finishes.
- Wizard Stitch: A decorative stitch suitable for various projects.
- Crossed Stitch: Used for decorative borders and elastic applications.
- Pin Stitch: A traditional stitch pattern for pintucks and edges.
- Entredeux Stitch: Useful for decorative stitching on borders and creating holes for ribbon insertion.
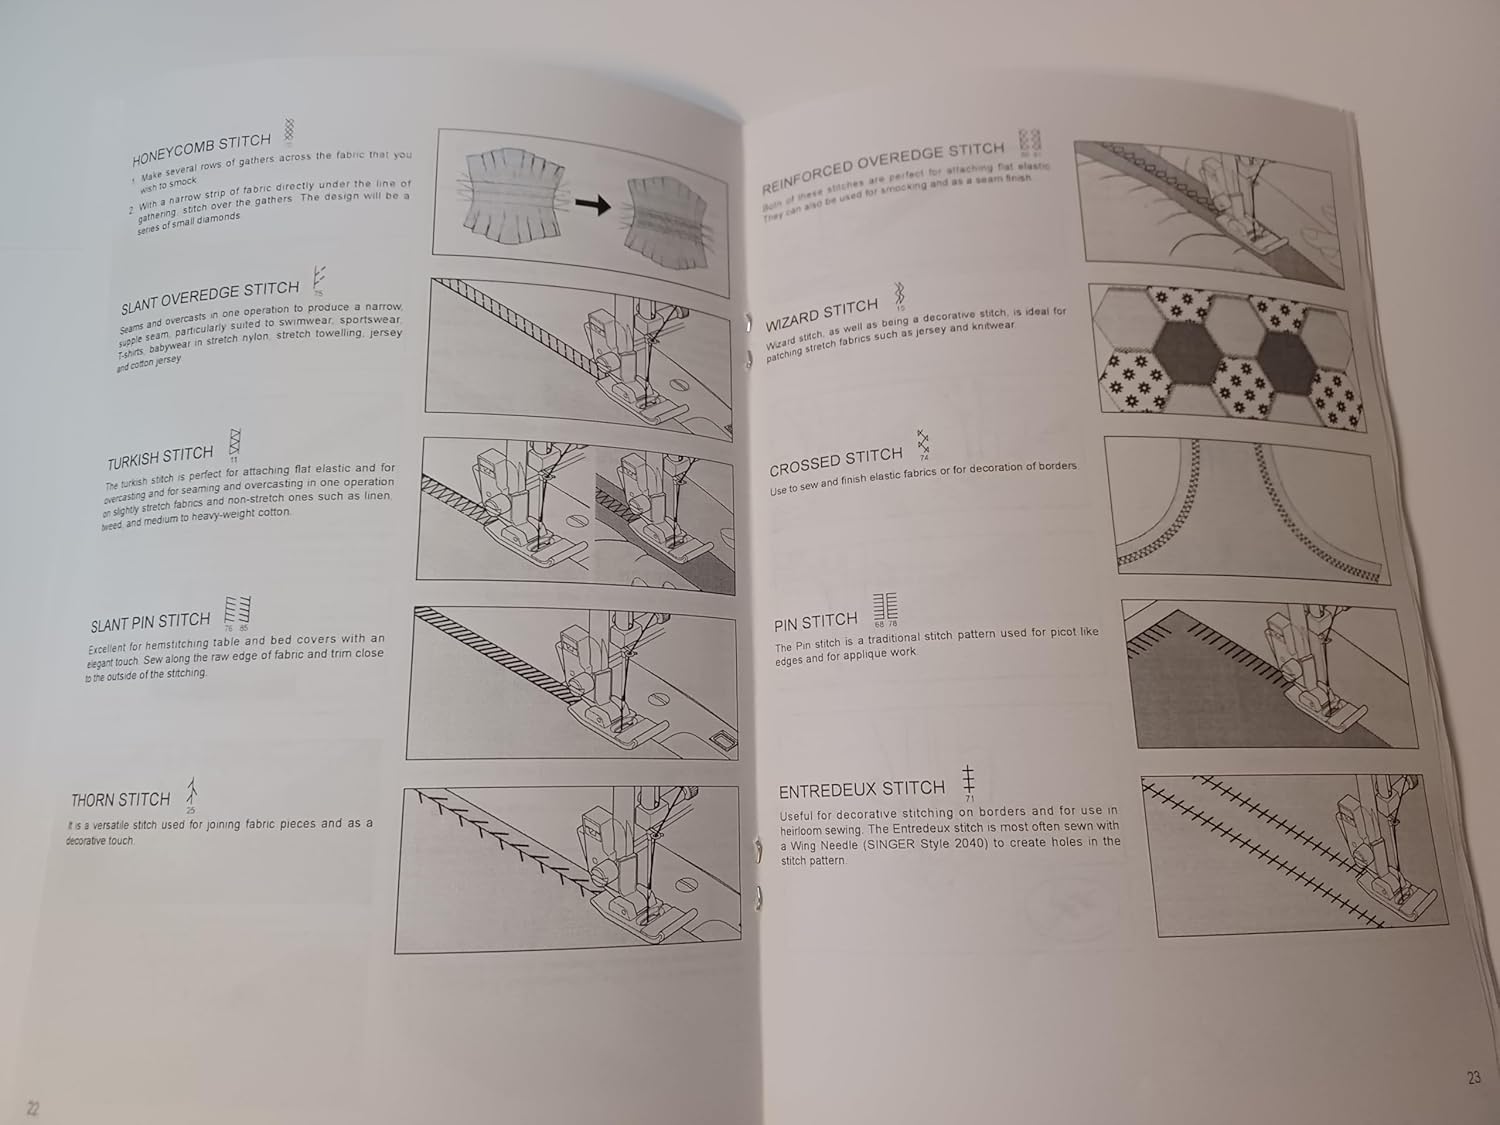
Image: An open page from the manual displaying diagrams and descriptions for various stitch types including Honeycomb, Slant Overedge, Turkish, Slant Pin, Thorn, Reinforced Overedge, Wizard, Crossed, Pin, and Entredeux stitches.
Баскычтар
The Singer 8500Q can create various types of buttonholes, including corded buttonholes and buttonholes on hard-to-sew fabrics. Follow the machine's instructions for precise buttonhole creation.
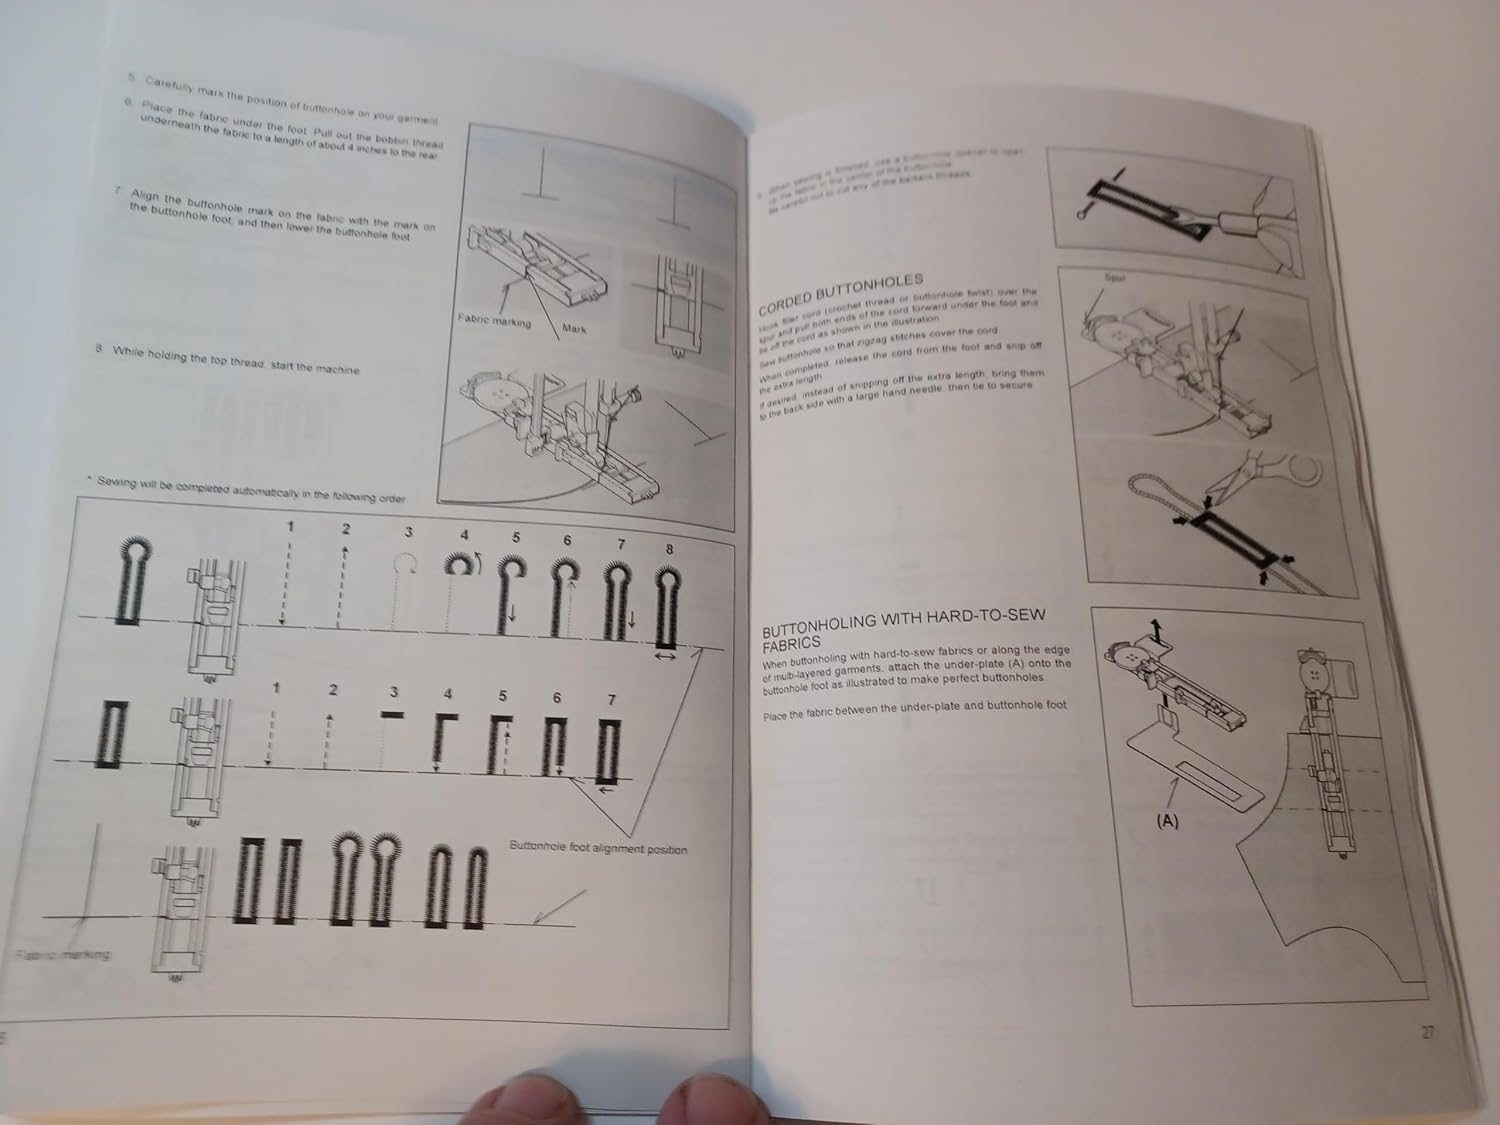
Image: An open page from the manual illustrating the process of creating buttonholes, including corded buttonholes and techniques for buttonholing with hard-to-sew fabrics.
Feed Dog Control
The feed dog control manages the movement of fabric. For general sewing, the feed dogs are engaged. For darning, free-motion quilting, or embroidery, disengage the feed dogs using the appropriate lever or button.
Техникалык тейлөө
Үзгүлтүксүз техникалык тейлөө тигүүчү машинаңыздын узак мөөнөттүү иштешин жана оптималдуу иштешин камсыздайт. Ар кандай техникалык тейлөө иштерин жүргүзүүдөн мурун машинаны ар дайым розеткадан сууруп коюңуз.
Тазалоо
- Remove the needle plate and clean out any lint or dust from the bobbin area and feed dogs using a small brush.
- Машинанын сыртын жумшак, кургак чүпүрөк менен сүртүңүз.
Майлоо
Refer to your machine's specific lubrication guidelines. Over-lubrication can cause issues. If unsure, consult a qualified service technician.
Проблемаларды чечүү
This section addresses common issues you might encounter with your Singer 8500Q sewing machine.
Жалпы маселелер жана чечимдер:
- Өткөрүлүп жиберилген тигүү: Ensure the needle is inserted correctly and is not bent. Use the correct needle type and size for your fabric. Re-thread the machine.
- Жиптин үзүлүшү: Check for proper threading, correct tension settings, and ensure the needle is not dull or bent. Use quality thread.
- Bobbin Problems: Ensure the bobbin is wound evenly and inserted correctly. Check for lint in the bobbin case.
- Машина менен азыктандырылбаган кездеме: Verify that the feed dogs are engaged. Adjust presser foot pressure if necessary.
- Кубат жок: Check if the power cord is securely plugged into both the machine and the outlet. Ensure the power switch is on.
If problems persist after following these steps, contact customer support or a qualified service technician.
Техникалык шарттар
| Өзгөчөлүк | Деталь |
|---|---|
| Модель номери | 8500Q |
| Power Source | AC |
| Электрик | Ооба |
Note: Some product data, such as dimensions and weight, refer to this instruction manual reproduction itself. For detailed machine specifications, please refer to the documentation provided with your original Singer 8500Q sewing machine purchase or the official Singer webсайт.
Кепилдик маалымат
This instruction manual is a reproduction and does not include specific warranty details for the Singer 8500Q sewing machine. For warranty information regarding your Singer 8500Q sewing machine, please refer to the documentation provided with your original machine purchase or visit the official Singer webсайт.
Кардарларды колдоо
For further assistance, technical support, or to purchase accessories for your Singer 8500Q sewing machine, please visit the official Singer website or contact their customer service department. This reproduction manual is provided by TabSynth Design Works LLC.
For video instructions, you may visit YouTube/SingerSewingCompany.


